Topic
This article describes the process for adding unmanaged devices to NinjaOne.
Environment
NinjaOne IT Asset Management (ITAM)
Description
Adding unmanaged devices in NinjaOne allows you to track assets that cannot install the NinjaOne agent, such as cameras, printers, and mobile devices unsupported by NinjaOne Mobile Device Management (MDM).
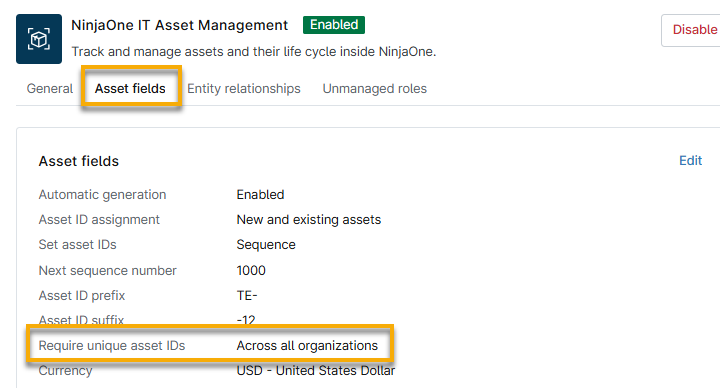
If you have the Require unique asset IDs field set to grant access Across all organizations, you must provide a unique number for each device, regardless of its type. If you activated the option for Asset ID automatic generation, you can leave the Asset ID field blank. Refer to
Index
Add an Unmanaged Device in NinjaOne
To add an unmanaged device in NinjaOne, perform the following steps:
- Click the plus sign (+) and select Device, and then click Unmanaged device.
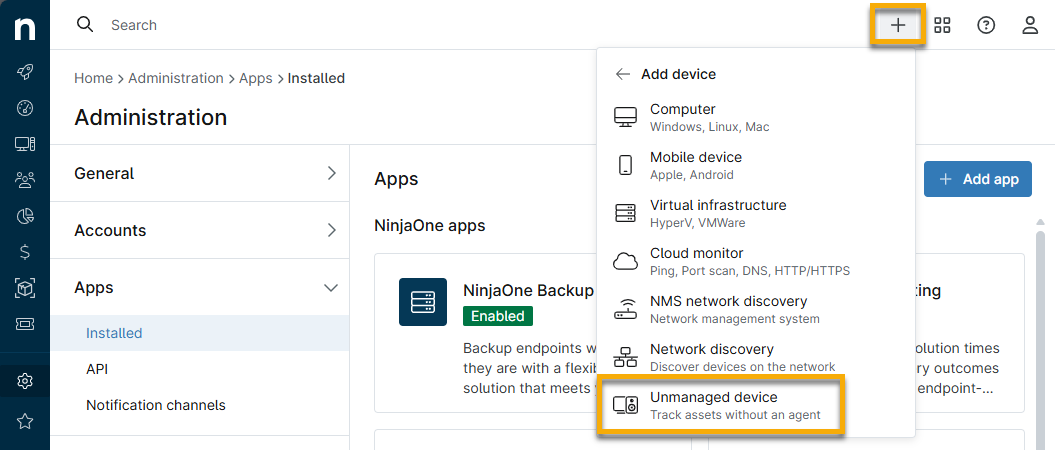
- Select whether you want to add the device manually or import it from a CSV file.
Manually Create Devices
To manually create a device, complete all fields to the best of your knowledge.
- Click Add to select a device role for the endpoint. Refer to
Figure 3: Add device role - Select the Create another device checkbox to create another device.
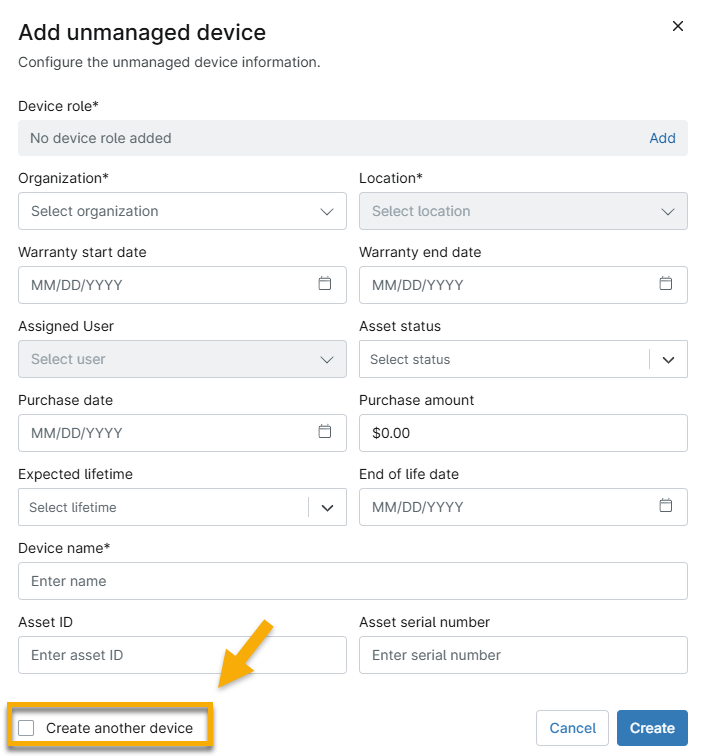
Figure 4: Add another unmanaged device Import Devices Via CSV
To import unmanaged devices via a CSV file, perform the following steps:
- Click Add to select a device role. To learn how to create an unmanaged device role, refer to
Figure 5: Add a device role for the unmanaged device - In the Add device role dialog, expand the sections as necessary and select the desired role. Click Add.
- You will return to the Import wizard dialog. Click Download CSV file. This button will not be active until you select the device role.
- Open the file from your computer's Downloads folder and enter data into all spreadsheet columns to the best of your knowledge. Organization and location names must match the data in NinjaOne.
- Save the file. In the NinjaOne Import wizard dialog, click Upload CSV file and select the recently updated spreadsheet.
- Click Continue.
- Review all errors, if applicable. Some data, such as a 365 license ID, may be required to proceed. If necessary, click Re-Upload.
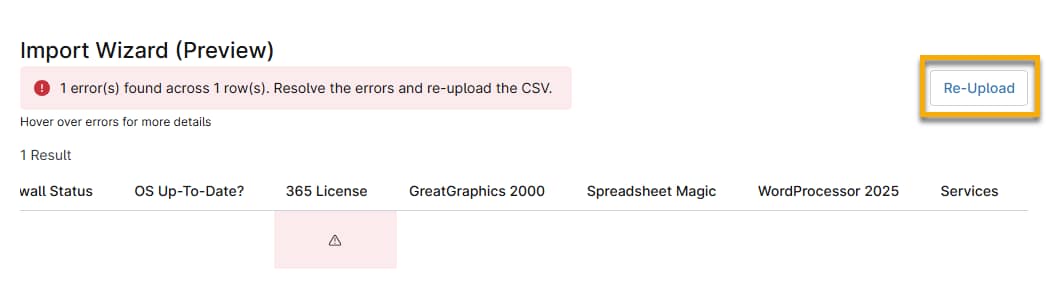
Figure 6: Re-upload template to import devices - If all data is accurate and accepted by NinjaOne, click Save Changes.
The device name will appear on the Devices search page and the organization dashboard. From these pages, you can access the unmanaged device dashboard.
Additional Resources
Refer to the following resources to learn more about IT asset management in NinjaOne:

