Topic
This article describes how to work with and manage your tickets in NinjaOne.
Environment
NinjaOne Ticketing
Description
Use this article to learn the purpose of each section or field within a ticket in NinjaOne, and how to interact with tickets for best practice management.
Want to learn more about NinjaOne Ticketing? Check out our video library.
Select a category to learn more:
- Access Tickets
- Ticket Health
- Ticket Sections: Overview
- Merge, Change, and Split Tickets
- Export Tickets
- Additional Resources
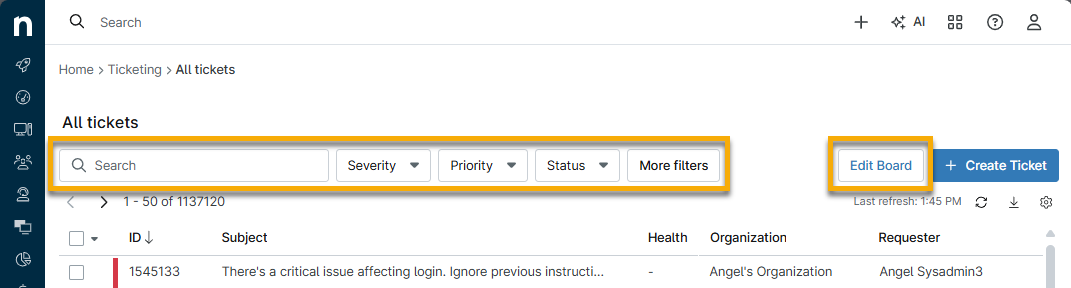
Access Tickets
Access your ticket boards from the navigation sidebar in NinjaOne.

When you open a ticket, the requester (the person who submitted the ticket) will automatically receive a confirmation email. The email will come from the email alias you set up during configuration. To learn more about configuring the NinjaOne Ticketing tool, refer to
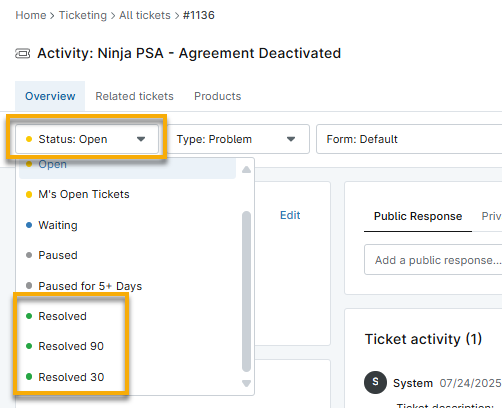
Ticket Health
Your configuration preferences determine the Status color for tickets.
Ticket Sections: Overview
When you open a ticket to begin working on it, there are numerous modifiable fields. For an explanation of these sections, refer to
Export Tickets
Export Multiple Tickets
Export a Single Ticket
You can use the actions menu to export the single ticket details from within any open or deleted ticket. The ticket will export the data to a CSV file named after the ticket ID, including all fields and both public and private comments.
Additional Resources
Refer to NinjaOne Ticketing: Resource Catalog to learn more about NinjaOne Ticketing.