
This guide outlines the process for enrolling personally owned devices, including smartphones, tablets, and macOS laptops, into your organization’s Bring Your Own Device (BYOD) program using NinjaOne.
BYOD enrollment with NinjaOne enables secure, policy-driven access to corporate resources while maintaining a clear separation between personal and work data. Once enrolled, IT administrators can deploy approved business applications, apply baseline security controls, and enforce compliance requirements without gaining visibility into personal content, activity, or private applications.
Note: NinjaOne MDM does not have access to any personal files, photos, or private app data, regardless of whether the device is company or personally owned.
What is a Work Profile?
On Android, a work profile creates a secure, isolated container for work-related apps, email, and configurations. This prevents corporate data from mixing with personal data. IT administrators can only manage this container, delivering security while protecting user privacy.
Part 1: Android Device Enrollment
Method: Personal Device with Existing Data (Standard)
Use this method if you are using a personal phone you already own.
Before You Begin:
- Ensure your device is connected to Wi-Fi.
- Confirm your device runs Android 8.0 or later (minimum supported version).
- Have your enrollment QR code or link ready (provided by IT).
Step-by-Step Enrollment:
- Install Android Device Policy: Open the Google Play Store on your device and install Android Device Policy (published by Google LLC).
You can also install it directly from the Google Play Store using the following link:
https://play.google.com/store/apps/details?id=com.google.android.apps.work.clouddpc
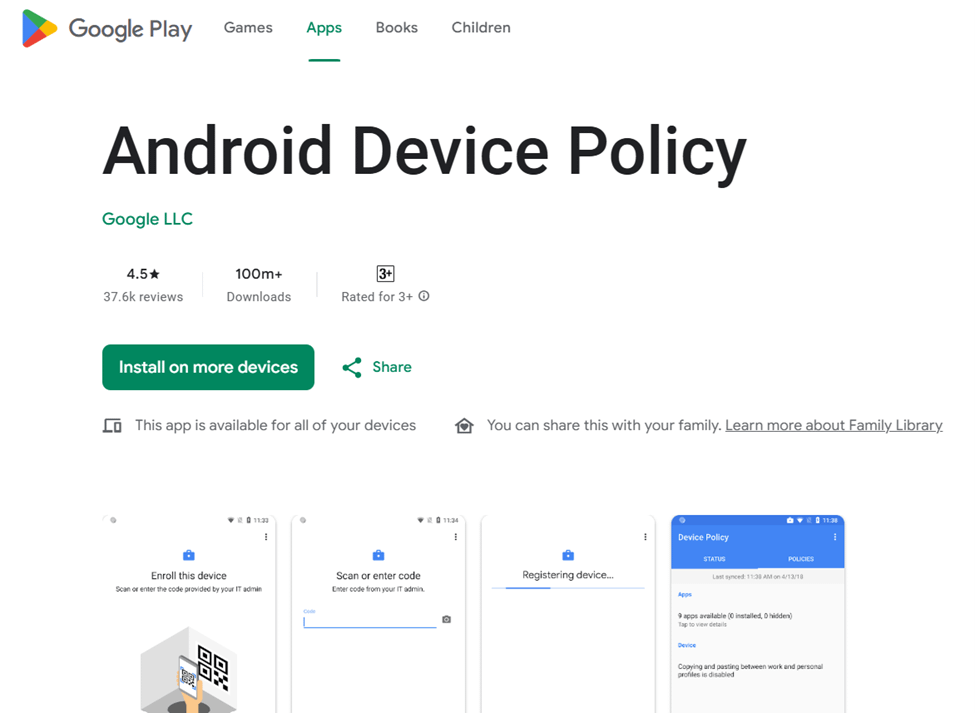
This app is required to create and manage your secure work profile.
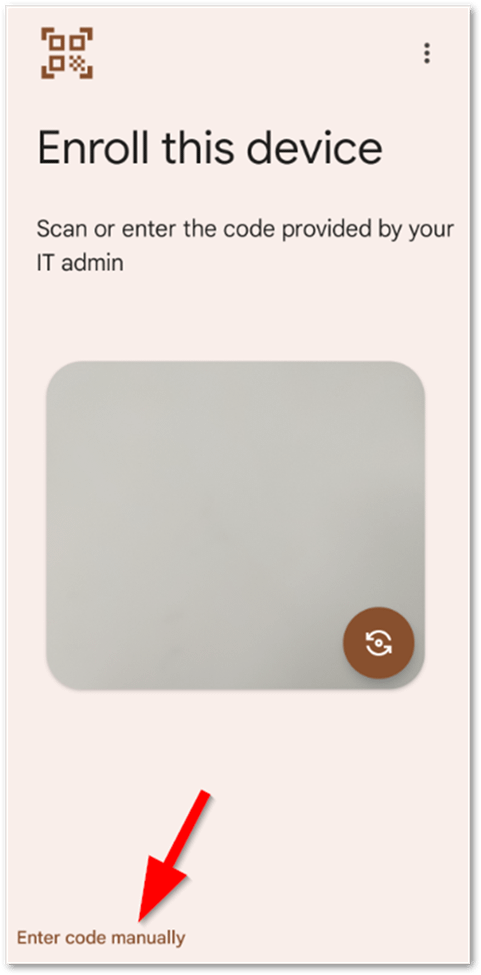
- Open the App & Scan: Open the Android Device Policy app. When prompted, tap to scan the QR code provided by your IT team.
- Note: If you cannot scan, you may enter the code manually by selecting Enter code manually.
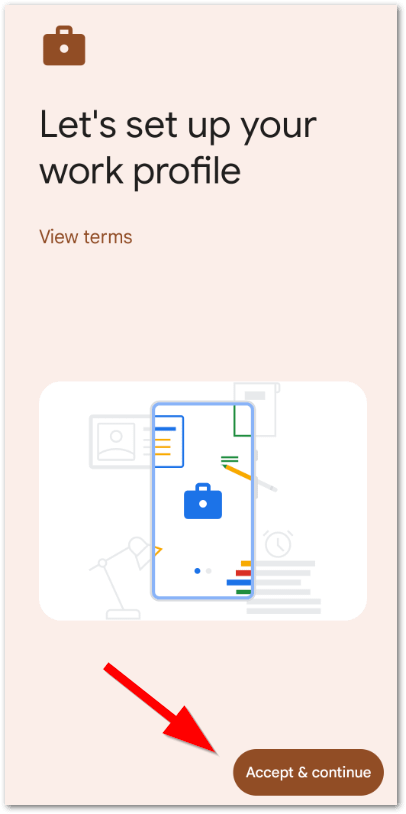
- Setup Work Profile: The screen will display “Let’s set up your work profile.” Tap Accept & Continue to proceed.
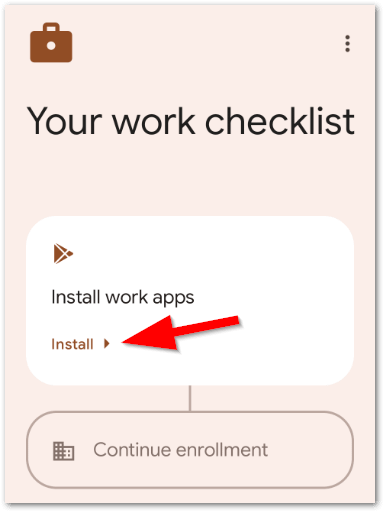
- Install Work Apps: You will see a “Your work checklist” screen. Tap Install to begin installing the work apps assigned to your device.
- Complete Enrollment: Once the required apps are installed, tap Set up or Next. The NinjaOne Assist app (and other company apps) will be installed, and you may see a confirmation that “Application setup is complete”.
- Finalize: You can now exit the setup. Your device is enrolled, and you will see your work apps marked with a small briefcase icon to distinguish them from personal apps.
Part 2: iOS/iPadOS Device Enrollment
Important Considerations for Personal iOS Devices
Unlike corporate-owned devices, enrollment on personal Apple devices uses the Unsupervised status.
- Unsupervised Status: Your device will be enrolled as “unsupervised.” This means only a limited set of privacy-respecting settings and policies designed for personal devices will be applied.
- App Deployment: Apple iOS. Apps can be deployed, but all requests to install or manage apps will need to be approved by the end user of the device.
- App Deployment Warning: If the Apple ID is not set up under your device’s Settings (for iCloud and iTunes/App Store), the device will be enrolled, but no managed company apps will successfully deploy. Ensure your personal Apple ID is active in Settings before starting enrollment.
Step-by-Step Enrollment:
(Note: These steps assume you have received a QR code or link from IT)
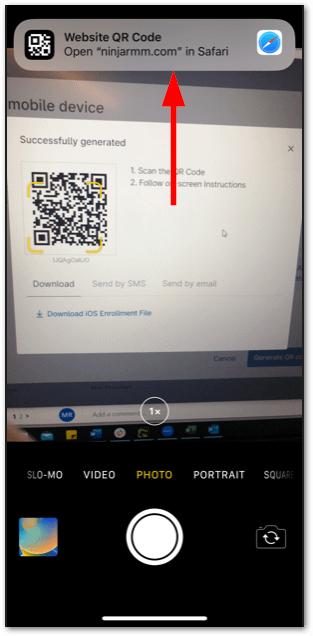
- Scan QR Code: Open your device’s Camera app and scan the QR code provided by IT. A notification will appear at the top of the screen; tap it to open the link in Safari.
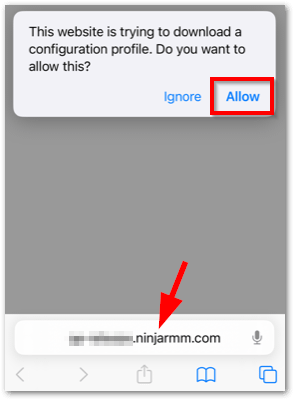
- Download Profile: A popup will ask, “This website is trying to download a configuration profile. Do you want to allow this?” Tap Allow.
- Confirm Download: Once you see the “Profile Downloaded” confirmation, tap Close.
- Install Profile:
- Open the Settings app on your device.
- Tap the Profile Downloaded option near the top (under your Apple ID info).
- Tap Install in the top right corner.

- Trust Remote Management:
- If prompted, enter your device passcode.
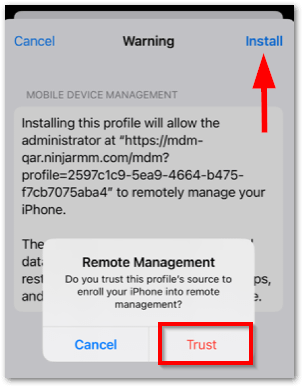
- You will see a “Warning” page about Mobile Device Management. Tap Install again.
- A “Remote Management” popup will ask if you trust this profile’s source. Tap Trust.
- Finish: When the screen says “Profile Installed,” tap Done. Your device is now enrolled.
Part 3: macOS Device Enrollment
For macOS devices, the enrollment is completed by manually installing a management profile.
Enrollment Method: Manually Install the Enrollment Profile
Before You Begin:
- Ensure your Mac is connected to the internet.
- Obtain the Enrollment Profile link or file from your IT team.
Step-by-Step Enrollment:
- Download the Profile: Click the link provided by IT to download the enrollment profile (.mobileconfig file) to your Mac.
- Install the Profile: Locate the downloaded file (usually in your Downloads folder) and double-click it.
- Follow System Prompts: A notification will open System Settings and guide you through the installation.
- Follow the on-screen prompts.
- You will likely be asked to enter your Mac’s administrator password to authorize the installation.
- Verification (Optional):Once installed, you can verify the profile is active. Go to System Settings → General → Device Management. The NinjaOne management profile will be listed there.
Post-Enrollment Summary
Once the enrollment steps are complete, the following actions will occur automatically:
- Agent Installation (macOS): For macOS devices, once the MDM profile is successfully registered, the NinjaOne companion software will automatically be deployed and installed into your Mac. The software is essential for device health monitoring and management.
- App Installation: Your IT team will begin pushing required applications to your device. On mobile devices, these will appear in your work folder or on your home screen. Apple app installs on mobile devices will ask for approval before install.
- Security Policies: Corporate security settings (such as password complexity requirements) may be enforced immediately upon enrollment.
- Privacy Maintained: Your personal apps, photos, messages, and files remain private and inaccessible to IT.
Additional Resources
For deeper insight into mobile device management (MDM), device supervision, and BYOD enrollment with NinjaOne, refer to the resources below:
Understanding Device Management
Learn the key differences between Supervised and Unsupervised device modes, including how each impacts management capabilities, security enforcement, and end-user privacy.
Supervised vs. Unsupervised Devices: What’s the Difference?
Detailed Technical Guide
Access a comprehensive, administrator-focused resource for enrolling Android devices, including support for multiple device ownership models and enrollment scenarios.
Enrolling Android Mobile Devices
Video Overviews
Watch concise videos that explain the business value, security benefits, and strategic role of Mobile Device Management (MDM) in modern IT environments.
Why Your Business Needs MDM
Mobile Device Management Strategy: Steps & Tips