Topic
This article describes how to use patch caching as a component of your software deployment workflows in NinjaOne.
Environment
NinjaOne Patch Management
Description
Patch caching ensures that patch jobs do not consume too much internet bandwidth and mitigates issues with limited or unreliable connections.
Select a category below to learn more:
- Important Considerations
- Create a Cache Server
- Delete or Reset a Cache Server
- Override Cache Servers for a Single Device
- Additional Resources
Important Considerations
Remember the following considerations when deploying patch caching:
- Supported cache content includes Microsoft Windows operating system (OS) updates, Windows software updates (excluding WinGet), and custom application installers.
- Driver updates are excluded from patch caching. Drivers are always downloaded directly from Microsoft's Windows Update service.
- You can only designate Windows devices as cache servers. You can specify servers for each level: Global (system-wide), organization, and location.
- NinjaOne supports device-level overrides to change a device's cache server priority. You can add up to 10 cache servers at each level: Global (system-wide), organization, and location. When you add a new cache server and save the configuration, NinjaOne deploys the caching service to the selected device.
- Cache servers do not act as proxies for agent communications. Each NinjaOne agent still requires direct internet connectivity to access the NinjaOne cloud and run Windows patch scans.
Allowlist Information and Recommended Settings
The agent connects to the cache listener (the server deployed where the cache node is set up) using the hostname and port 8443. You must allow that connection to establish, and the server must be able to accept it. The server process for the rule is called CacheListener.exe. Windows Firewall usually allows client-side traffic but blocks server traffic by default, requiring rule creation.
- For up to 1,000 concurrent transfers, ensure network bandwidth of at least 10 Gbps. Use a cache machine of at least eight cores and 32 GB of memory.
- For up to 250 concurrent transfers, ensure network bandwidth of at least 2.5 Gbps.
- The network must be able to handle all TCP connections without timing out.
How Deployment Works
The following configuration occurs during deployment:
- The system creates a cache folder, which typically corresponds to the URL. NinjaOne will search the Microsoft Catalog for the corresponding patch global unique identifier (GUID) or title if a direct URL is unavailable.
- NinjaOne sets folder permissions to prevent unauthorized access.
- Service begins automatically upon system startup.
- NinjaOne creates an activity log on the NinjaOne dashboard.
How Agents Connect to Cache Servers
The agent receives a list of all cache servers configured in NinjaOne.
- If there are multiple servers, the agent uses the first operable server on the list.
- If all cache servers are unavailable, the agent uses a direct internet download.
- If the download file size exceeds the cache server's capacity (the server is out of space), the cache server returns an error, and the agent downloads directly from the internet.
Create a Cache Server
To enable caching in NinjaOne, you must first configure one or more devices that act as local repositories for any downloaded files the agent uses. Refer to NinjaOne Agent Installation: Add Device (Windows) to learn more.
We recommend that you set up caching in a new folder. The default %programdata%/cache is a good example. While you can use existing folders, there is a high risk that data will interfere with the cache sizes and be deleted when everything is removed.
Select an option to create a cache server:
- Create a System-Wide Cache Server
- Create an Organization-Level Cache Server
- Create a Location-Level Cache Server
Create a System-Wide Cache Server
System-wide cache servers can provide coverage and fallback for remote or roaming devices, devices that move between locations, and simpler environments where a single centralized cache is sufficient.
- In NinjaOne, navigate to Administration → Devices → Cache, then click Add.
- The Add a cache server window will open. Select the device that will serve as the cache server from the Existing device drop-down menu.
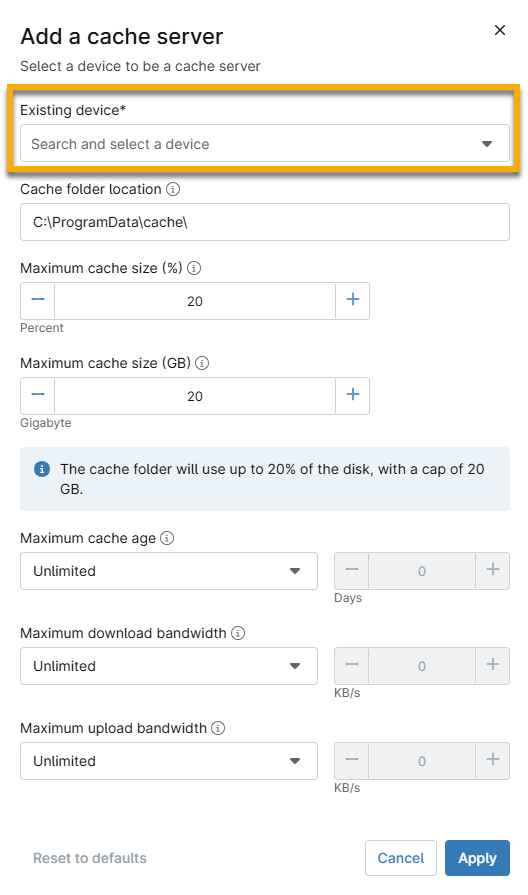
- Use the table below to complete the applicable fields, then click Apply.
| Field | Description |
|---|---|
| Cache folder location | Specify the location where the cache files are stored on the server. If the folder location changes, NinjaOne creates a new folder in the updated location and deletes the original folder and its contents. |
| Maximum cache size (%) | Set the percentage of disk space to use for caching. If the cache size is close to exceeding the configured limit, NinjaOne deletes the oldest files first until they are below the limit. |
| Maximum cache size (GB) | Define the storage limit (in gigabytes) to use for caching. This setting takes priority over the Maximum cache size (%) setting. If the cache size is close to exceeding the configured limit, NinjaOne deletes the oldest files first until they are below the limit. |
| Maximum cache age | Set the age limit of cache files based on the creation date. NinjaOne deletes files that exceed this setting. |
| Maximum download bandwidth | Choose the bandwidth value for the internet connection of the cache server. |
| Maximum upload bandwidth | Choose the bandwidth value for each agent's network connection to be adapted by the cache server. |
Create An Organization-Level Cache Server
Individual devices will use local organization-level cache servers.
- In NinjaOne, navigate to Administration → Organizations and select an organization.
- On the organization's configuration page, click Cache, then click Add.
- The Add a cache server window will open. Select the device that will function as the cache server from the Existing device drop-down menu.
- Use the table in the Create a System-Wide Cache Server section, above, to configure the cache server.
Create a Location-Level Cache Server
To add a location-specific cache server, you must first select or create a location. Refer to Organizations: Locations to learn more about creating locations within an organization.
Navigate to the Location
- In NinjaOne, navigate to Administration → Organizations and select an organization, as shown in step 1 of the Create an Organization-Level Cache Server section of this article.
- On the organization's configuration page, click Locations, then select the location from the list. The Edit Location window will open.
Add the Cache Server
- In the Edit Location window, click Cache, then click Add.
- The Add a cache server window will open. Select the device that will function as the cache server from the Existing device drop-down menu, then use the table in the Create a System-Wide Cache Server section, above, to configure the cache server.
Delete or Reset a Cache Server
When you delete a cache, NinjaOne:
- Removes all cache files and service settings from the device.
- Stops and removes the caching service process on the device.
- Adds a logged event to the Activities dashboard.
When you reset a cache, NinjaOne:
- Removes all cached files from the device.
- Adds a logged event to the Activities dashboard.
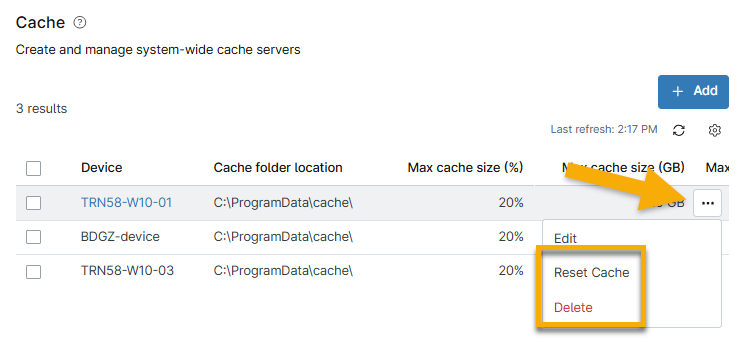
Procedure
To delete or reset a cache server, move your cursor over the device, click the ellipsis button, then click either Delete or Reset Cache.
Override Cache Servers for a Single Device
You can add existing cache servers, but you cannot create new cache servers on this page.
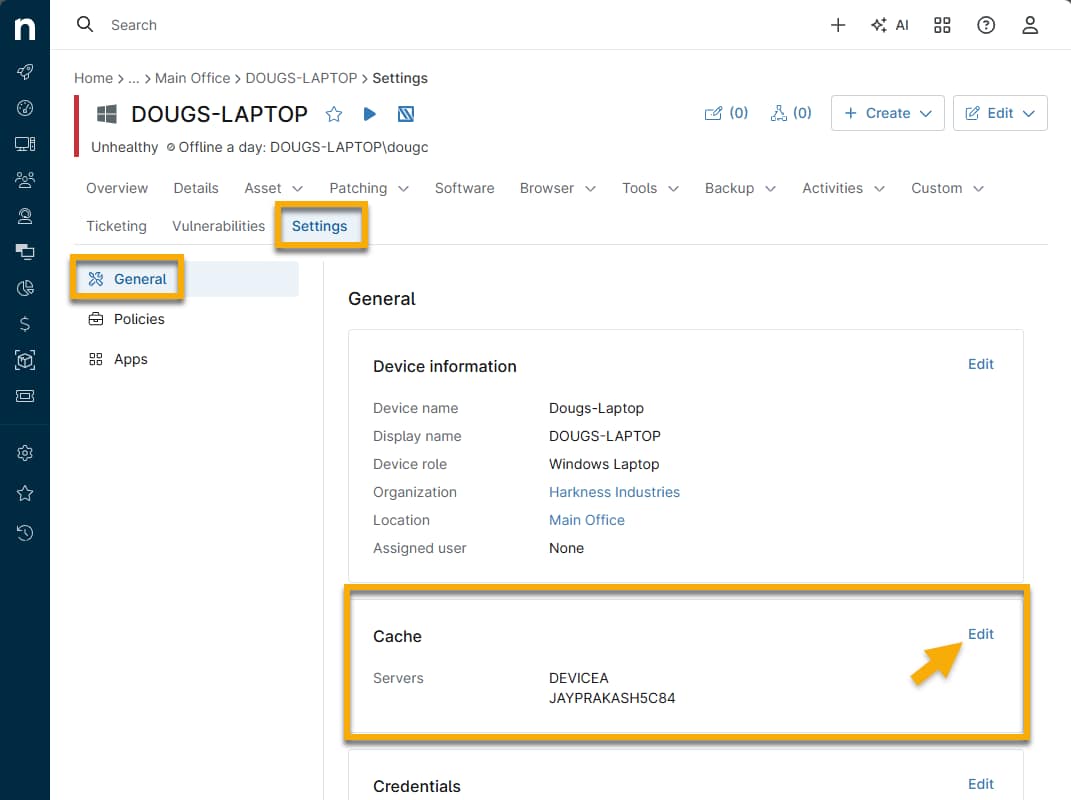
- Navigate to the dashboard for a Windows device that is not set up as a cache server and click the Settings tab.
- In the Cache section, click Change.
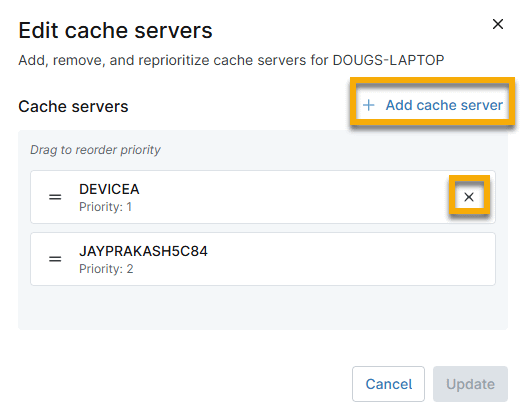
- The Device overrides configuration window will open. Click Add cache server and choose the device.
- To remove a cache server, place your cursor over it and click the X icon when it appears.
- You can reorder the priority by selecting a node and dragging it up or down in the list.
- Only system-level cache servers appear on the device dashboard unless the device belongs to an organization with a cache server enabled.
- Click Apply to save your settings.
Additional Resources
Refer to Patching: Resource Catalog to learn more about NinjaOne Patching.