Topic
This article describes the multiple ways to create a ticket in NinjaOne.
Environment
NinjaOne Ticketing
Description
There are several ways to create a ticket in NinjaOne, whether manually or through automation rules.
Select a category to learn more:
- Ticket Types: Incident, Problem, Task, Question
- Create Tickets from an Activity
- Create Tickets from Conditions
- Create Tickets Manually as a Technician
- Submit Ticket as an End-user
- Assign Asset Ownership for Requester
- Additional Resources
Ticket Types
When creating a ticket, the requester has the option of selecting a type. This section provides a description of each type.
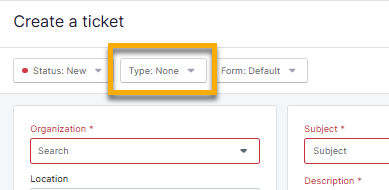
Figure 1: Select or change the ticket type in NinjaOne
| Ticket Type | Description |
|---|---|
| Appointment | You can use appointment tickets to set reminders for meetings. Tickets for appointments also allow you to add related items, sub-tasks, notes, and attendees for scheduling purposes. |
| Change request | You can use change request tickets to update a project, workflow, or procedure. Change request tickets are helpful when documenting the scope of work or requesting approval from stakeholders. |
| Incident | You can use incident tickets to resolve issues that are unplanned and have a limited effect on quality or service. |
| Miscellaneous | You can use miscellaneous tickets to track work for projects that may not fall into the description of other ticket types. |
| Problem | You can use problem tickets to define the root cause of one or more incidents that pertain to the same or related issue(s). |
| Project | You can use project tickets to help teams track and manage work requests and sub-tasks. |
| Question | You can use question tickets to collect information or start an investigation. |
| Service request | You can use service request tickets to track assets, log which users have access to resources, and manage service level agreements. |
| Task | You can use tasks to assign work that may be unrelated to a service issue. Examples include order requests, provisioning new accounts, or monitoring events. |
Create Tickets from a Response Template
When you first enable and configure the NinjaOne Ticketing application, you have the option to create response templates, which were originally designed to facilitate a quick response to common tickets. To learn how to create and manage your response templates, refer to NinjaOne Ticketing: Automation.
We added the ability to use response templates while on the new ticket screen, which allows you to automatically update specific fields with data. To learn more about the types of action a response template can take when creating a ticket, refer to NinjaOne Ticketing: Automation Configuration Definitions.
Create Tickets from an Activity
You can manage activities at the following levels:
If you have a third-party ticketing application enabled, such as ServiceNow or another professional services automation (PSA) tool, you may notice additional fields above Ticketing Rule.
- For more information about policy activities, refer to Device and System Activity Notification Feed.
- For more information about PSAs, refer to Getting Started with NinjaOne PSA and QuickBooks.
System Level Activities
To create tickets for system-level activities, perform the following steps:
- Navigate to Administration → General → Activities.
- Select a system activity.
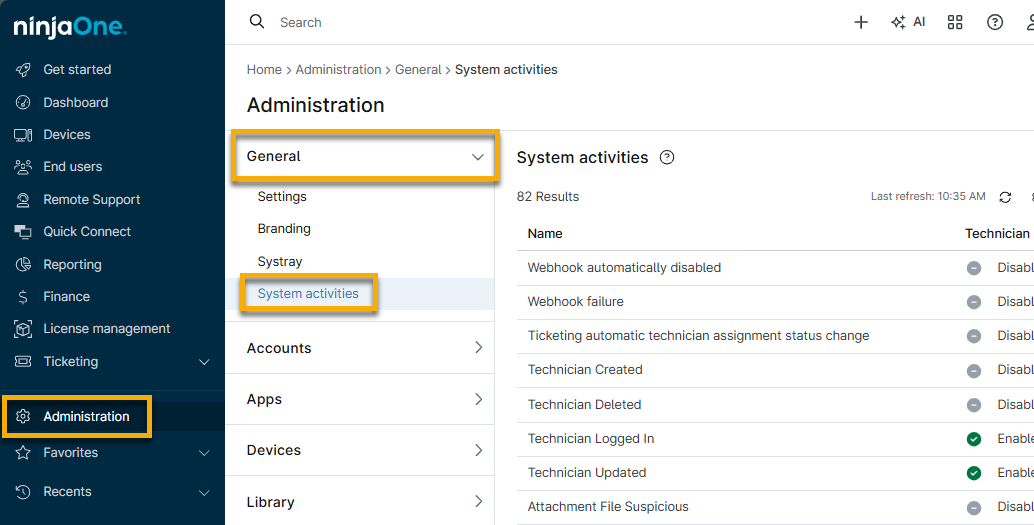
Figure 3: Access system activities in NinjaOne
The Activities configuration modal displays.
- Select an option from the Ticketing Rule drop-down menu, and then click Save.
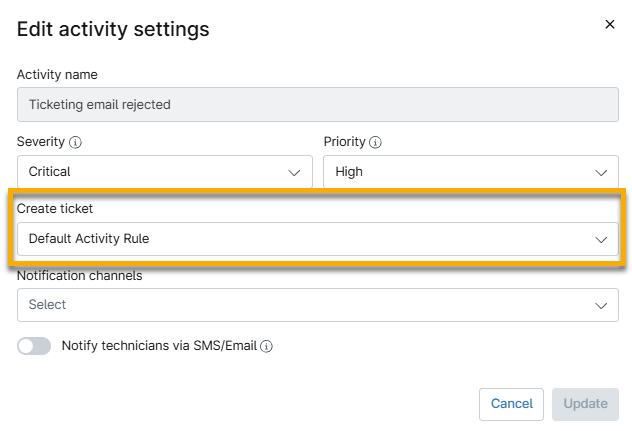
Figure 4: Select a ticketing rule for the activity
The Activities administration page updates to display all activities using a ticketing rule.
Policy Level Activities
- Navigate to Administration → Policies and open a policy to edit it.
- Open the Activities tab and click any of the rows to expand options.
- Click an activity option to configure the settings.

Figure 5: Edit a policy activity
- Select an automation from the Ticketing Rule drop-down menu and then click Save. Learn more about setting up Activity Rule automations in NinjaOne Ticketing: Automation.
Create Tickets from Conditions
You can create a ticket from a triggered condition. If you have other ticketing applications enabled, such as ServiceNow, you will notice an option to create a ticket through that integration.
- Navigate to Administration → Policies and open a policy to edit it.
- The Conditions tab is open by default. Click Add Condition.
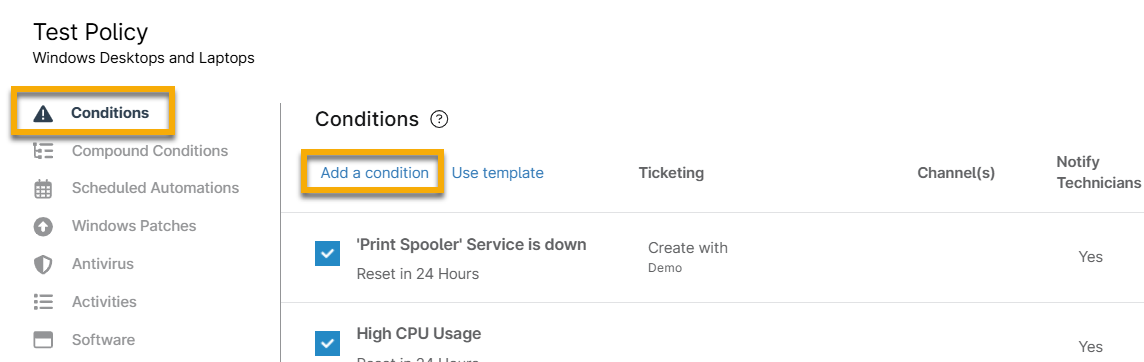
Figure 6: Add a condition to a policy
- Configure the condition to your preference (refer to Policies: Condition Configuration for instructions).
- From the Ticketing Rule drop-down menu, select your preferred ticketing rule, and then click Add.
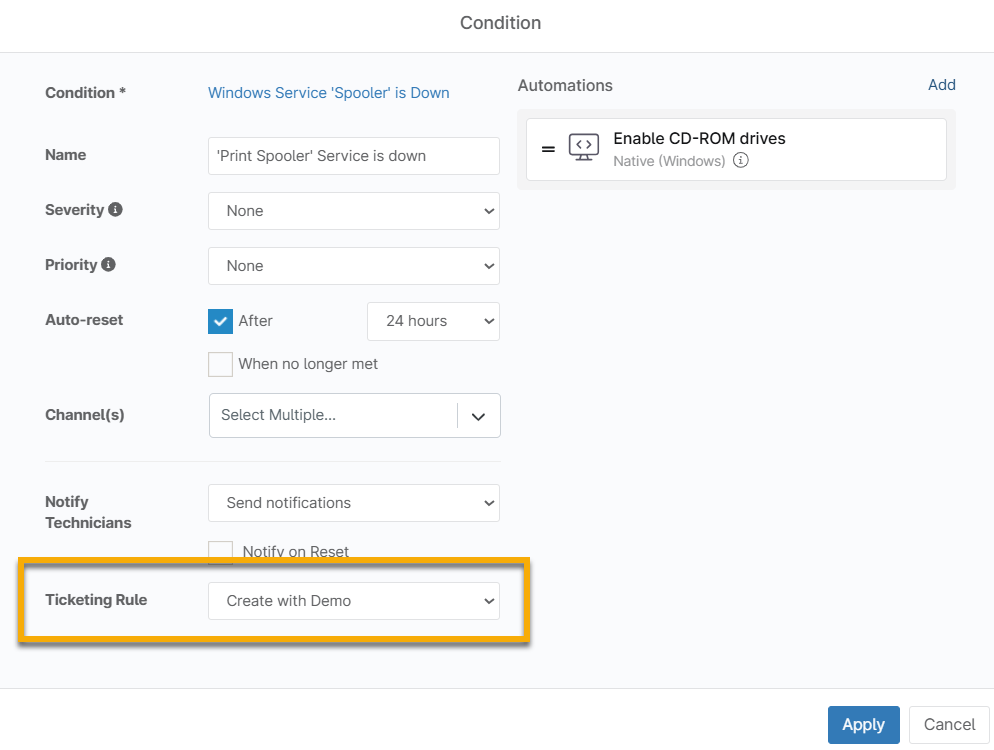
Figure 7: Add a ticketing rule to a condition (click to enlarge)
Create Tickets Manually as a Technician
As a technician with appropriate permission levels, there are several places in NinjaOne where you can manually create new tickets, such as:
- Create a Ticket from the Ticketing Board
- Create a Ticket from the Organization Dashboard
- Create a Ticket from the Device Dashboard
- Create a Ticket from the Search Dashboard
- Create a Ticket from a Health Alert
Create a Ticket from the Ticketing Board
Technicians can create tickets from any ticket board. Navigate to any ticket board and click Create.
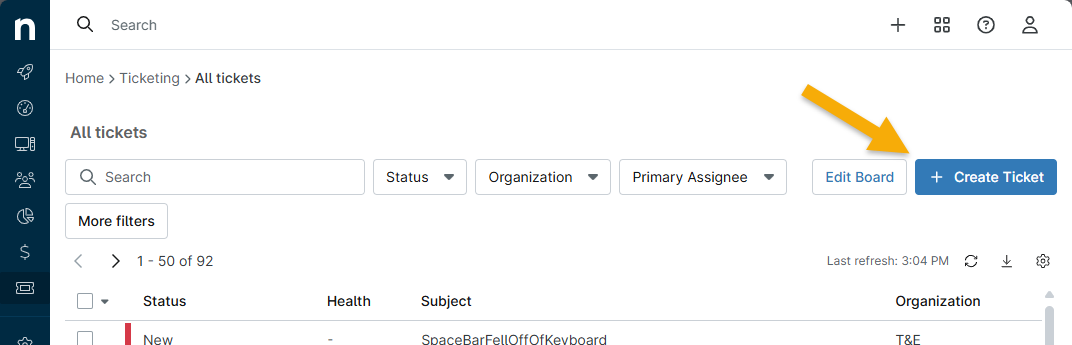
Figure 8: Create a ticket from a NinjaOne Ticketing board
Create a Ticket from the Organization Dashboard
Technicians can also create tickets from the Organization Dashboard.
- Navigate to an organization and open the Ticketing tab.
- Click Create Ticket.
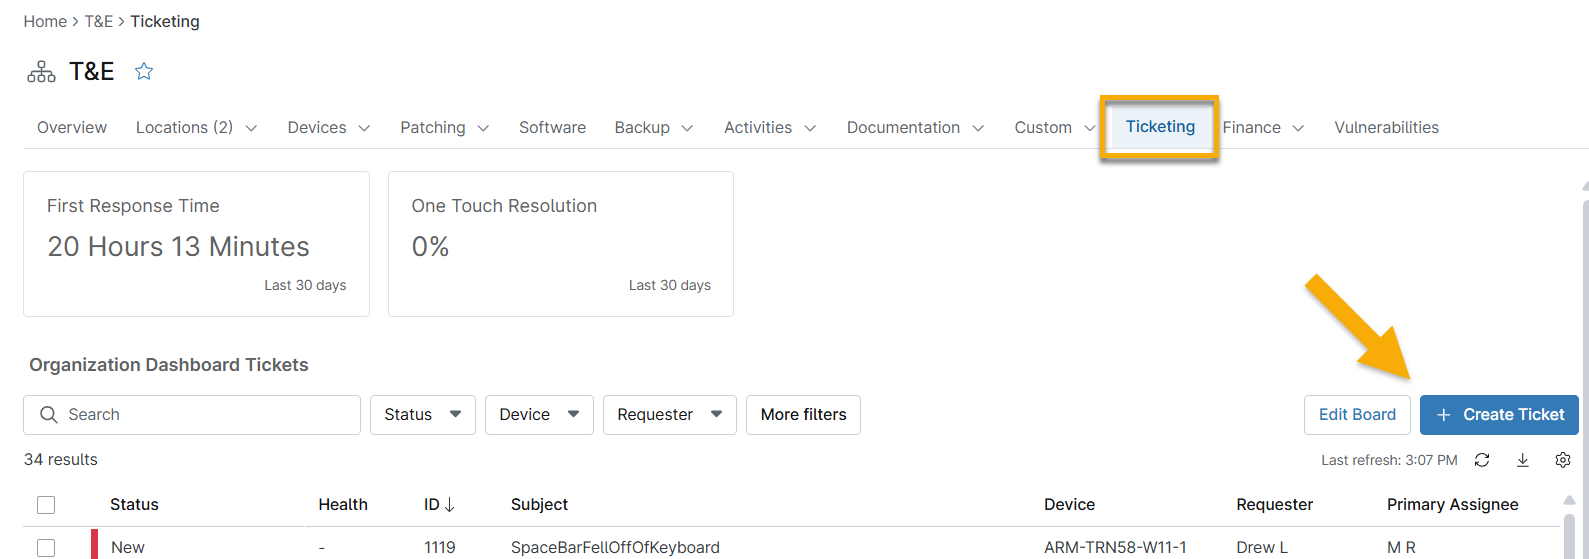
Figure 9: Create a ticket from the organization dashboard
Create a Ticket from the Device Dashboard
Similar to the option above, tickets can be created from the Device Dashboard. If the device in question has an assigned asset owner, that asset owner is automatically assigned as the requester for the ticket.
- Navigate to a device, then open the Ticketing tab.
- Click Create Ticket.
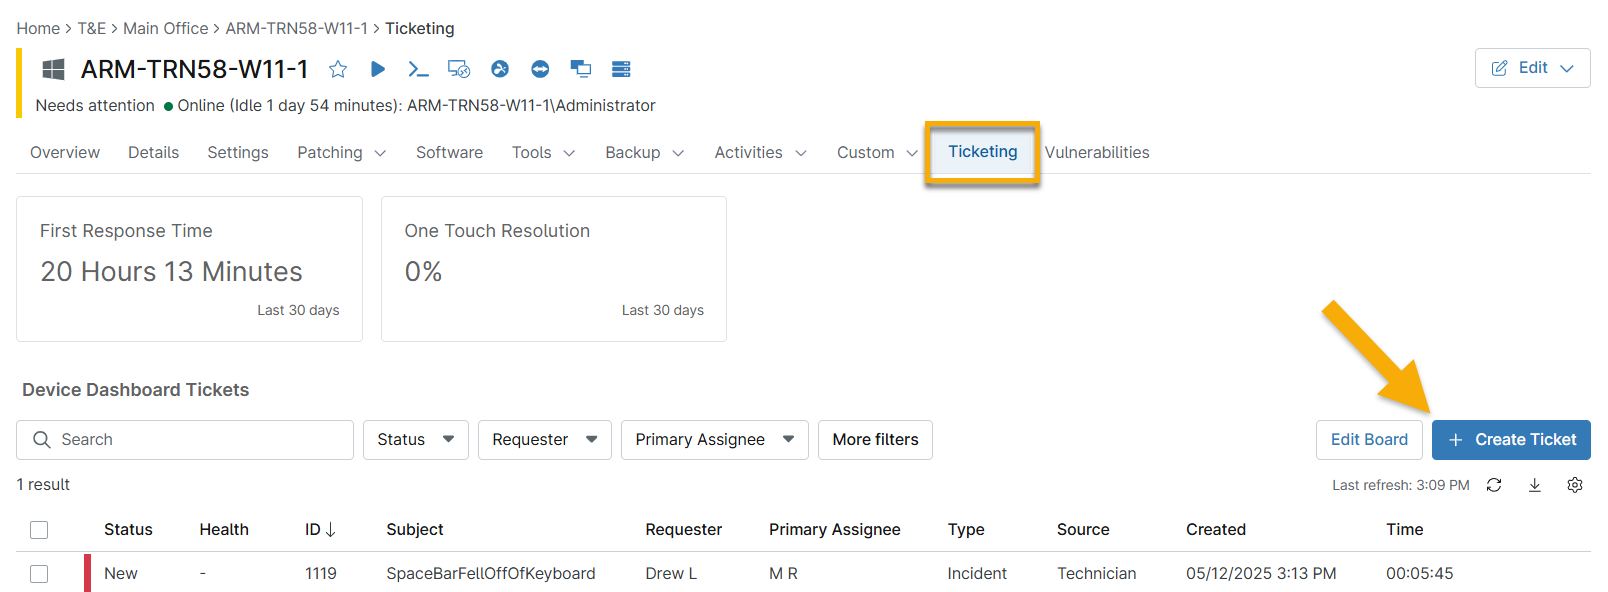
Figure 10: Create a ticket from the device dashboard (click to enlarge)
Create a Ticket from the Search Dashboard
Tickets can also be created from the device list in the Devices tab in the left navigation pane. The organization, location, and device data are automatically populated in the new ticket. Additionally, if the device in question has an assigned asset owner, that asset owner is automatically assigned as the requester for the ticket.
- Click Devices in the left navigation pane.
- Select the checkbox for a device and click Create Ticket.

Figure 11: Create a ticket from the device search page
Create a Ticket from a Health Alert
If a certain condition is triggered on a device, you can create a ticket from the corresponding health alert.
- In the Health issues section of a Device Dashboard, move your cursor over the event and click the ellipsis button. Select Create Ticket.
- Additionally, if a non-deleted ticket in any status is already present for the condition, you will have an option to View Ticket in the same location.

Figure 12: Create a ticket from a health alert (click to enlarge)
Submit Ticket as an End-User
End users must have Ticketing permission enabled in their NinjaOne account to view and submit tickets.
End users who have been added via End User Sharing can submit tickets directly from their self-service portal. Refer to Submit Tickets as an End User.
If the user is assigned to a specific organization, the ticket will be automatically linked to the organization upon creation. If the user is assigned to multiple organizations, the organization field will remain blank until the technician manually updates it.
End users can also use the NinjaOne Assist mobile app to submit tickets. Refer to NinjaOne Assist Mobile Application for more information.
Assign Asset Ownership for Requester
You can link devices in NinjaOne to a technician, end user, or contact. For example, when the system creates tickets without a requester, NinjaOne can automatically assign the person assigned to the device as the requester.
If you need to change the device owner to enforce an appropriate assignment, refer to Add or Change Device Owner.
You can configure ticket conditions to assign a device owner when a requester is not included. To configure this, use the following instructions:
- Navigate to Administration → Apps → Ninja Ticketing.
- In the Automation tab, select Condition Rules and click Add. (This option is available for Activity Rules and Script Rules.)
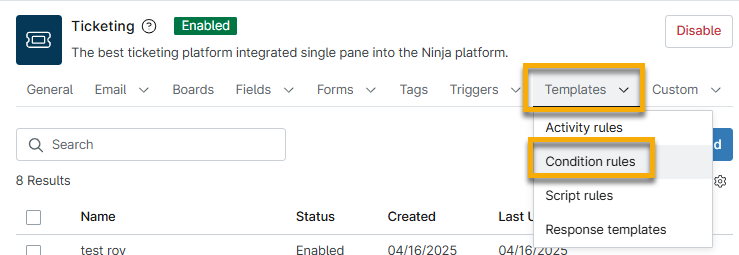
Figure 13: Add a condition rule automation for NinjaOne Ticketing
- Click Ticket creation and select the checkbox titled Use the device's user as a requester.
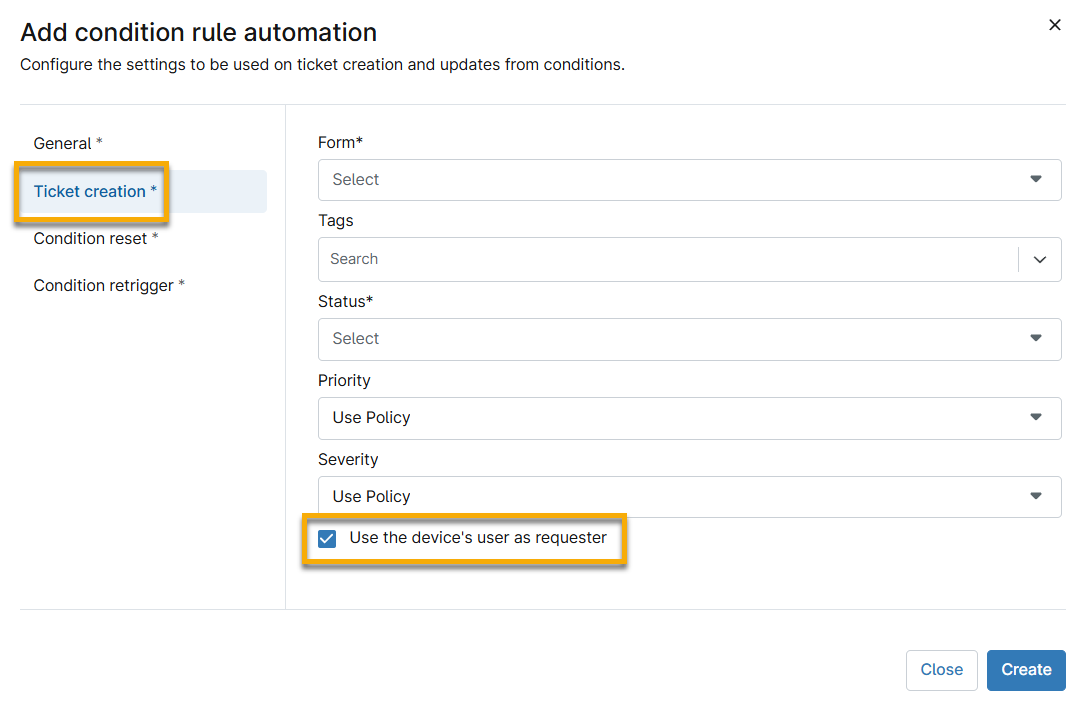
Figure 14: Use the device's user as a requester for a condition rule automation in NinjaOne Ticketing
Additional Resources
Refer to the .