Topic
This article explains how to import multiple end users into NinjaOne for account creation or manually create a single end user account in NinjaOne.
If you need instructions for importing technicians, refer to NinjaOne Platform: Create a Technician Account.
Environment
NinjaOne Platform
Description
To assign devices to a user in NinjaOne, or to give an end user access to view device details, you must first create an account for the end user in NinjaOne.
Once the end user has an account, they can also create tickets and download files from devices with backup enabled, if you enable the appropriate permissions.
Index
Select a category to learn more:
- Create an End User Account
- Import Multiple End Users for an Organization
- Copy an End User
- Additional Resources
Create an End User Account
Add a new end user to NinjaOne through the End users dashboard or from Administration → Accounts → All users. Click Add user and select End user.

Refer to User Permissions: Permission Options for configuration instructions and details about how the permissions work. Refer to NinjaOne Dashboards: End Users for help with the End users dashboard.
Import Multiple End Users for an Organization
The Import End Users modal on the Organization → End Users page provides an area to paste in tab-delimited, comma-separated values (CSV) data, which NinjaOne will automatically detect and extract the values corresponding to each column. NinjaOne validates the data to ensure accuracy before importing the data; invalid data formats or values will cause the entire import to fail.
Pre-requisites
When importing in bulk, you are required to provide the following data separated into columns:
- First Name: This field cannot be blank or empty and must use letter characters only. This field supports a maximum of 150 characters per value.
- Last Name: This field cannot be blank or empty and must use letter characters only. This field supports a maximum of 150 characters per value.
- Email: This field must be unique to the system (that is, it is not currently in use for an existing technician or end user account in NinjaOne), and this field supports a maximum of 64 characters per value. You must use the following format:
<local-part>@<domain-part>- Phone Number (optional): This field must include the country code. If you are using an Excel file to organize this data, Excel will assume you are providing a formula when you use "+" to add the country code at the beginning. To prevent this, add an apostrophe ' before the +. NinjaOne will validate the number based on the rules of the corresponding country; if an invalid phone number is provided, the entire import will fail.
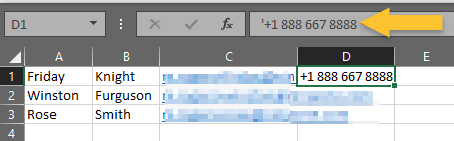
Figure 2: Using Excel spreadsheets to import end users in bulk
Import Users to an Organization
To import users, perform the following steps:
- Navigate to Administration → Organizations and select the organization to which the end user belongs (and whose devices are managed). Then, open the EndUsers tab.
- Click Import Users.
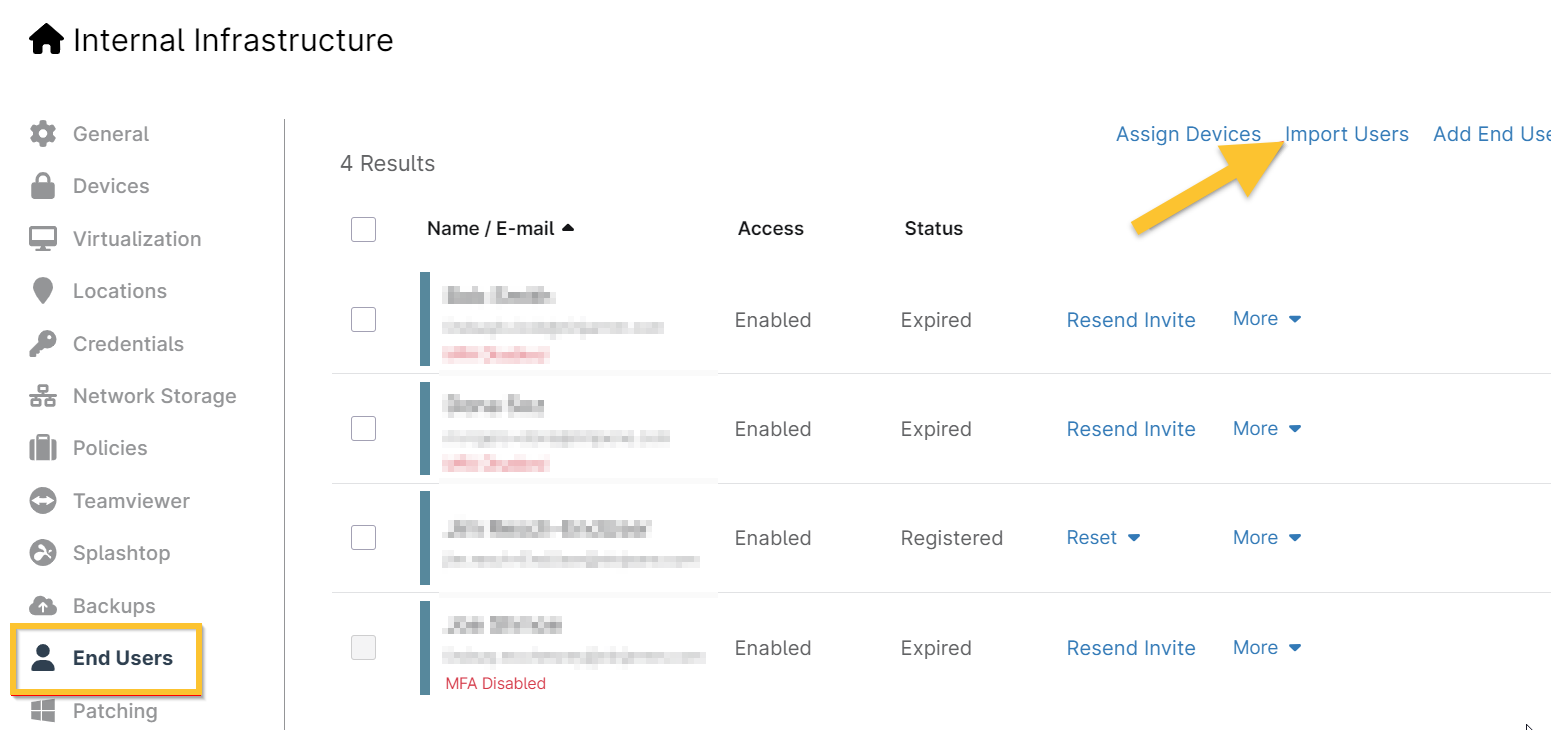
Figure 3: Import Users
- Paste the spreadsheet content directly into the modal and click Import.
Once you paste the data, the new end users' data will be populated. - Select the checkbox next to the user's name to assign them to a role.

Figure 4: Import end users and assign roles
- Once you assign all users to a role, click Import.
Once you've saved the new end user, you'll be able to review the invitation status (it will be Pending until the user clicks the link in the email to accept the invitation and finish setting up their account), and resend the invitation.
Copy an End User
The process described in this section copies the configured settings for that end user but prompts you to enter the end user's personal information (such as name, email address, and an optional phone number).
- Navigate to Administration → Accounts → All users.
- Select the checkbox for the user data you want to copy.
- Click Actions and then select Clone user.
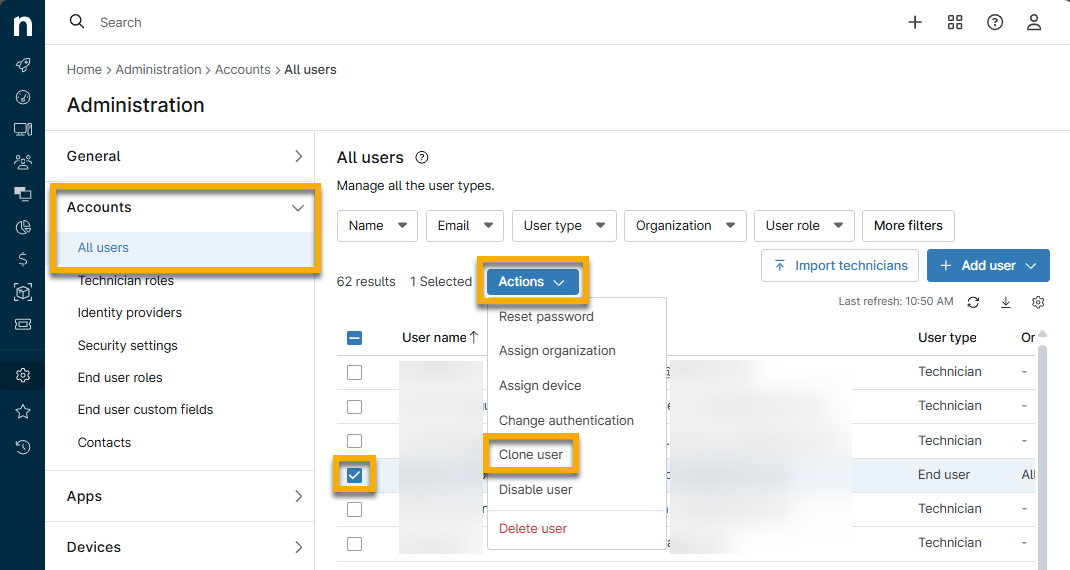
Figure 5: Copy an end user
Additional Resources
To learn how to assign devices to end users, refer to NinjaOne Endpoint Management: End User Sharing for Device Access.
For information about user management, refer to User Management: Resource Catalog.