Topic
This article explains how to use scheduled automation to run actions from the NinjaOne Automation Library on endpoints under a policy.
Environment
NinjaOne Endpoint Management
Description
Scheduled automations enable you to run actions from the Automations Library on endpoints assigned to a policy.
If you have fast boot or quick startup configured for your Windows OS device, following the steps in this article may prevent scheduled tasks and automations from running on system startup. This is because the device does not completely shut down. Fast boot causes the device to wake up rather than start; the startup value is not triggered.
View additional tutorials in our video library.
Select a category to learn more:
- Creating New Scheduled Automations
- Editing or Deleting Scheduled Automations
- Scheduling Options for Scheduled Scripts
- Additional Resources
Creating New Scheduled Automations
To create a new scheduled automation, perform the following steps:
- In NinjaOne, click Administration in the left navigation menu, then select Policies from the expanded options. To learn more about policies, refer to NinjaOne Policies: Create and Manage a Policy.
- Select the policy type in the Policies drop-down menu, then click the agent policy.
- Click Scheduled Automations, then click Add a Scheduled Automation.

Figure 1: Add a Scheduled Automation
- Give your new scheduled automation a name, an optional description, and a schedule. Move your cursor over the Schedule tooltip to learn more about schedule options.
- To receive notifications when this scheduled automation runs on a device, you can attach a notification channel and configure the action to send notifications. Once enabled, you can also assign the severity and priority for the notification. Refer to Notification Channels to learn more.
- If you have a PSA integration configured, you can also create a ticket whenever this scheduled script runs. The option you see for this field depends on which PSA you integrated with NinjaOne, if any. If NinjaOne Ticketing is enabled, use the Ticketing Rule drop-down menu options to create a ticket.
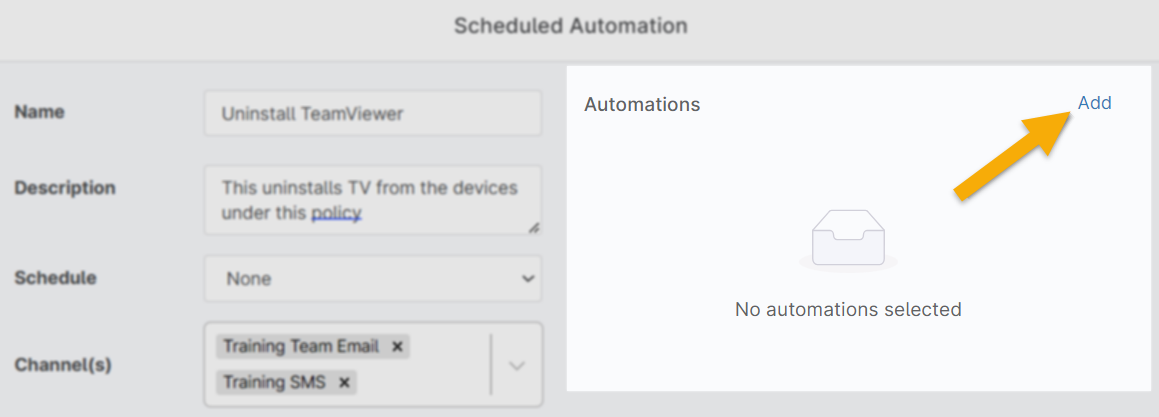
Figure 2: Create a ticket from a scheduled automation
Activate the Automation
To activate the automation, perform the following steps:
- Click Add Automation in the top right corner to select which script or application(s) to run as a part of the scheduled automation.
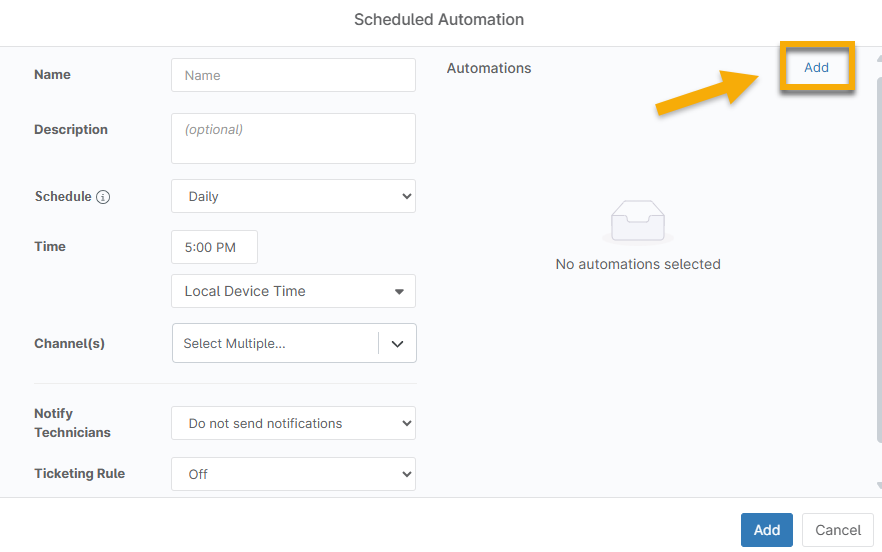
Figure 3: Add the automations to the schedule
- From the NinjaOne Automation Library, choose from the native scripts that NinjaOne provides or any custom scripts you added to the library. If you add multiple scripts, they will run in the order listed. You can drag and drop the scripts to change the order. Visit Getting Started With NinjaOne's Automation Library (Scripting) to learn more.
- Move your cursor over the automation to see options to edit or delete. Move your cursor over the information icon (i) to view details. Only scripts that require additional details will have the option to edit.
Once you have added all necessary scripts, click Save to add the configuration for your new scheduled automation, and then save your policy.
Editing or Deleting Scheduled Automations
To edit or remove a schedule automation, perform the following steps:
- On the policy configuration page, select Scheduled Automations.
- To edit, click the automation.
- To delete, move your cursor over the scheduled automation and then click Delete on the right side. You cannot delete inherited automations, but you can override them.
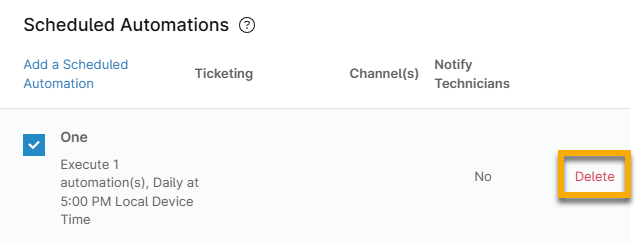
Figure 4: Delete a scheduled automation in NinjaOne
Scheduling Options for Scheduled Scripts
You can make a selection from the following options when creating scheduled automations:
- Daily, Weekly, Monthly: To learn more, move your cursor over the Schedule tooltip in the Add Automation dialog box.
- You can select specific days of the week by clicking each day you want the automation to run. You can choose one or more days out of the week to run the schedule.
- Run once: The scheduled automation runs once at the time you specify.
- Run once immediately: The scheduled automation runs once on any online device right after you save the policy, on any offline device as soon as it comes back online, and on any new devices as soon as they are added to that policy.
- None: Used when you do not want to run this automation on all the endpoints. Use this in cases where you want to run it on demand on some of the endpoints.
- When you choose None, the automation will be saved under the policy.
- Every: Used when you want to run a scheduled automation based on an interval of a specified number of hours or minutes (for example, every two hours, or every 20 minutes).
- On System Startup: Used when you want to run a scheduled automation every time the system starts.
- On User Login: The automation is scheduled to run the next time the user logs in.
Additional Resources
Refer to the following resources to learn about other scheduling options: