Topic
This article explains how to renew or update a Security Assertion Markup Language
(SAML) certificate for access to NinjaOne.
Environment
- NinjaOne Identity Access Management (IAM)
- NinjaOne Integrations
Description
Occasionally, an older enterprise will expire and will no longer allow users to log in to NinjaOne with their single sign-on (SSO) accounts. The renewal process within NinjaOne is similar for all identity providers (IDPs) with some exceptions. We recommend you review the documentation from the IDP that you use to ensure understanding when generating or renewing a SAML certificate.
For the purpose of this guide, we will use Microsoft Entra ID as an example. For your convenience, refer to the following external resources to learn how to manage certificates for other IDPs compatible with NinjaOne:
- Can I regenerate a certificate for a generic SSO integration? | Duo Knowledge Base Topics (external link)
- Tutorial: Manage federation certificates - Microsoft Entra ID | Microsoft Learn (external link)
- Maintain SAML certificates - Google Workspace Admin Help (external link)
- Manage signing certificates | Okta Classic Engine (external link)
- Creating and Applying Certificates (4266990) | OneLogin (external link)
- What do I do when a SAML Certificate is Expiring? | Ping Identity (external link)
Update Metadata for an Expired SAML Certificate
To update the metadata in NinjaOne for your IDP, perform the following steps:
- Log in to NinjaOne as a system administrator. Navigate to Administration → Accounts → Identity providers.
- Select the IDP account with the expiring certificate.
- Click Update metadata in the notification banner.

- Open a separate browser tab and log in to your Microsoft Entra ID account.
- Navigate to Enterprise apps and select the NinjaOne SSO application.
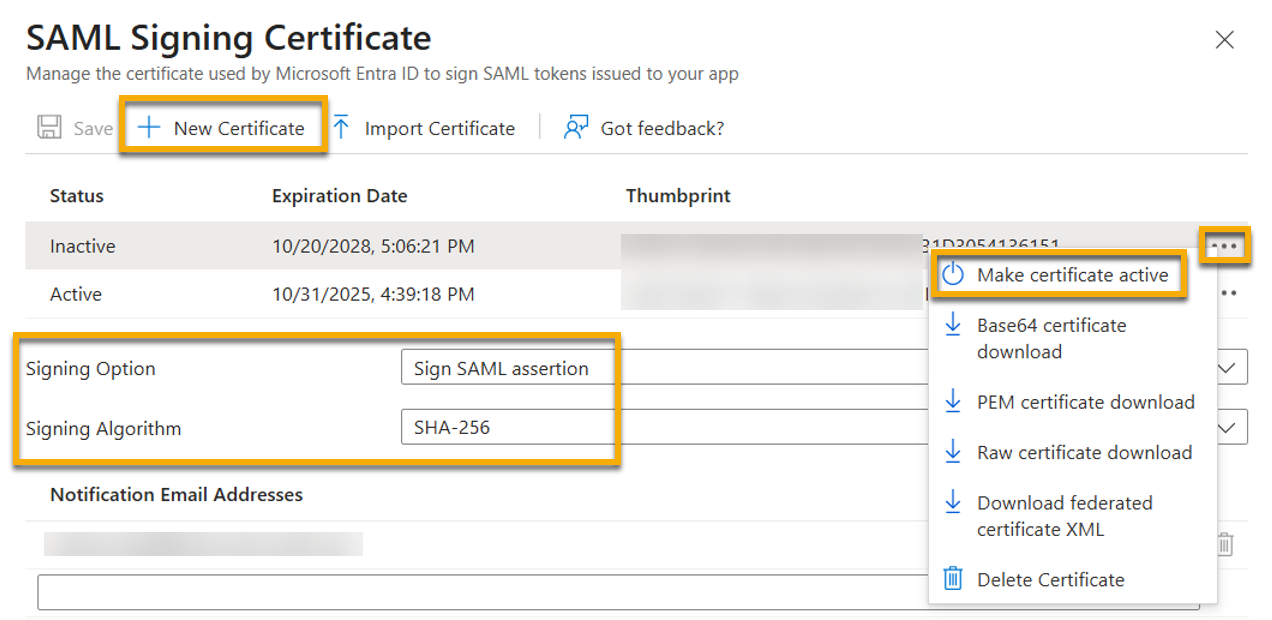
- Open SAML Certificates and click Edit.
-
Select New Certificate and then use the following table to complete the applicable fields.
Field Data Signing Option "Sign SAML assertion" Signing Algorithm "SHA-256" - Click Save.
- Click the ellipsis menu icon and select Make certificate active. We recommend that you refresh the page and review changes.
- Navigate to the SSO section of the Enterprise application in Entra ID and copy the App Federation Metadata URL.
- Return to the browser tab with your NinjaOne account open to the IDP page.
- Paste the copied data into the Import metadata from field and then click Test connection.
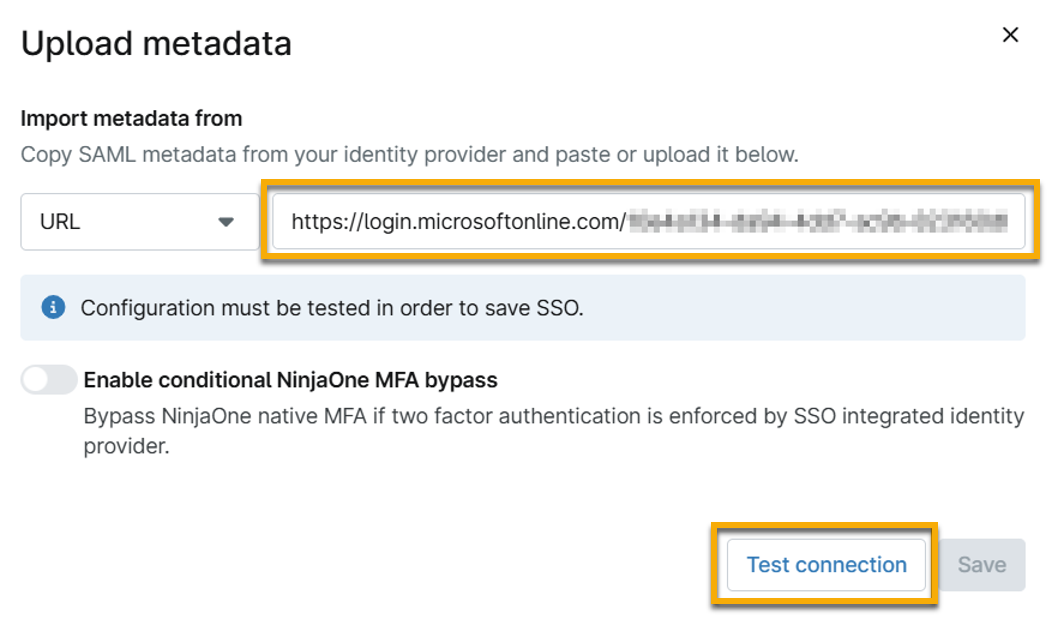
- When the connection succeeds, click Save.
Additional Resources
To learn more about NinjaOne IAM, refer to NinjaOne Identity Access Management (IAM): Resource Catalog.