Topic
This article describes which tools in NinjaOne you can use to optimize the Bitdefender GravityZone integration.
Environment
- NinjaOne Integrations
- Bitdefender GravityZone
Description
After you enable the Bitdefender GravityZone antivirus integration in NinjaOne and deploy it to managed devices, you can use the integration to optimize other tools in NinjaOne.
Select a category to continue:
- Enable Notifications and Ticketing Rules
- Check if GravityZone is Up to Date
- Enable Additional Management Access
- Additional Resources
Enable Notifications and Ticketing Rules
From the policy configuration page, you can enable notifications for a channel or technician or create a ticket for various GravityZone events, such as GravityZone managed status or threat alerts. For more information, refer to Notification Channels.
- From Administration → Policies, select a policy and open the Activities tab. Expand GravityZone.
- Select any of the GravityZone events from the list.
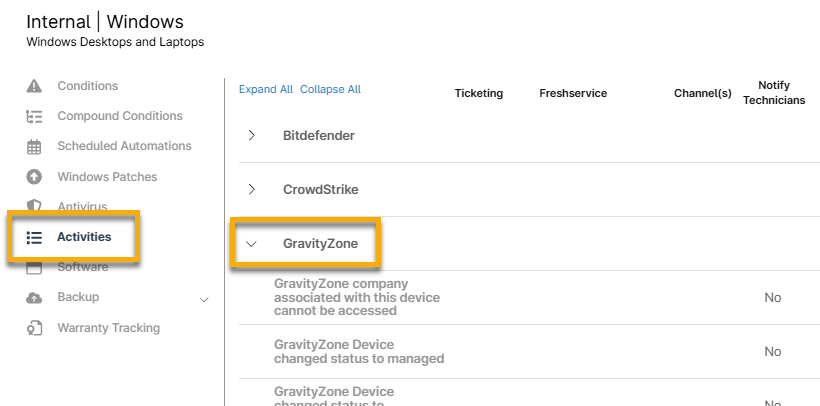
Figure 1: Policy → Activities → GravityZone
- In the Activity configuration modal, use the Channel(s) or Notify Technicians drop-down menus to set up alerts. Use the Ticketing Rule drop-down to create tickets using NinjaOne's Ticketing tool. You can create tickets using that tool if another ticketing application is enabled.
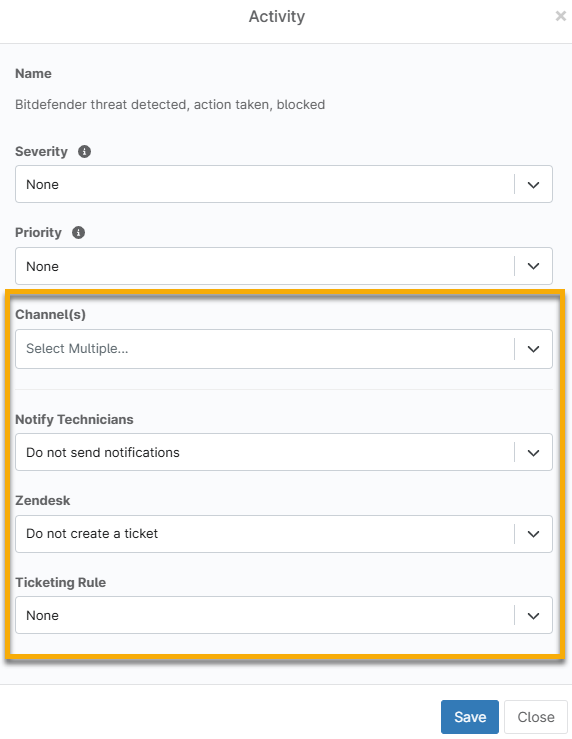
Figure 2: Notification and ticketing preferences for GravityZone events
- Configure the severity and priority for the notification. These settings work with each user's individual severity and priority notification settings.
- Click Save. A message displays in the UI indicating that notifications have been enabled for this activity.
Check if GravityZone is Up to Date
Open the Details tab on the Device Dashboard and select Antivirus to view your antivirus status and product state. This section includes any antivirus software that has been historically used on the device through NinjaOne. If you remove the antivirus software in the policy, the Product State will reflect "Off."
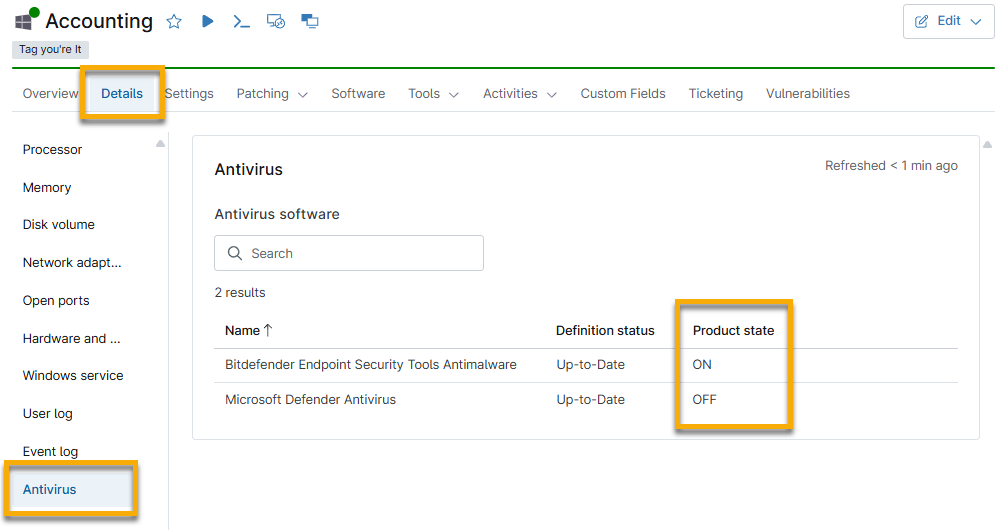
Figure 3: Antivirus details on the device dashboard
Find devices with GravityZone installed
You can easily find devices with GravityZone installed on the Devices search page by clicking Load group. Enter "Bitdefender" in the search field and select Has Bitdefender on. The page displays all applicable devices, and you can click the device name to navigate to its dashboard.
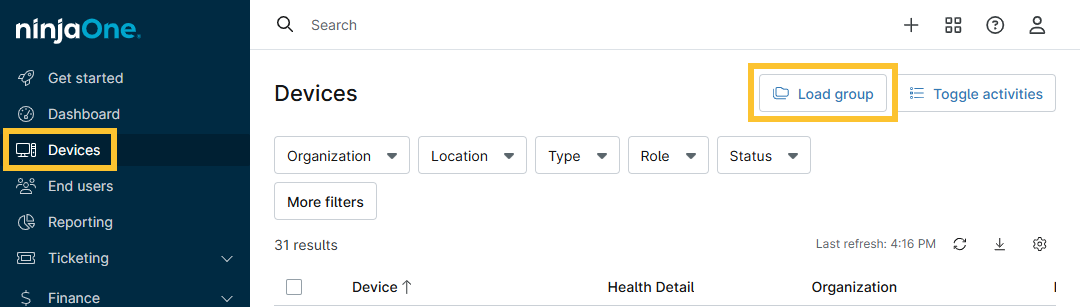
Figure 4: Use search groups in NinjaOne
Enable Additional Management Access
System administrators have default access to the Bitdefender GravityZone Integration. Technicians with custom user permissions must be granted access through permissions or roles. Refer to User Roles and Permissions for more information.
- Navigate to Administration → Accounts → All users and select a technician to whom you would like to grant GravityZone management access. Alternatively, add the permission to a technician role.
- Select System. If system access is not enabled, use the toggle switch to enable it.
- Scroll down to the GravityZone options. There are two roles available:
- GravityZone Admin: This role grants the user complete rights to administer the integration, including enabling or disabling it and starting or canceling scans.
- GravityZone Scan Options: Users in this role can only start and cancel scans.
- Select No Access or Allowed for each role. Then, click Save Changes.
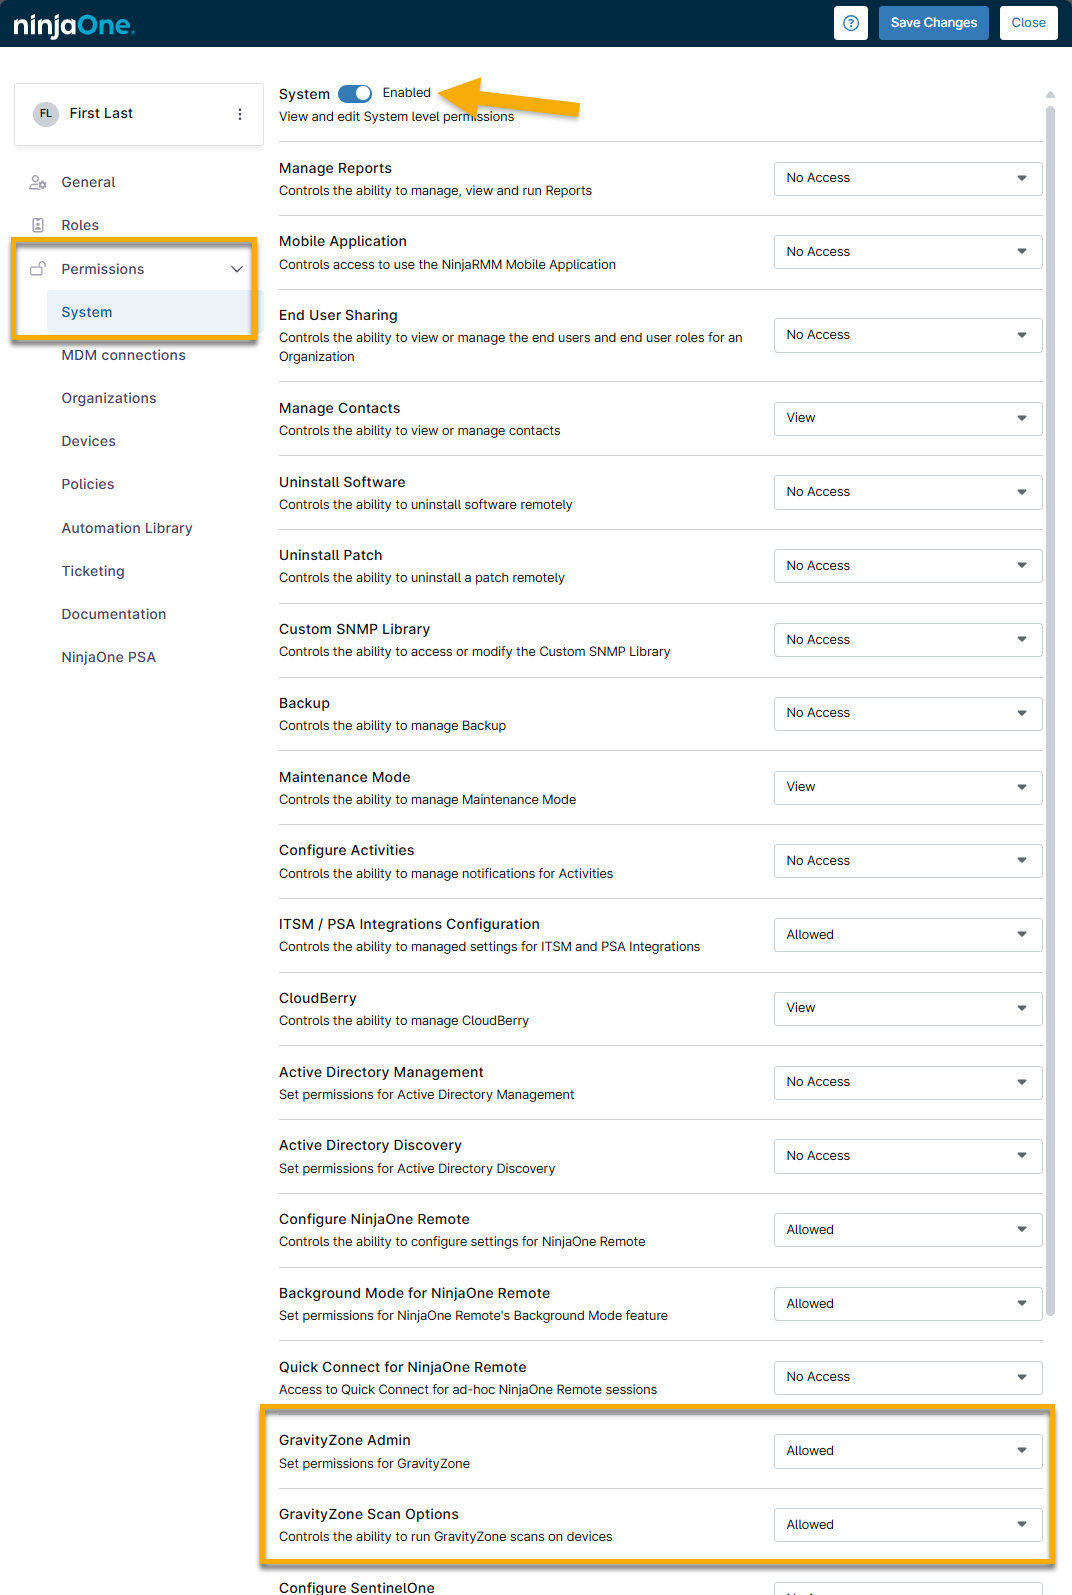
Figure 5: GravityZone permissions (click to enlarge)
After you grant a technician access to GravityZone in NinjaOne, their GravityZone account will be created the first time they click the GravityZone console link from the App Exchange page in NinjaOne.
Additional Resources
The following learning content will help you maximize the benefits of the Bitdefender GravityZone feature set.