Topic
This article discusses how to back up network shares with NinjaOne Backup.
Environment
NinjaOne Backup
Description
The Network Share Backup plan type lets you back up data directly from an SMB network share to cloud backup storage.
Select a topic to continue.
- How Network Share Backup Works
- Setting Up a Network Share Backup
- Running a Manual Backup Job
- Restoring a Network Share Backup
How Network Share Backup Works
Other backup plans, such as Image and File/Folder, are configurable at the policy level and can apply to all devices within the policy. Network share backups, however, use a single backup device, and that endpoint backs up the network share
Setting Up a Network Share Backup
Follow this procedure to configure your backup.
Add the network share.
- In the device Overview dashboard, click the endpoint assigned to back up the network share.

- Click the Settings tab, ensure the Apps tab is selected, and then click the link to the right of the backup plan.

- In the device navigation menu, select Backup → Network Share and then click Add plan.

Configuring Share Backup Settings
- In the Network Share Plan configuration window's General tab, configure the following options:
- Plan Name: Assign a descriptive name to the plan to identify its backup type or share content.
- Backup Destination: Designate where the backup is saved.
- Schedule: Use the Schedule drop-down menu to specify the backup frequency and select the desired time options.
- Power Options: Configure device sleep behaviors.
- Revisions: Use these options to specify the number of revisions the system should retain and the duration for which you want them kept. If you configure both parameters, the earliest one will trigger the trim.
- Pre-plan automations: Specify whether the system should run automation scripts before performing the backup job. If you select the checkbox, the system will prompt you to add the automations.
- Post-plan automations: Specify whether the system should run automation scripts after completing the backup job. If you select the checkbox, the system will prompt you to add the automations.

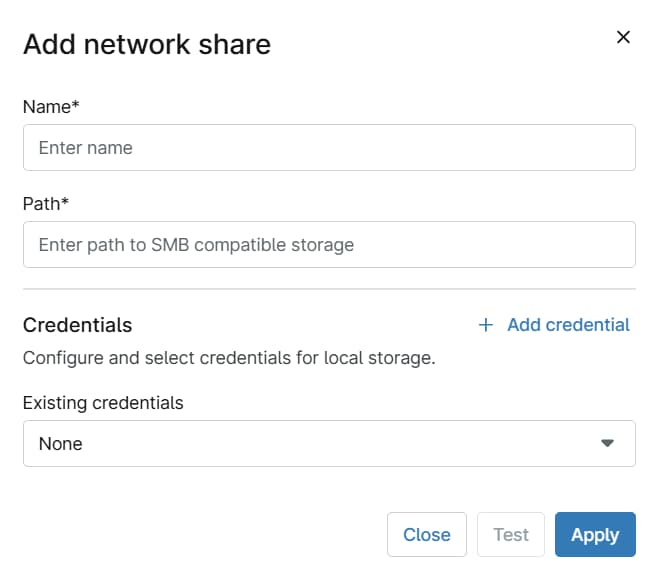
- In the Target tab, click Edit, then configure the following options:
- Name: Assign a descriptive name to the plan to identify its backup type or share content.
- Path: Enter the share path of the directory you are backing up.
- Credentials: You can add existing username and password credentials by choosing them in the drop-down menu, or you can click Add Credential to create a new one.
- In the Filters tab, select the filter masks to include or exclude files from the share. If you do not set these options or select All files, the backup will capture all files in the share.

Running a Manual Backup Job
You can initiate backup jobs manually outside of scheduled settings.
- Navigate to the device on which you configured the backup job, click the disk drives icon in the action bar as shown in Figure 7, then select Run backup plan.
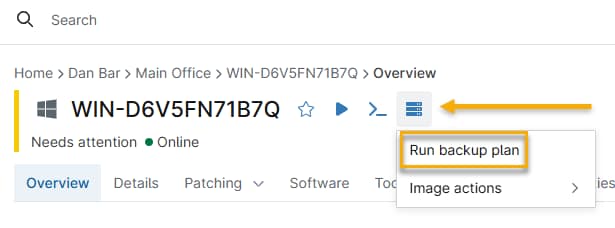
2. Pick your backup plan from the drop-down menu, then click Run.

Restoring a Network Share Backup
You can download files or folders directly to your local machine or use the Restore function to restore them to their source or to another machine running NinjaOne Backup.
Restoring files and folders
- In the Device Overview dashboard, place your cursor over the device. When the Actions menu appears, click Manage.

On the Manage screen, click the NAS share you want to restore.
3. The top-level folder will appear. Click the actions menu (three dots) and select Restore to start the restore, or click the folder to drill deeper into the file system.
