Topic
Environment
- NinjaOne platform
- ConnectWise Manage
Description
Per ConnectWise documentation, agreement types are templates that you can use to apply an agreement to your customer. If you sell standard service offerings, you can set up specific agreement types for each one. If you do not have standard service offerings, you can still set up some templates that can be edited when they are applied to the customer. Refer to Agreement Type Setup Table - ConnectWise (external) for more information.
When the ConnectWise Manage integration is enabled in NinjaOne, NinjaOne syncs data based on the number of NinjaOne devices that map to each agreement. NinjaOne may increase or reduce this quantity as the device count in NinjaOne changes. However, if you remove all NinjaOne devices for a particular ConnectWise company or product, NinjaOne will not change the quantity on any matching agreement additions. This prevents NinjaOne from altering agreement addition data that does not map to device data in NinjaOne.
Select a category to learn more:
Map Products and Agreements
NinjaOne does not have the ability to create ConnectWise products or agreements. You must set up products and agreements in ConnectWise before mapping them in NinjaOne's integration. Use ConnectWise PSA (Manage) - ConnectWise documentation to learn how to create products and agreements.
To map existing products and agreements from ConnectWise to NinjaOne, perform the following steps:
- Under the ConnectWise settings, open the Products section on the left. The Mappings tab is open by default. Click Add New Mapping to create a new mapping.

Figure 1: Map ConnectWise products to NinjaOne
The Product Mapping configuration modal displays.
- Name the new mapping and select whether you want to map the device to the first mapping only or all matching products.
- Click Add Mapping on the right side.
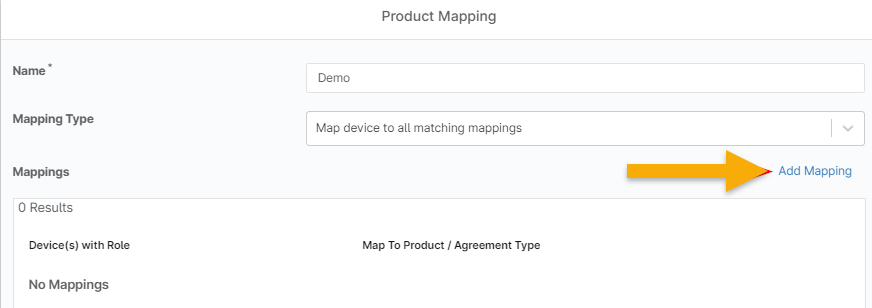
Figure 2: Map ConnectWise products to NinjaOne → Add mapping type
The Add Mapping configuration modal displays.
- Select the product and agreement type you'd like to map to from the drop-down lists. Then, select the NinjaOne device role and group(s) you'd like to map to the selected product and agreement type. Once you configure the mapping, click OK.
- Product: This refers to the products you have set up in ConnectWise. You can sync multiple "NinjaOne Device Role" items to the same ConnectWise "Product."
- Type the product description and not the name to find mappings.
- Agreement Type: This refers to the types of agreements you have set up in ConnectWise. Generally speaking, you want to select the "Agreement Type" associated with managed services.
- Product: This refers to the products you have set up in ConnectWise. You can sync multiple "NinjaOne Device Role" items to the same ConnectWise "Product."
- Repeat Steps 3–4 to complete multiple product mappings.You can map multiple different device roles to their respective product or agreement type under a single mapping configuration (for example, you can add mappings for macOS roles, Windows roles, or any other types of custom roles that you have configured); however, to map the same device role to different products or agreement types, you must include other groups. For example, Figure 3 shows duplicate device mappings; the first is in the group "is HP device," and the second is in the group "Connected." When you add a group to a device mapping, the (i) icon displays next to the device name; move your cursor over the icon to see group details.

Figure 3: Mapping tooltips
- If you have more than one mapping listed, you can map the device to all these mappings or just the first listed mapping (as discussed in Step 2). To change the list order of your mappings, click on one of the mappings to select it and then choose the Up or Down button at the top of the list.
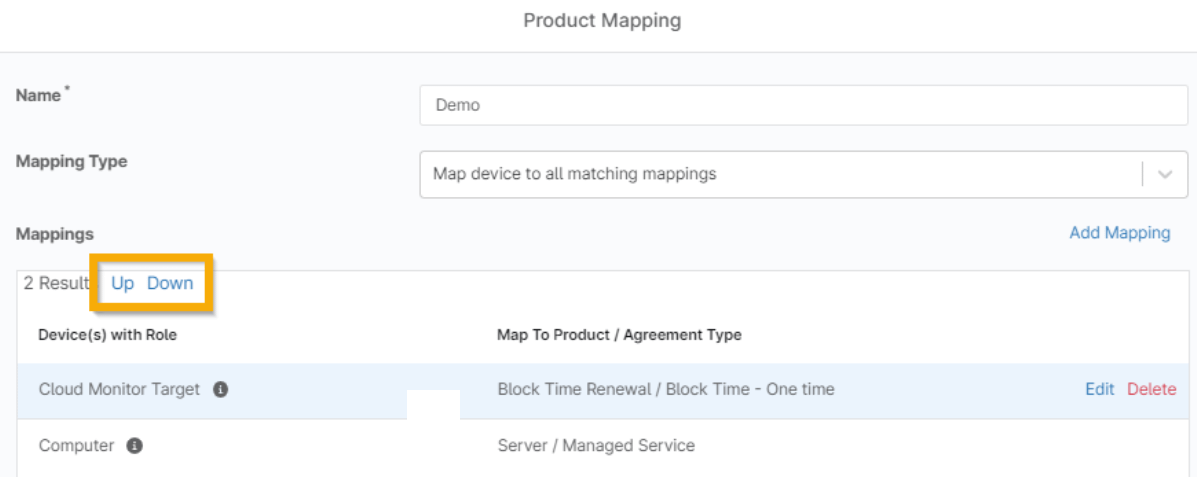
Figure 4: Change the order of the product mapping list
- Once you have configured the mappings, click OK to save.
- You can edit, copy, or delete existing mappings by checking off the mapping in question and clicking the respective button at the top of the list.
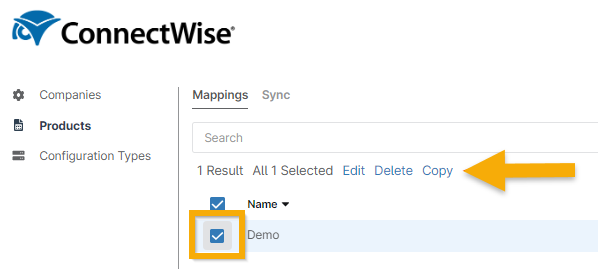
Figure 5: Edit, copy, or delete product mappings
Configure Scheduled Synchronization
When configuring and working with synchronization, it's important to understand the following characteristics of the feature:
- Device updates occur as synchronization takes place.
- Synchronization is an automated process that runs in the background. Because it is continuous, you will not receive "completion" notifications.
- After setting up synchronization, you do not need to adjust its settings unless you want to manually trigger a synchronization session.
- To synchronize multiple device roles to configuration types in ConnectWise, you must add all individual role mappings to a single Configuration Type Mapping. Once you've done so, navigate to Companies and select the corresponding Configuration Type Mapping to trigger the synchronization.
- Creating Configuration Type Mappings at the location level is optional. Mappings created at the top level will apply to all locations. You only need to change individual locations if your use case requires different mappings for each location.
To configure scheduled syncs between NinjaOne devices and ConnectWise Products and Agreements:
- Click Products and open the Sync tab.
- Activate the toggle switch to enable or disable the schedule.
- Designate your preferred schedule and when or if the scheduled sync will end (you can select whether you want the task to stop after a certain number of occurrences, on a specific date, or never).
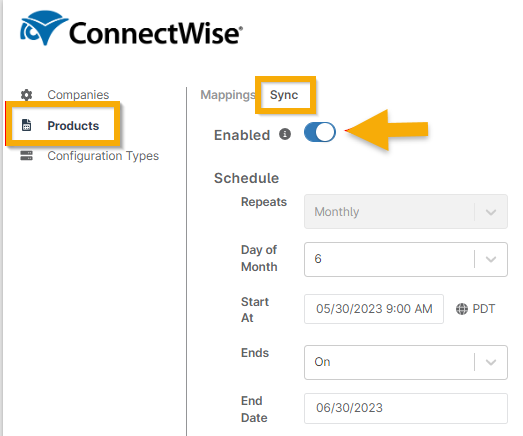
Figure 6: Create a schedule to sync product mappings
Additional Resources
Refer to the following resource(s) to learn more about the ConnectWise integration in NinjaOne: