Topic
This article describes the initial process for setting up NinjaOne's Backup tool in your instance.
Environment
- NinjaOne Backup
Description
NinjaOne features integrated image-based and file-based backup solutions.
Want to learn more about NinjaOne Backup? Check out our video library.
Index
- System Requirements
- Prerequisites
- Enabling NinjaOne Backup
- Deploying NinjaOne Backup to Machines
- Applying Bandwidth Throttling to Individual Devices
- Granting Custom User Access to NinjaOne Backup
- Enabling Backup From the Devices Search Grid
- Additional Resources
System Requirements
NinjaOne Backup supports the following operating systems:
- Windows 8 and newer
- Windows Server 2012 R2 and newer
- macOS Monterey
To use local storage with Windows Server 2012 R2 and avoid backup problems, you must configure the file share to support concurrent connections. Refer to Performance Tuning Guidelines for Windows Server 2012 R2 (external link). Follow the steps for network tuning, disk subsystem tuning, and file server tuning.
Prerequisites
Before activating NinjaOne Backup, review the following prerequisites to ensure that your environment meets all compatibility requirements:
- NinjaOne Backup is only compatible with Windows and Mac devices. Linux is not supported.
- If your antivirus solution has active protection enabled, you'll need to allowlist the NinjaOne Backup executable (lockhart.exe). Not doing so may impact the speed of uploads and downloads.
- For Mac devices, you must grant the Lockhart agent full disk access. For information about how to do so, refer to NinjaOne Backup: Mac Permissions and NinjaOne Backup: Mac Permissions Full Disk Access.
Enabling NinjaOne Backup
To configure backup services for your instance, perform the following steps:
- In Ninjaone, navigate to Administration → Apps and select Backup. If the app is not visible, click Add Apps in the top right corner to select it.
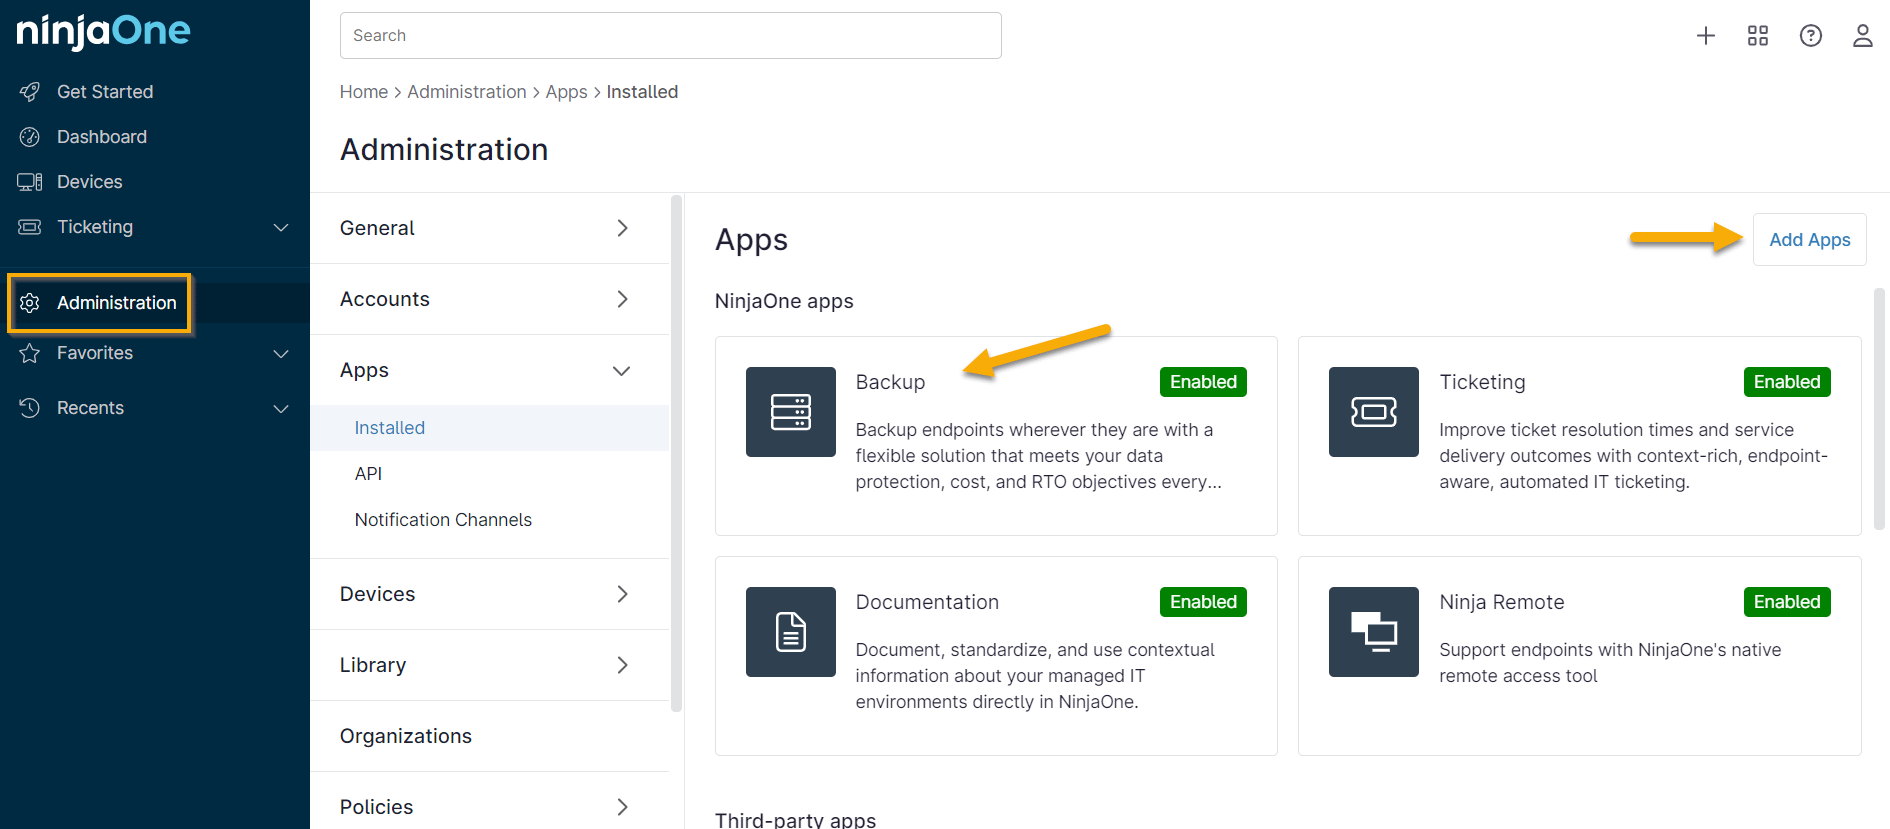
Figure 1: Administration → Apps → Backup (click to enlarge)
- On the Backup configuration page, click Enable.
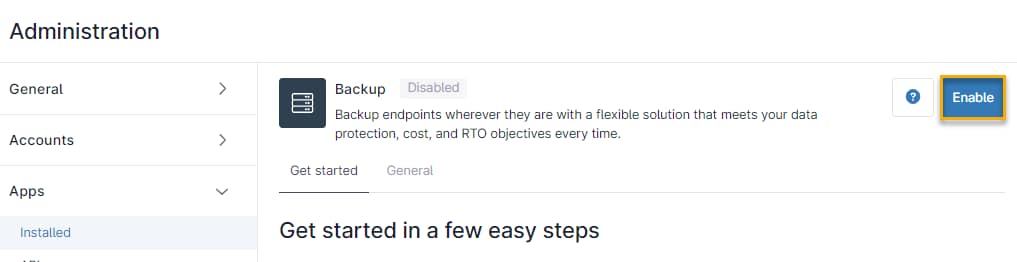
Figure 2: Backup configuration page (click to enlarge)
- On the Update Backup Integration modal, choose which cloud storage bucket to use. The available cloud storage buckets populate automatically based on your geographical region.
- Click Save to continue.
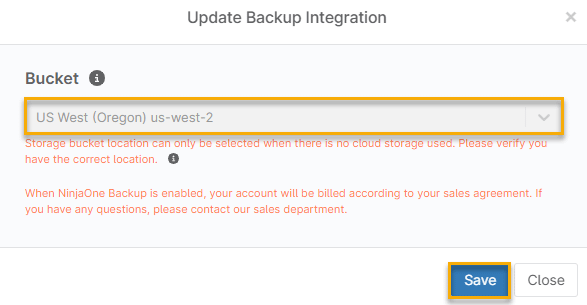
Figure 3: Update Backup Integration
The following storage buckets are available for each NinjaOne instance:
| Storage Bucket | Locations |
|---|---|
| US | Oregon |
| US2 | Ohio |
| EU | Frankfurt, Stockholm, Ireland, London, Paris, Switzerland |
| OC | Sydney |
| CA | Canada |
- Once NinjaOne Backup has been enabled, the Apps section indicates as such. The Disable option can be used to disable NinjaOne Backup in your environment, whereas the Edit button can be used to modify which features are enabled (file/folder and/or image).
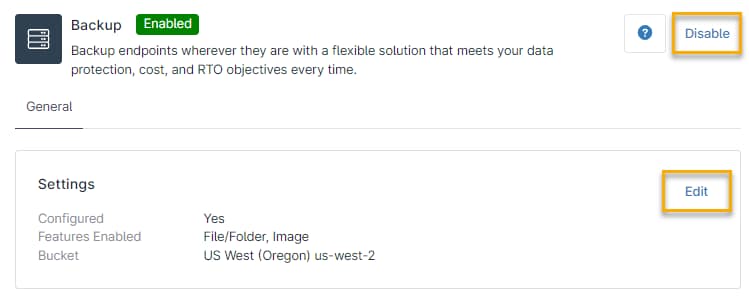
Figure 6: Disabling or editing backup settings
Deploying NinjaOne Backup to Machines
Complete the following workflow to deploy the backup solution to your endpoints.
- In NinjaOne, navigate to Administration → Organizations.
- Click the organization you would like to update.
- In the side navigation menu, navigate to Backups → Deployment.
- If Disabled appears on the Deployment pane next to the header, click Enable to activate the management options for deploying the backup solution to your instance's endpoints.
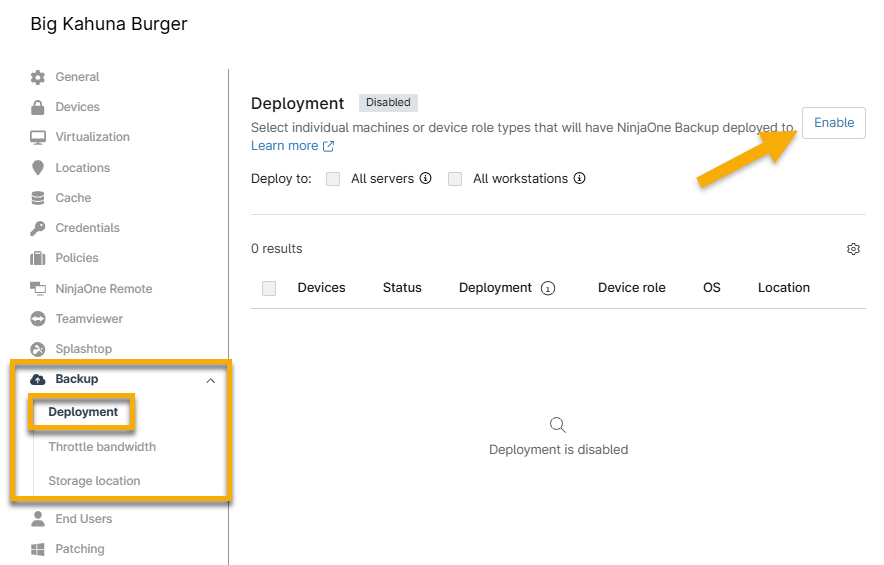
Figure 7: Enable Backup for a NinjaOne organization
- Once you've enabled the feature, a table enumerating all devices eligible for protection will appear in the pane. From this location, you can enable NinjaOne Backup for all servers, all workstations, and any individual devices you designate by selecting the check boxes next to the corresponding roles and device names you'd like to protect.
- To manually manage deployment for specific endpoints, move your cursor over the device's name in the table. Then, click the ellipsis button to select the Enable or Disable option.
- You can also perform these actions by selecting the check boxes next to the devices you wish to manage. Enable or Disable buttons will appear below the Search box.
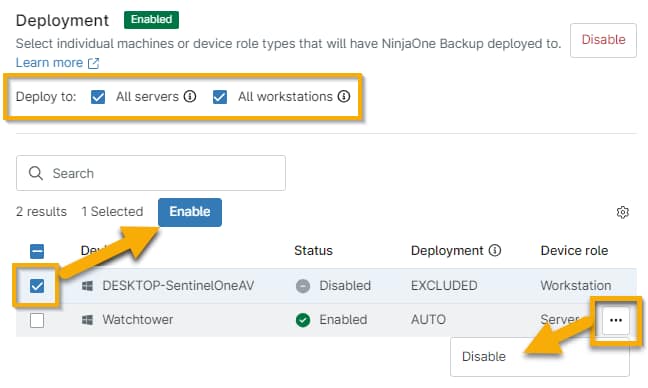
Figure 8: Deployment management options (click to enlarge)
- To configure bandwidth throttling, in the side navigation menu, select Backup → Throttle Bandwidth.
- Activate the Enabled toggle switch to manage the throttling settings.
- Define the schedule during which bandwidth throttling should apply and the units of bandwidth to throttle.
- When you've completed the configuration, click Save.
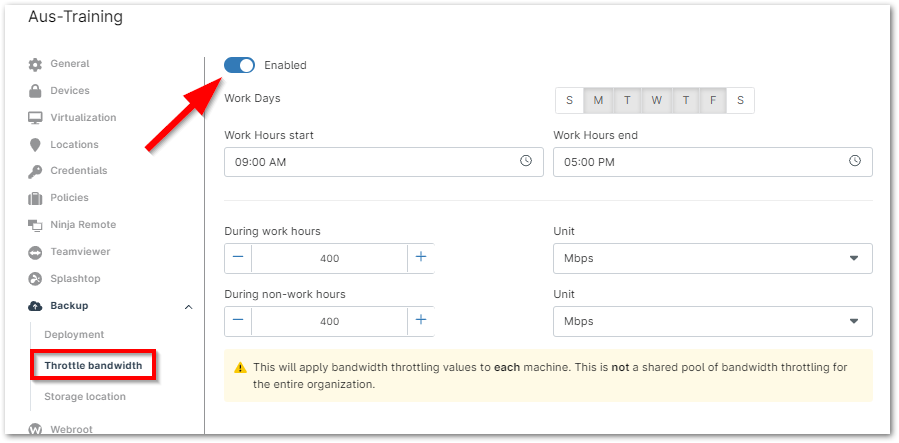
Figure 9: Configuring bandwidth throttling (click to enlarge)
- Finally, save the changes to your organization by clicking Save in the top navigation bar.
- If you navigate to a device that has NinjaOne Backup enabled, you'll see an entry in its activity feed indicating that NinjaOne Backup was installed.
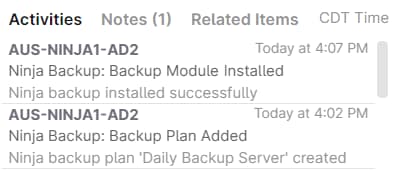
Figure 10: NinjaOne Backup installation log
Applying Bandwidth Throttling to Individual Devices
You can also configure device-level overrides for bandwidth throttling settings. To do so:
- Navigate to the detail page for the device in question.
- Select the Settings tab.
- Click Edit in the Bandwidth Throttling row.
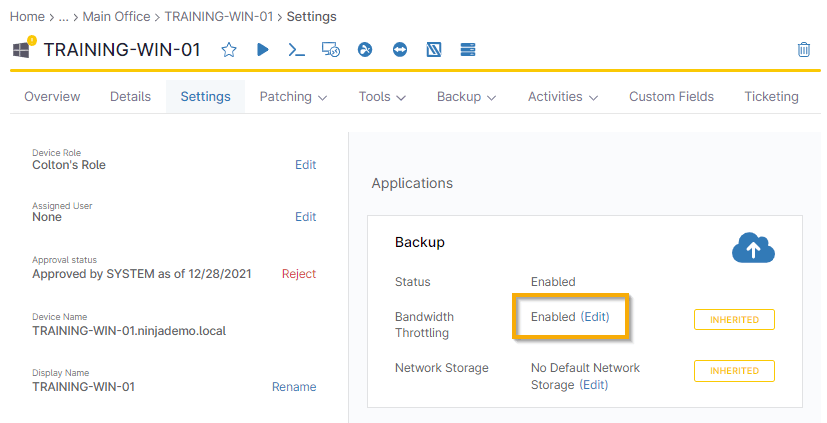
Figure 11: Applying individual bandwidth throttling (click to enlarge)
If you'd like to use network storage for local backup use, refer to NinjaOne Backup: Network Storage Setup.
After deploying NinjaOne Backup to your machines, we recommend configuring backup plans and notifications. Refer to the following articles to learn more.
- Device and System Activity Notification Feed
- NinjaOne Backup: File/Folder Backup Plans
- NinjaOne Backup: Image Backup Plans
Granting Custom User Access to NinjaOne Backup
NinjaOne system administrators have access to NinjaOne Backup by default. Only they can enable or disable NinjaOne Backup at the system level. You can also grant backup levels to custom users. To do so, perform the following steps:
- Navigate to Administration → Accounts → Technicians. Select a technician whose permissions you'd like to edit.
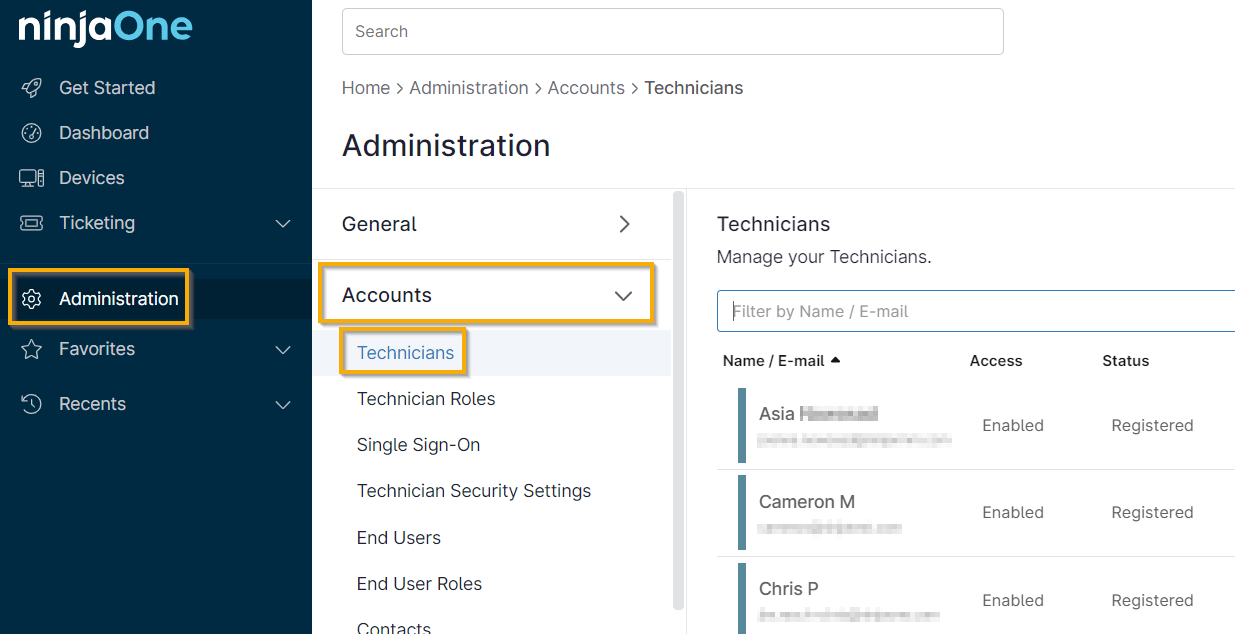
Figure 12: Administration → Accounts → Technicians (click to enlarge)
- In the user's profile, navigate to Permissions → System.
- Ensure that the Enabled toggle switch is active.
- Click the drop-down menu in the Backup permissions field.
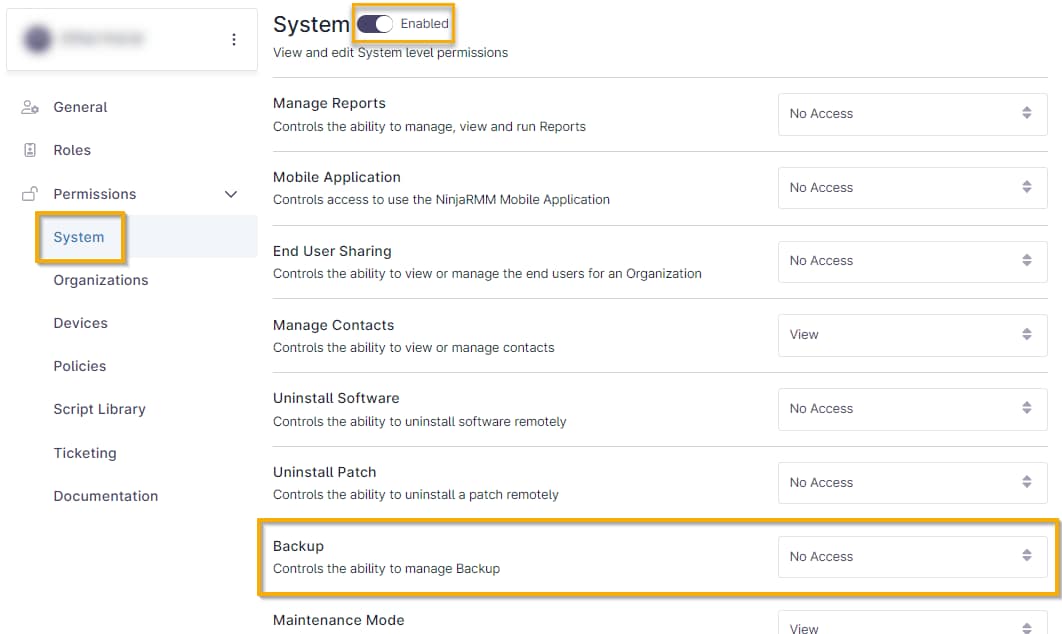
Figure 13: User system permissions (click to enlarge)
- Select the level of privilege you'd like the user to have. Refer to the following table for permission definitions.
| System-Level Permission | Description |
|---|---|
| View | Users can see the Backup dashboard for the organizations and devices to which they have been granted access. |
| View and Manage | Users can see the Backup dashboard for the organizations and devices to which they have been granted access and can delete backup data or run backup plans on demand for those devices. |
| View and Restore | Users can see the Backup dashboard for the organizations and devices to which they have been granted access and initiate a restore for those devices. |
| View, Restore, and Manage | Users can see the Backup dashboard for the organizations and devices to which they have been granted access, can run a backup on demand, and can delete backup data. |
Access to the organization's backup settings and backup plans depends on the organization and policy permissions granted to the user. Users who do not have backup access can see when an active backup or restore job runs on a device they can access.
Enabling Backup From the Devices Search Grid
From the device search grid, you can multi-select devices and enable backup via the following workflow.
- In the left navigation menu of the NinjaOne console, select the Devices tab.
- Click the check boxes to select two or more devices.
- Navigate to Configure → Backup → Enable.
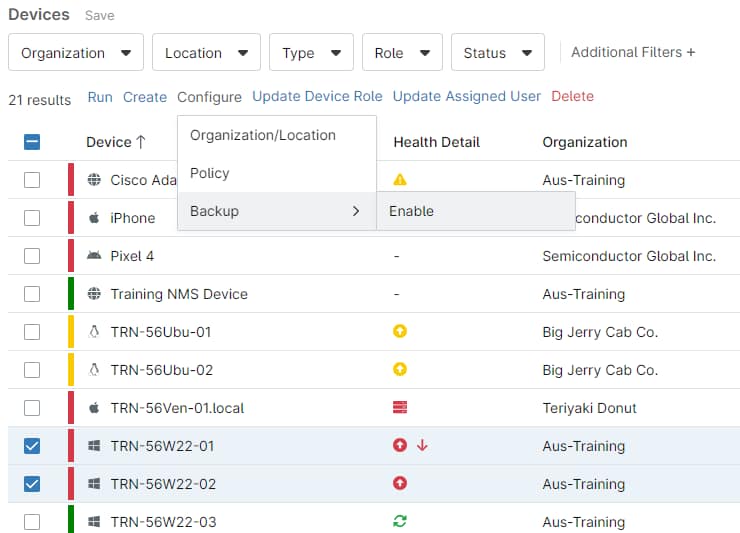
Figure 14: Configure → Backup → Enable (click to enlarge)
- A confirmation window will appear with a list of the nodes you selected. Click Enable to activate backups.
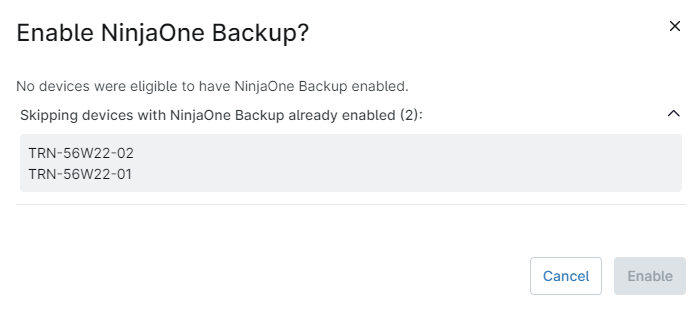
Figure 15: Enable NinjaOne Backup
If you selected any devices that can't be enabled, either because they are already enabled or because NinjaOne Backup is not active for their organizations, they won't appear in the confirmation window.
Additional Resources
For further information about managing your backups, refer to the following articles: