Topic
This guide goes over the options for configuring file/folder backup plans for NinjaOne Backup. You can configure File/folder backup plans for both Microsoft Windows and Apple macOS devices.
Environment
NinjaOne Backup
Description
- File/folder Backups Explained
- Configuring File/Folder Backup Plans
- Running a Backup on Demand
- Configuring Notifications for NinjaOne Backup Activities
- Additional Resources
File/folder Backups Explained
The following process occurs when you run a file/folder backup job on a device:
- NinjaOne Backup agent prepares a list of folders to scan based on the plan configuration.
- The list of available files is collected, and the agent attempts to determine if a record already exists for these files. If so, it tries to determine if they have changed since the last successful backup (i.e., whether a delta/incremental backup is required).
- The agent stores a list of "events" that keep a historical record of action taken on a new file. This process repeats for each possible type of event (for example, modifications, file moves).
- The first time the agent finds a file, it records a "file created" event.
- If the agent finds that a file has been deleted, it records a "file deleted" event.
- The agent reads new or changed files found during the scan. Depending on the file, VSS may be invoked to retrieve its contents (for example, locked files).
- Once the contents are retrieved (either due to a first encounter or a detected change), the agent breaks the data up into numerous chunks. The agent then encrypts and compresses each chunk and saves the hashes needed to validate the data when decompressed.
- Many files are processed concurrently. There are separate pipelines for large and small files, allowing some pipelines to process small files while others work on larger files.
When running a file and folder backup job that contains a large number of files, the files begin uploading as soon as the scanner determines they need revision. The agent will not report live job statuses while scanning is in progress.
Understanding Backup Revisions
File and folder backups only show the revisions per file once you've selected a file to restore or download. File and folder plans only create a new revision for files when NinjaOne detects a change or sees a file for the first time. There are three types of revisions for files and folders:
| Revision Type | Description |
|---|---|
| Non-BLD (Block Level Difference) | Created for file revisions when the file is less than 10MB. The entire file is backed up with each revision, versus just the changes. |
| Full | Full backup of a file that is over 10MB. |
| Delta | This is a differential backup from the last full or preceding delta revision. It will be taken automatically until the sum of the delta revisions' sizes exceeds 75% of the original size of the last full backup. |
Configuring File/Folder Backup Plans
You can configure backup plans in two different ways: at the policy level or at the device level (as a policy override).
Policy Level Backup Plans
To create a backup plan at the policy level, follow these instructions.
- Navigate to the editor for the Windows or Mac policy (Administration → Policies) for which you'd like to configure a backup plan, then select Backups → File/Folder from the navigation menu.
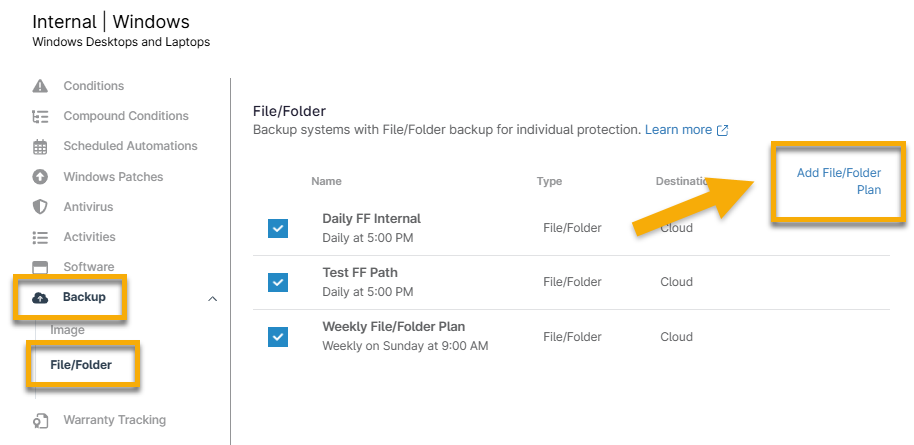
- Click Add Plan in the top right corner of the page, and then select Add File/Folder Plan.
The plan configuration settings will display.
In the Settings tab, assign a name, schedule, and time to your new backup plan. Refer to the table below for an explanation of the time options.
Schedule Description Daily The plan runs at a set time every day. Select the time and zone—the "System" selection refers to the time zone you configured in Administration > General > Settings.

Weekly The plan runs at a set time on specified days each week. Select which days of the week you want the plan to run, in addition to the time and time zone.
In the example below, the plan runs every Tuesday and Thursday.

Monthly, Day of Week The plan operates on a specific day of the week every month. Select which day of the week and which week of the month you want the plan to run, and the time and time zone.
In the example below, the plan runs every month on the third Wednesday of each month.

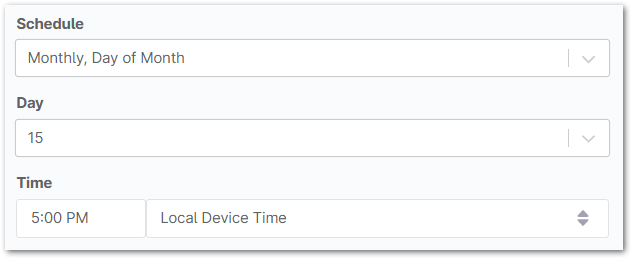
Monthly, Day of Month The plan runs every month on a specified day. In addition to the time and time zone, select the day of the month on which you want the plan to run.
In the example below, the plan runs on the 15th of every month.
Every The plan runs every specified hour or minute. Select the number of hours or minutes between each plan run.

- Select the applicable option for your device's power settings.

| Power Options | Notes |
|---|---|
| Prevent device from sleeping | This option does not apply to devices running on battery power. This option is not currently compatible with laptops. These features can only be used with Desktops and Servers. |
| Attempt to wake device if sleeping | This setting only applies to devices sleeping during a scheduled backup. This option is not currently compatible with laptops. These features can only be used with Desktops and Servers. |
| Run plan immediately if missed | This setting only applies to devices that are offline at the regularly scheduled time. If this option is selected for multiple backup plans on a device, and the device misses multiple plans, all missed plans will run when the device comes back online. |
Next, select your revision options. You can limit the number of revisions NinjaOne stores, trim revisions that are older than a designated number of days, or trim revisions for files that have been deleted locally after a specified number of days. You can also opt to keep the latest revision of a locally deleted file.
Important Notes:
- For device-level backups, the Backup Destination must be Cloud Only.
- By "trimming" revisions, we delete all revisions up to the latest that meet the criteria for being removed.
- If the options to limit/trim/remove revisions are all disabled, backup data is never trimmed or deleted.
- Between Limit revisions and Trim revisions settings, the one that triggers first will always take precedence. For example, if you limit revisions to 10 and trim revisions older than 7 days, the system will trim at the 11th revision even if it's less than 7 days old. Conversely, if you were to have only two revisions, after 7 days, they would be trimmed, even though you have not yet reached the Limit Revisions threshold. You can choose just to set one of these options if you prefer.
- If you would like to schedule a script to run before or after the backup job (for example, you could stop specific applications from running during backup or install all available patches after the backup finishes), use the Add Automation hyperlink listed in Pre/Post Automation Execution to select an option from the library. In addition to scripts, you can choose to install or run applications. You can select only one automation to run at each point in the backup plan for a possible total of two automations.

- Next, select the Folders tab at the top of the window. This tab is where you'll select the specific folders that you'd like to include in the backup.
- Click Manage in the top right corner of the page. From here, you can choose between Common, Exclude Common, Include Folder, or Exclude Folder. Refer to the table below for an explanation of each option.

| Manage Option | Description |
|---|---|
| Include Common | This option lets you pick common folders to back up on all devices under this policy. To choose specific folders on a device, edit the backup plan in the device overrides. |
| Exclude Common | This option lets you exclude specific folders from being backed up even if they are part of a selection to include. To exclude specific folders on a device, edit the backup plan in the device overrides. |
| Include Folder | This option allows you to select one or more folders to include in backups. This field supports the use of wildcards, for example, C:Users*appdatalocalbox. |
| Exclude Folder | This option allows you to designate one or more folders to exclude in backups. This field supports the use of wildcards, for example, C:Users*appdatalocalbox. |
- Next, open the Filters tab.
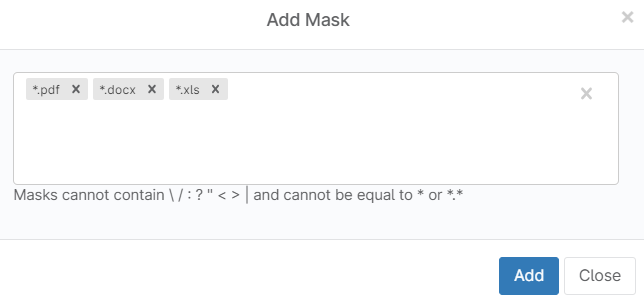
- Select whether to exclude or include files from the drop-down list. Then, click Add to define masks (i.e., the unique identifier for a file or group of files, using an extension designation).

- Type in the mask and press Enter on your keyboard. You can add as many masks as you need in this field. Then, click Add.
- You can add both included and excluded files for the backup. After you make your selection to include/exclude, select a different option from the drop-down and then click Add again.
- Finally, open the Advanced tab at the top of the configuration dialog box.
- Use the toggle switches to override NinjaOne's default exclusions, which differ slightly depending on whether you are modifying a Windows or Mac plan.
- Save the plan when you have configured it to your liking.
- Then, be sure to click Save in the top right corner of the policy editor to save the changes to your policy.
Device Level Backup Plans
To create a backup plan at the device level, follow these instructions.
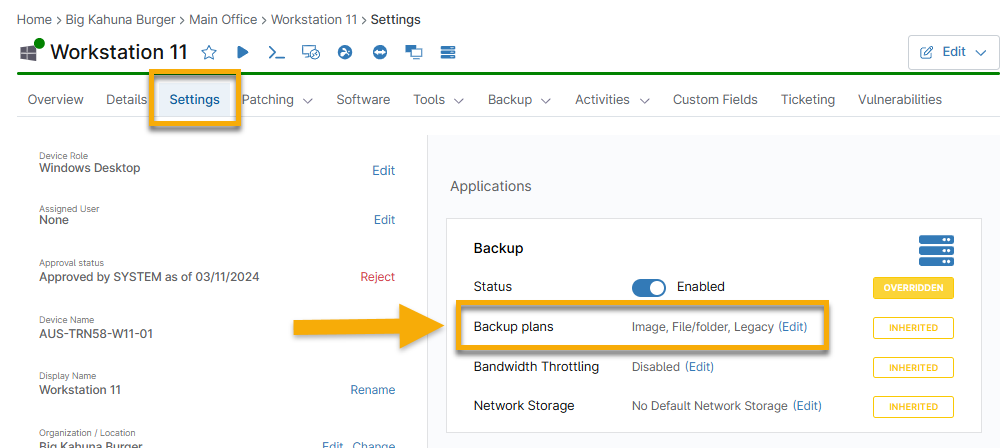
- Navigate to the dashboard for a device that requires a backup plan configuration and open the Settings tab.
- The Backup app widget is on the right side of the page. Click Edit to the right of the backup plans section.
The device-level policy editor page displays.
- Follow the instructions from the section above, starting at Step 3.
Running a Backup on Demand
Backups run automatically according to the schedule you set when configuring a backup plan. However, if you'd like to run a backup ad hoc on a device, there are two different ways to do so:
From the device dashboard
- Navigate to the device on which you'd like to run a backup job. Then, move your cursor over the Backup button and select Run Backup Plan.

You are prompted to select which plan you'd like to run on the device. Only plans that are configured for this particular device (at the overall policy level or as a device-level override) are available to select.
Select a plan and then click Run.
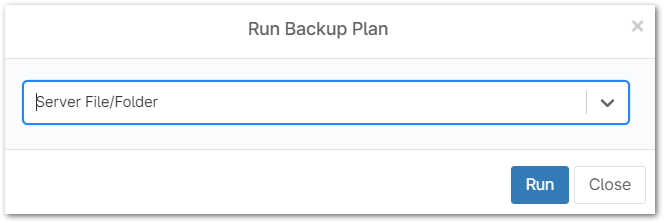
Figure 9: Run Backup Plan (click to enlarge)

From the Devices search page
- Select the device for which you would like to run a backup job, move your cursor over the Backup option, and click Run Backup Plan.

You are prompted to select which plan you'd like to run on the device(s). Only plans that you've configured for the particular device(s) are available to select.
- Select a plan and then click Run.
Canceling a Backup Job
When a backup job starts, an activity notification appears on the device dashboard, and a "Queued" section is displayed in the General Information area of the page. You can cancel a backup job from the Queued section.
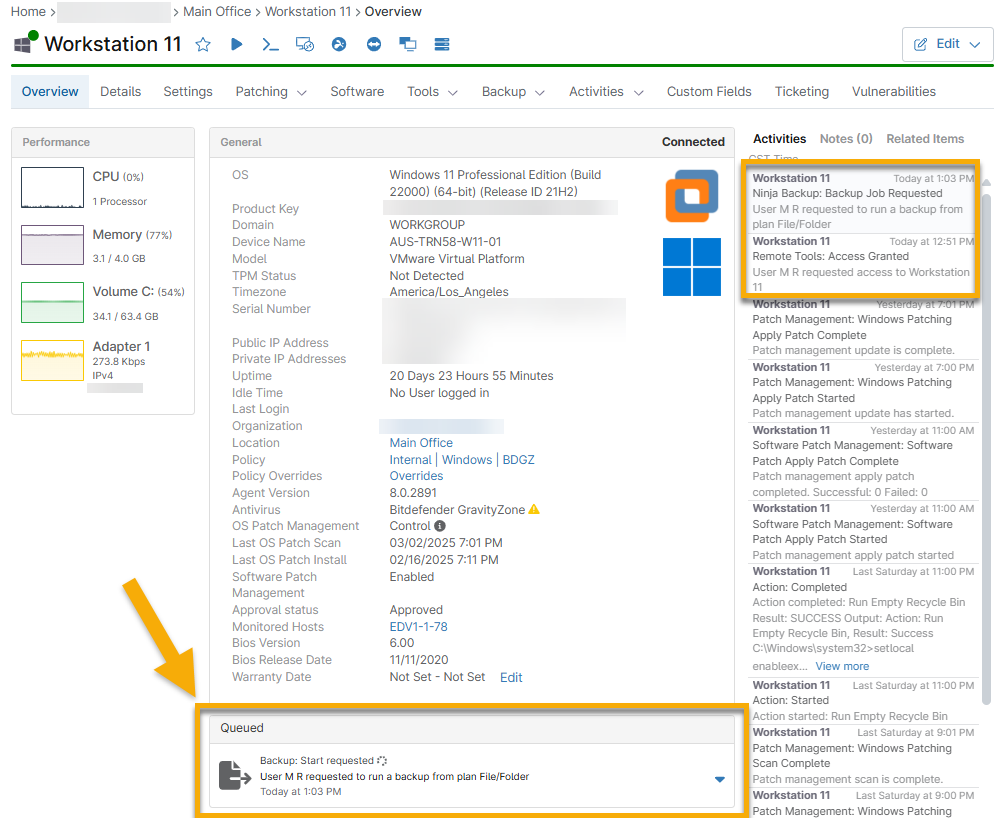
- The downward-facing arrow on the right side of the job allows you to either Cancel the job or view Details about its progress.
- Details show you information about the overall completion percentage and the completion rate for the current file being uploaded.

Configuring Notifications for NinjaOne Backup Activities
To configure notifications for backup activity, follow these steps.
- Navigate to the editor for the policy (Administration → Policies) needing NinjaOne Backup activity notifications; select the Activities tab and expand the Backup section.
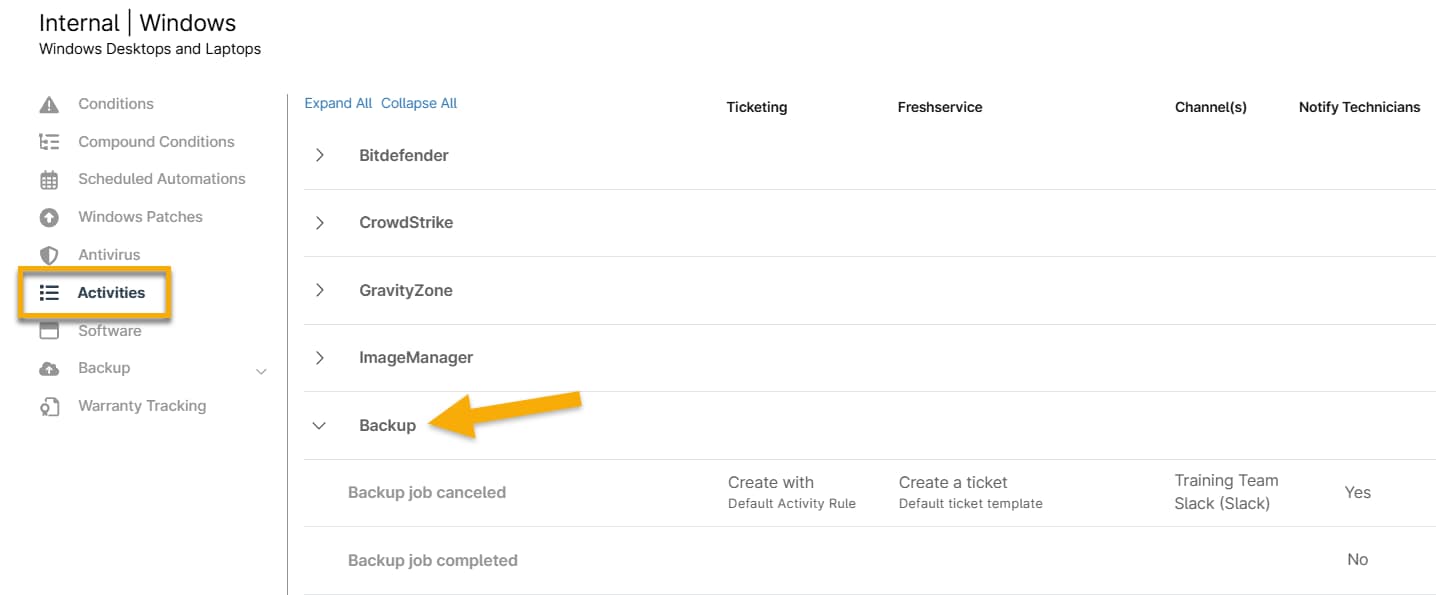
- Click any activity to change the notification settings. The activity editor displays in a pop-up window.
- In the Notifications drop-down menu, select Send notifications and then select a channel to deliver the notification to.
- Optionally, select a severity and priority for the notification. These settings adhere to the technician's notification schedule, which you can configure through their NinjaOne account.
- Click Save. A message displays in the UI indicating that you've enabled notifications for this activity.
- Repeat these steps for any other activities for which you would like to enable notifications, and then save the changes to your policy.