Topic
This article explains how to bypass NinjaOne Multifactor Authentication (MFA) when adding an identity provider (IDP) in NinjaOne.
Environment
NinjaOne Identity Access Management (IAM)
Description
Skip Login MFA will conditionally skip NinjaOne Login MFA based on evidence in the SAML (Security Assertion Markup Language) response that MFA was performed during the user's login through an IDP. This ensures that the user is not required to enter MFA twice to access the NinjaOne console.
Select a category to learn more:
Important Notes
- NinjaOne only supports Microsoft Entra ID (Azure) and Okta for MFA bypass.
- If you are using a branded site, you have to add both the native and branded URLs to your IDP's affiliated URL (Uniform Resource Locator) list.
- For example:
https://<branding_hostname>/ws/account/saml-login.
- For example:
- NinjaOne has not conducted full testing with other providers, and they are not currently supported by NinjaOne.
- If you are using a branded site, you have to add both the native and branded URLs to your IDP's affiliated URL (Uniform Resource Locator) list.
- There are two different workflows related to SAML. Currently, only the SP-initiated workflow is enabled for NinjaOne SAML.
- Service Provider (SP) initiated workflow: You navigate to NinjaOne to log in, and you are forwarded to the identity provider.
- Identity Provider (IDP) initiated workflow: You navigate to your identity provider to log in, and you are forwarded to NinjaOne to log in.
Configure Skip Login MFA
The following example is configured via Okta.
- In the NinjaOne console, navigate to Administration → Accounts → Identity Providers.
- Click Add provider on the right side of the page.

Figure 1: Add a new identity provider in NinjaOne
- Add your IDP metadata. Refer to Login Security: Configure Single Sign-On in NinjaOne for instructions.
- Click Test Connection.
- Your IDP connection platform should open in a new tab. Enter your credentials and sign in.
- If prompted to receive a push notification, click to send. The SSO configuration modal opens in the NinjaOne console indicating the connection has been validated.
- Follow all prompts from the IDP to validate assertion.
- If you successfully import the metadata from your IDP, you will be able to activate the Enable conditional NinjaOne MFA bypass toggle button.
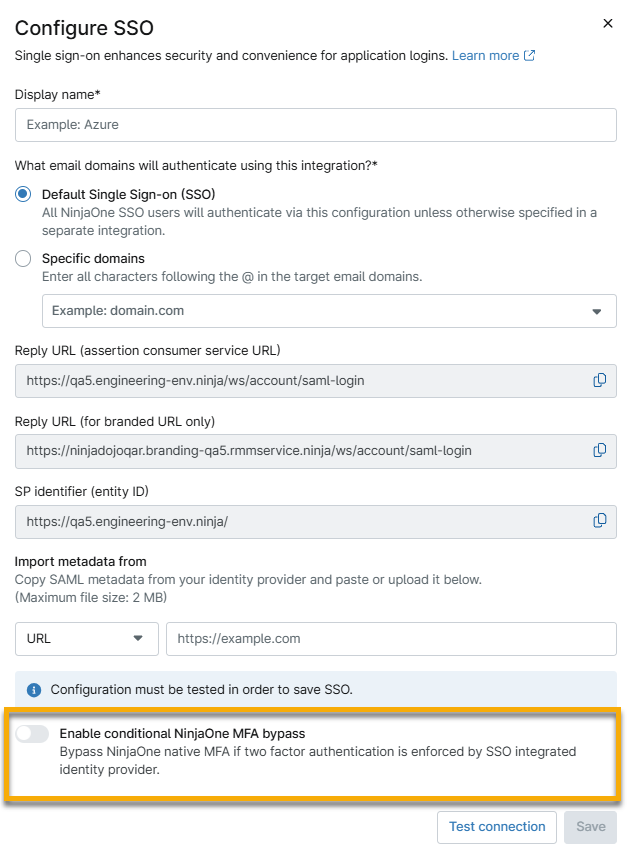
Figure 2: Enable conditional MFA bypass for your identity provider in NinjaOne
- Click Save.
Upon successful configuration, the indication appears in the lower-right section of the NinjaOne console.
Once it is enabled, the customer can see this under the Administration → Accounts → Identity Provider section of their Ninja UI:
The following user accounts can access this feature:
- System administrators
- Technicians
- End users
Additional Resources
To learn more about NinjaOne's identity services, refer to Identity Authentication and Management: Resource Catalog.