
Maintenance mode is a crucial tool for system administrators, allowing them to temporarily suppress notifications or restrict certain functionalities to perform updates, repairs, or other maintenance tasks without causing disruptions or data loss.
NinjaOne’s maintenance mode empowers you to precisely control maintenance windows, ensuring seamless operations during critical periods. By suspending features like patching, automations, tasks and antivirus scans on specific devices or groups, it minimizes disruptions. It also suppresses alerts and notifications, ideal for preventing false positives during device maintenance.
Activating Maintenance Mode for Devices in NinjaOne
- Navigate to the Devices tab in the left-hand navigation pane.
- Apply the desired filters to your devices (e.g., by organization). Then, select the checkbox(es) next to the device(s) you want to enable maintenance mode for.
- Hover over the Run menu at the top of the list and select Maintenance > Configure.

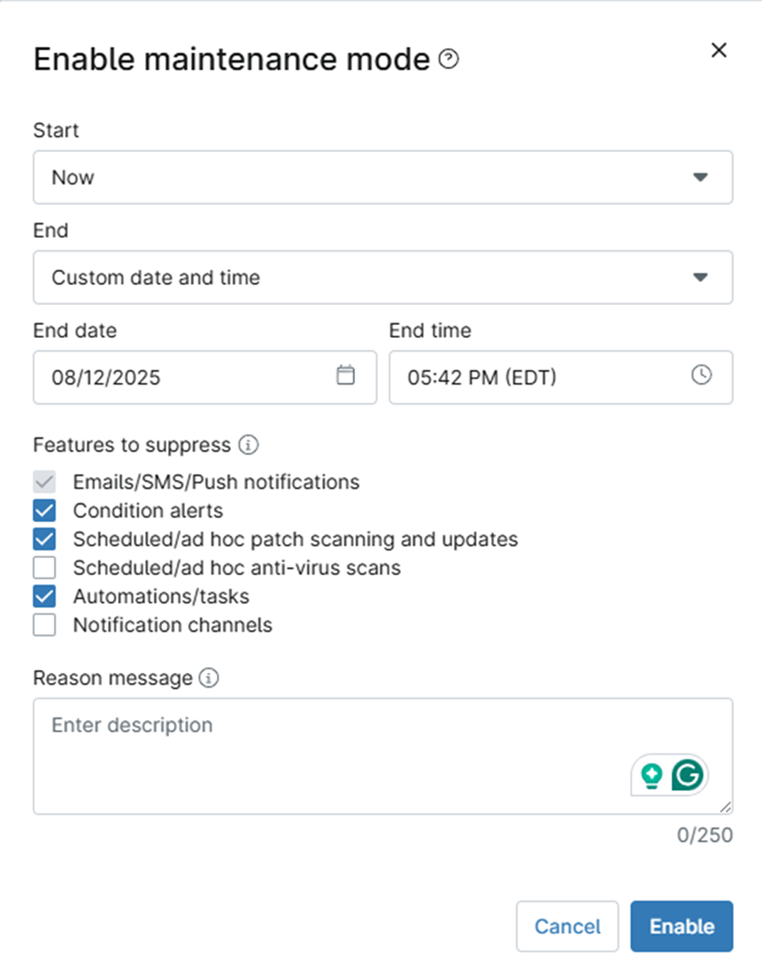
- In the Enable Maintenance Mode dialog box, configure the following settings:
- Start: Set when maintenance mode should begin. Select Now to start immediately or specify a custom date and time.
- End: Define when maintenance mode should stop. Select Never to keep it active until manually disabled.
- Features to Suppress: Choose which alerts or notifications to mute during the maintenance window.
- Reason Message: Optionally, add a note explaining the alert suppression. This message will appear in the device’s Activities log.
- Once all options are set, click Enable.
OS-Specific Activity Suppression
- Notifications: Disables all email, SMS, and push notifications. (Always selected and cannot be deselected).
- Condition-based Alerting: Disables evaluation of conditions to prevent alert triggers.
- Automations/tasks: Prevents the execution of scheduled and on-demand tasks and scripts.
- Patching: Pauses all scheduled and on-demand OS and software patch scans and updates. (Works on all OSes).
- AV Scans: Suspends all scheduled and on-demand antivirus scans. (Works on all OSes).
Scheduling Maintenance Mode with an Automation
You can now schedule maintenance mode in advance using automations, enabling flexible and recurring maintenance windows.
How to Create a Scheduled Automation:
- Navigate to Administration > Policies and create or edit a policy.
- Go to the Scheduled Automations section.
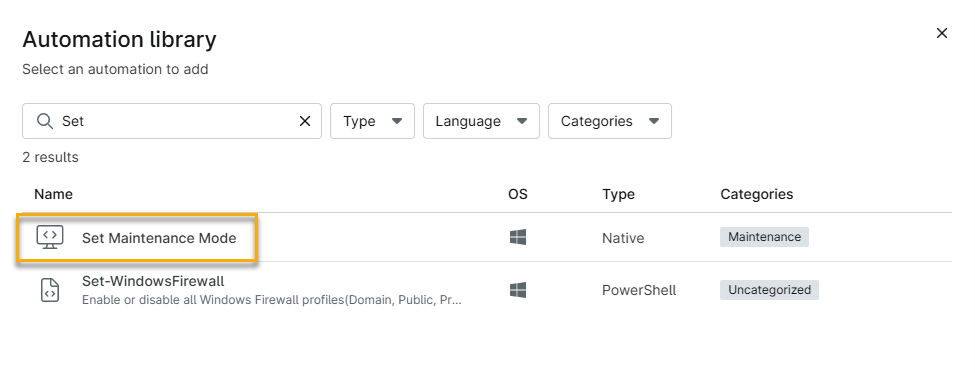
- Click Add Automation and select Set Maintenance Mode from the library.
- Configure the automation options:
- Duration: Set how long maintenance mode lasts (e.g., 2 hours) or set it to Never Expires.
- Features to Suppress: Choose which functions to pause (Notifications, Patching, AV Scans, etc.).

This is ideal for automating overnight patching cycles or weekly reboot windows.
Enabling the Maintenance Mode Patching Policy
A new policy setting allows devices to automatically enter maintenance mode during patch install operations, suppressing alerts during reboots and updates.
How to Enable the Policy:
- Navigate to Administration > Policies > Agent Policies and select a policy.
- In the left navigation bar, click on Patching (may also be Windows Patches or macOS Patching).
- Scroll to the Update Schedule section.
- Check the new checkbox for Maintenance Mode.
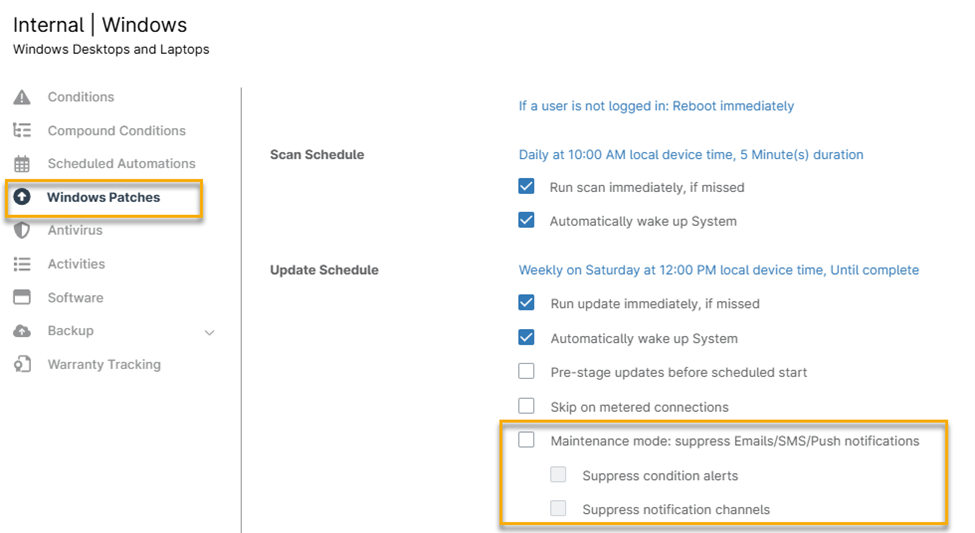
Now, any device using this policy will automatically enable maintenance mode whenever it installs patches.
Updating or Disabling Maintenance Mode from Devices
Devices configured with maintenance mode display a wrench icon to indicate the active maintenance window. Maintenance mode can be managed and cleared from devices in three different locations.
Device Page
- Navigate to the device for which you want to update or clear the maintenance mode.
- Locate the Maintenance Mode entry under the Health issues section and click the downward-facing arrow on the right side.

- To update the maintenance window, click Configure. In the subsequent pop-up window, adjust the maintenance window settings as needed. A confirmation prompt will appear to confirm the override of the existing maintenance settings. Click Yes to proceed.
- To clear the maintenance window, click Disable. You will be prompted to confirm the action to disable maintenance mode for the selected device.
Devices Tab
- Navigate to the Devices tab in the left navigation pane and select the checkbox(es) for the device(s) you wish to update or clear maintenance mode from.
- To update the maintenance window, click on the Run button at the top of the list, then choose Maintenance mode > Configure.

- In the pop-up window that appears, modify the maintenance window settings as needed. A confirmation prompt will appear to confirm the override of the existing maintenance window. Click Yes to proceed.
- To clear the maintenance window, hover over the Run menu at the top of the list, then select Maintenance > Disable. You will be prompted to confirm that you want to disable maintenance mode for the selected devices.
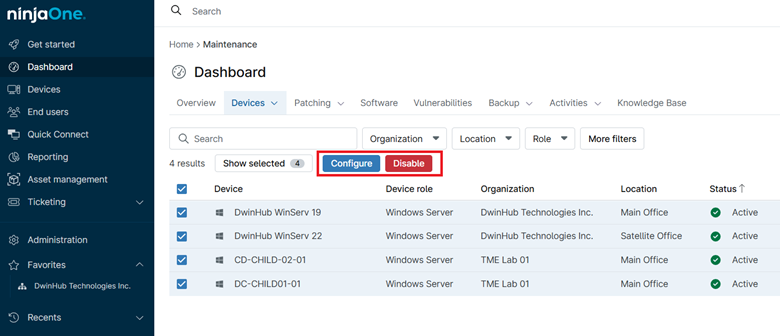
Maintenance Dashboard
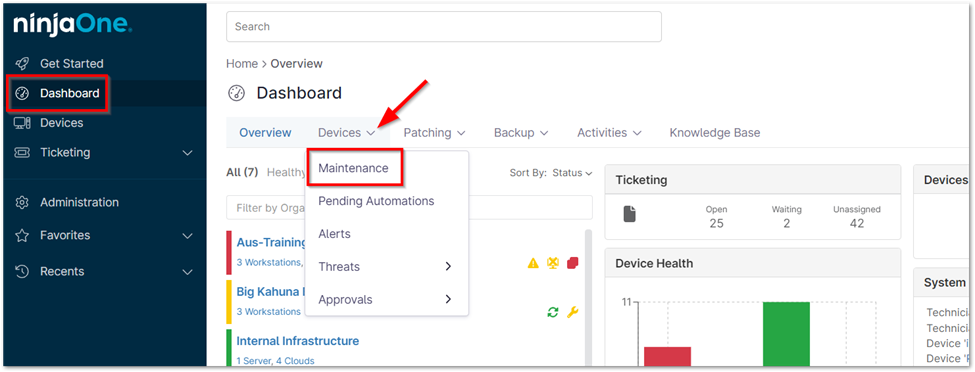
The maintenance dashboard provides an overview of all devices with current or upcoming maintenance windows. This dashboard is accessible at both the system and organization levels.
- From either the system dashboard (by clicking Dashboard in the left navigation pane) or the organization dashboard (by selecting an organization from the system dashboard), navigate to the Devices tab and select Maintenance.
- A list of devices within your NinjaOne environment that are currently in a maintenance window will be displayed.
- Select the device(s) you wish to manage, and the options Configure or Disable will appear at the top of the list.
- Configure: Use this option to override the existing maintenance window for the selected device(s).
- Disable: Use this option to clear the maintenance window for the selected device(s).
Benefits of NinjaOne Maintenance Mode
- Centralized Management: Effortlessly manage maintenance mode for multiple devices or groups from a single platform, saving time and resources.
- Enhanced Control: Selectively suppress specific features like patching and alerts, providing granular control and flexibility during maintenance activities.
Strategies and Best Practices for Effective Maintenance Mode in NinjaOne
- Plan Ahead: Schedule maintenance during off-peak hours to minimize disruptions.
- Communicate Clearly: Inform stakeholders about upcoming maintenance and its potential impact.
- Monitor and Test: Actively monitor and test systems during maintenance.
- Review and Improve: Gather feedback and refine maintenance strategies for better efficiency.
- Minimize Disruptions: Strategically schedule maintenance during off-peak hours to avoid impacting end-users and ensure business continuity.
Practical Use Cases for NinjaOne Maintenance Mode
- Scheduled Patching and Updates: Suppress alerts and prevent disruptions during critical patch deployments.
- Hardware or Software Upgrades: Ensure smooth transitions during major upgrades requiring system downtime.
- Troubleshooting and Repairs: Temporarily disable automated tasks to facilitate remote troubleshooting and repairs.