Topic
This article discusses how to customize the NinjaOne Portal with your company's branding.
Environment
NinjaOne Platform
Description
NinjaOne allows you to customize the visual presentation of your NinjaOne Portal with your organization's preferred color theme, customized Help menu, and elements of your brand identity.
Index
Select a topic to continue.
- Enabling Branding
- Adding Your Custom Elements
- Accessing Your Branded Portal
- Viewing Your Customizations
- Additional Resources
Enabling Branding
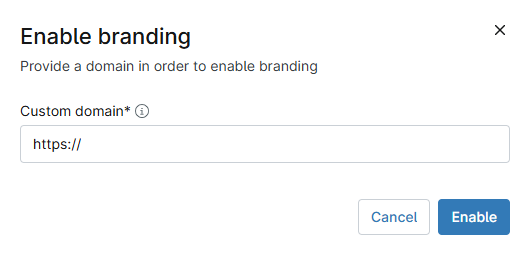
- In NinjaOne, click Administration, then click Branding in the General section, then click the Enable button in the upper-right corner of the section.

- When the Enable Branding prompt appears, enter your website domain, then click Enable.
Adding Your Custom Elements
There are three portal elements you can configure to make your custom portal:
- Portal settings: In this section, you can configure your portal to match your company's brand.
- Help menu: Here, you can enable help options and decide how they are displayed.
- Appearance: This page lets you add your company's logo and choose the portal's color palette.

Configuring Portal Settings
Portal settings define your custom portal and tell viewers how to contact you. Here, you can configure the following options:
- Branded site: Enter the hostname, including letters, numbers, and dashes, but no special characters or periods. The suffix domain will depend on the user's region.
- Browser tab: Enabling this feature allows you to modify the name appearing on tabs in your user's web browser.
- Footer information: This section lets you enter and display your contact information in the website's footer. You can include your phone number, the email address you use to reach your support team, and the URL of your help website.

Configuring Help Menu Settings
Help menu settings give your customers access to your organization's support resources.

You can customize the following settings:
- Menu: Activate this option to show the help menu icon in the navigation bar. Users can click the icon to open a menu containing additional help options.
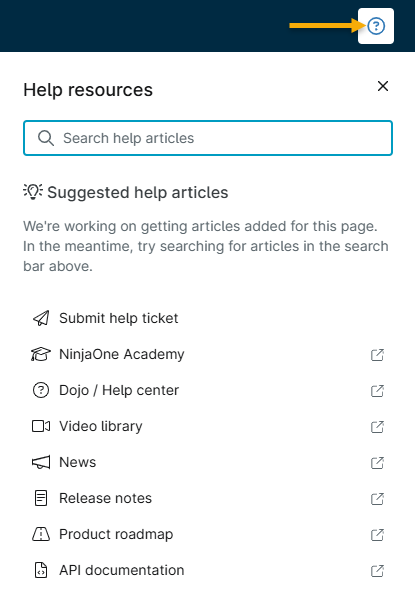
- Help articles: Enable this setting to add the search bar for your support articles and related article suggestions to the Help menu, as shown in Figure 6, above.
- Links: Your Help menu's content area contains topic links, which you can use to send users to commonly used help content, open a ticket with your support team, view product release notes, and more.
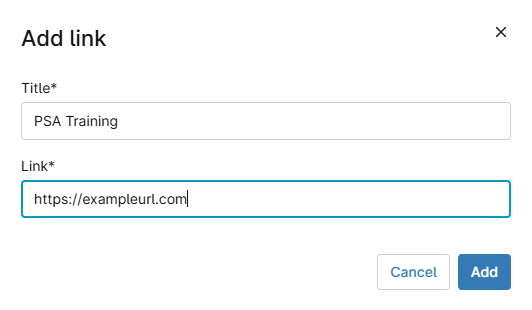
- To add a topic link, click Add link, enter the title text and URL, then click Add.
- By default, the system includes links to the following sections in NinjaOne's help center: Submit Help Ticket, Dojo/Community, Announcements, and Release Notes. You can remove the links to the latter three items if you wish.
- If you do not add links, the Help icon will be visible, but not clickable.
- Added links will not appear if you do not enable the Help toggle switch.
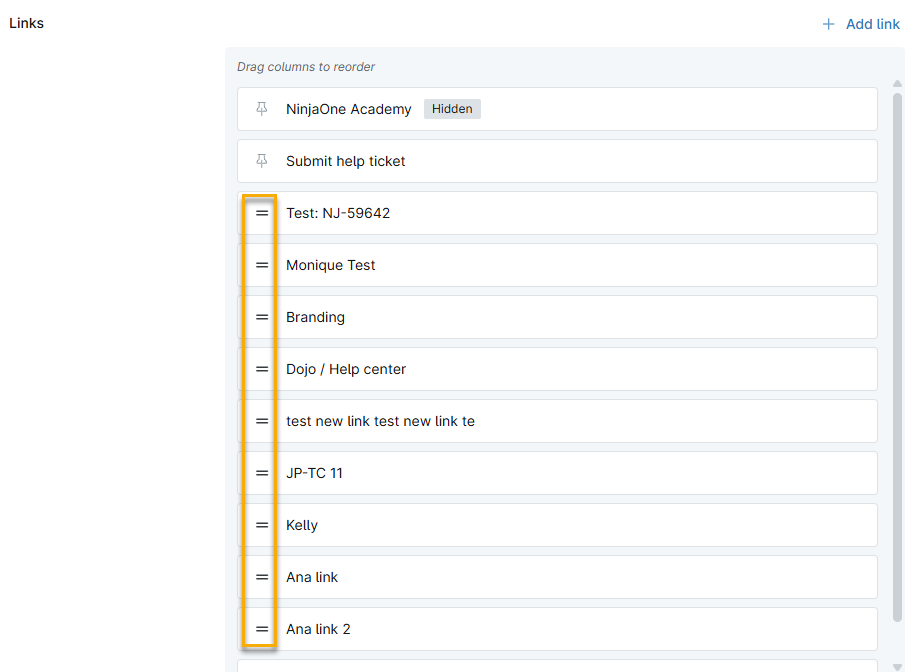
Reordering and Removing Links
You can reorder links in the Edit window by clicking the link icons and dragging them to the order in which you wish them to appear.
Configuring Appearance Settings
Appearance settings let you add your custom logo to the portal, pick the browser icon, and choose the color theme. Click Edit to configure the following appearance options:
- Login logo: This image appears on your branded portal's login page.
- Application logo: This image appears in the application window, above the navigation menu.
- Browser icon: This image appears in the browser tab when it is open to your branded portal. If a user collapses the tab, the browser icon will appear in the navigation pane.
- Current theme: Choose a color palette for your portal.

Accessing Your Branded Portal
Navigate to your branded hostname (<your hostname choice>.rmmservice.com). Your login logo should appear in the login window.

Viewing Your Customizations
After logging in, your branded portal will appear in your selected color theme.
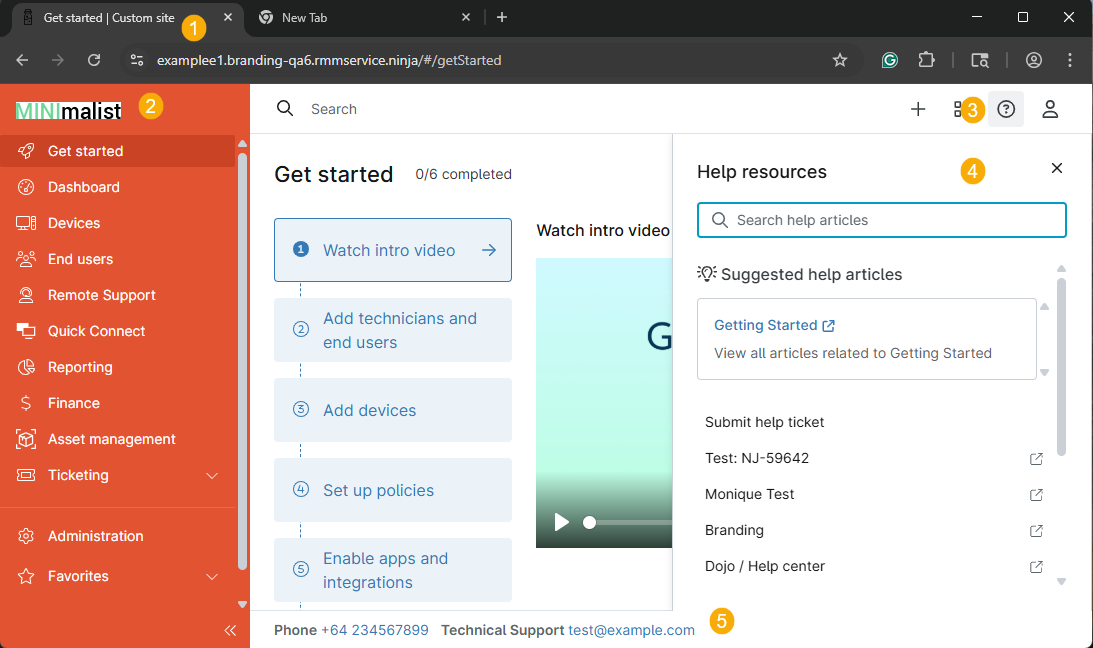
If you configured all options, the screen will display the following elements:
- The browser tab icon and icon
- The Application logo
- The Help icon
- The Help menu (after clicking the Help icon)
- Contact information in the footer.
Additional Resources
For frequently asked questions about Branding, refer to Branding: FAQ.