
To create a custom field, follow the next steps:
1. Go to Administration, then Devices, then Global Custom Fields.
2. Click Add, then choose Field. A dialog box will appear.
3. Choose the Field type (see previous section in the document).
4. Fill out the Label and Name. Label is what you will see when this custom field is viewed at the device level. The Name will be used internally by NinjaOne in the back end, and it´s auto populated, although you can change it.
Next, select the Definition Scope. This specifies where the custom field will be visible. You can choose Device, Location, Organization, or any combination of these options to control its visibility. You can also check the Custom field is required box to make the field mandatory, ensuring it must be completed whenever applicable.
5. Assign the proper permissions for Technician, Automations and API.
- Permissions for Technicians can be None, Read Only or editable.
- Permissions for Automations can be None, Read Only, Write Only or Read/Write.
- Permissions for API can be None, Read Only, Write Only or Read/Write.
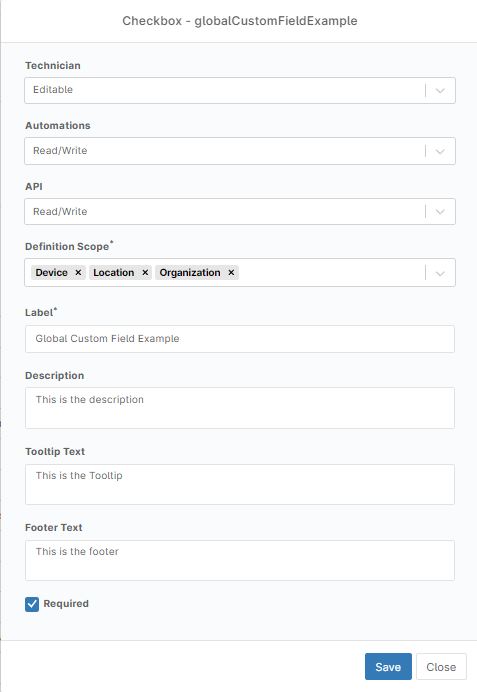
6. Provide the description, ToolTip Text, and footer text to add additional context and guidance for the custom field.
- The description is a text explaining the use of this custom field, it will not appear anywhere but in this place.
- The Tooltip and the footer are hints for the user when filling out the fields. See below screenshot showing where these hints appear. For this example, the custom field is a checkbox.
![]()
To create a custom field, follow the next steps:
1. Go to Administration, then Devices, then Role Custom Fields.
2. Click Add, then choose Field. A dialog box will appear.
3. Choose the Field type (see previous section in the document).
4. Fill out the Label and Name. Label is what you will see when this custom field is viewed at the device level. The Name will be used internally by NinjaOne in the back end and it´s also used in the scripts to call the custom field. This field is auto populated, although you can change it.
You can also check the Custom field is required box to make the field mandatory, ensuring it must be completed whenever applicable.
5. Assign the proper permissions for Technician, Automations and API.
- Permissions for Technicians can be None, Read Only or editable.
- Permissions for Automations can be None, Read Only, Write Only or Read/Write.
- Permissions for API can be None, Read Only, Write Only or Read/Write.
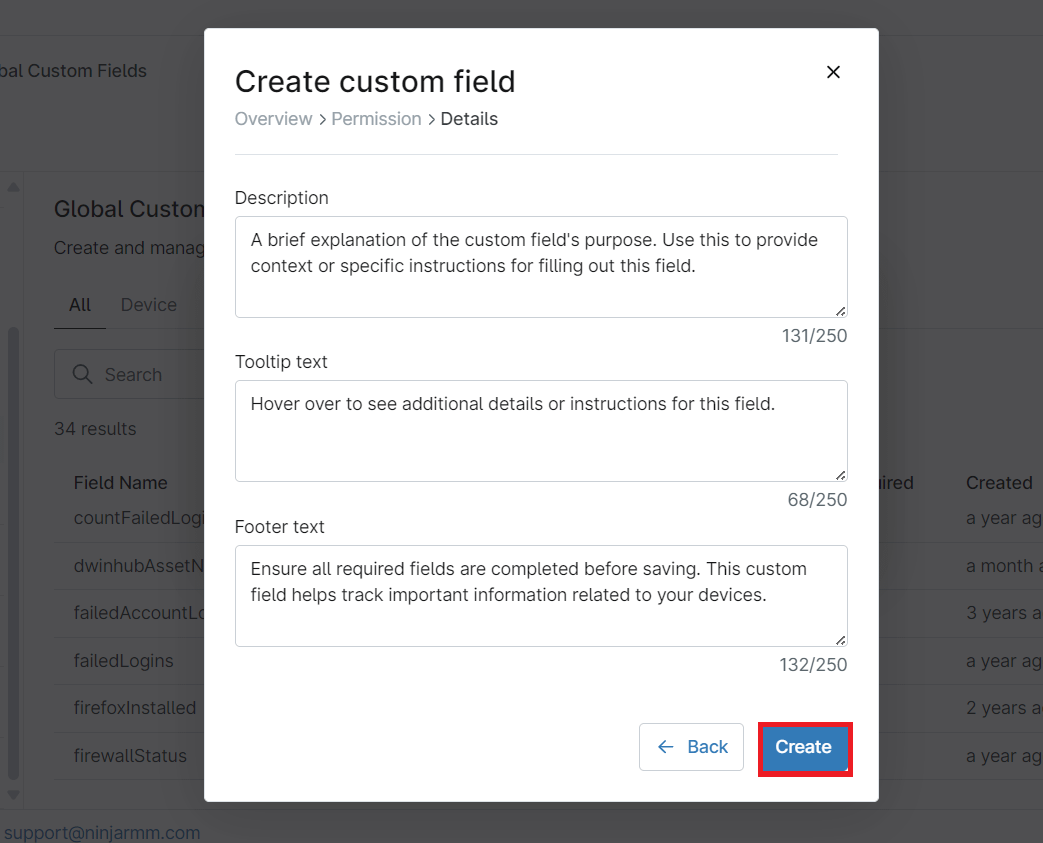
6. Fill out the description, ToolTip Text, footer text. You can also choose whether this Custom Field is required.
- The description is a text explaining the use of this custom field, it will not appear anywhere but in this place, the edit page for custom fields.
- The Tooltip and the footer are hints for the user when filling out the fields. See below screenshot showing where these texts appear. For this example, the custom field is a Multi line.

7. After configuring the settings, click the Create button to save and complete the creation of your custom field.
8. To assign this newly created custom field to a device role, go to Administration, then Devices, then Roles.
9. Hover the mouse over the device role of your choice, the Edit button will appear at the right, click on it. A dialog box will appear.
10. Click Add. Select Field.
11. From the drop-down menu, select the custom field you want to add. You can add more than one.
12. Click Add and then click Save.