

🔑 Key Points
- View all network shares in Windows 10/11 using File Explorer, Command Prompt (net share / net view), PowerShell (Get-SmbShare), or Computer Management.
- Fastest method: Open File Explorer, type \\ComputerName or \\IPAddress in the address bar, and press Enter.
- Troubleshoot shared folder access by enabling Network Discovery and File & Printer Sharing, checking permissions, and verifying firewall settings.
- Public vs. Private profiles: Use Private for home/trusted networks and Public for untrusted networks to control device visibility.
- Security tip: Limit share permissions, disable SMBv1, and re-enable firewalls after testing to reduce security risks.
File-sharing over a secure network happens a lot more commonly in controlled environments. But if you’re setting it up for the first time on your personal device or managed network, here’s our comprehensive guide on how to view all files on shared network computers. Let’s dive in.
For a visual version of this guide, watch How to View All Network Shares on a Windows PC.
Methods to view all Network Shares
There are four common methods to view all network shares; you can use:
✔️ File Explorer (Recommended)
✔️ Command Prompt (general guide on using the Command Prompt)
✔️ PowerShell
✔️ Computer Management
The quickest way to view all network shares for general purposes is via File Explorer.
Option 1: View Network Shares Using File Explorer (Recommended)
- Open File Explorer or press Win + E.
- In the address bar, type \\YourComputerName or \\YourIPAddress.
- Press Enter to view a list of folders shared on the network.
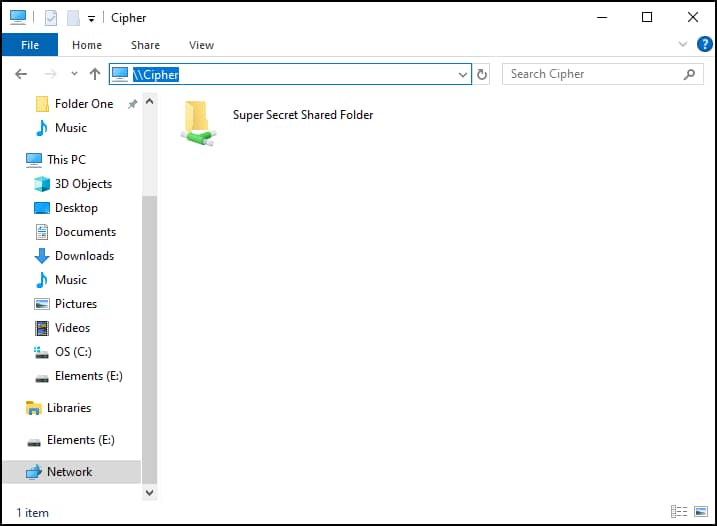
🥷 Tip: If Network is pinned to Quick Access, just click the icon and tap your computer name to view network shares. Should you receive a prompt, enter network credentials to access shared resources.
Option 2: List Network Shares with Command Prompt (For quick listings)
- Type cmd in the Run dialog box. Administrative privileges may be required if you are viewing protected or administrative shares.
- Run the net share command to display all local shares, or net view \\ComputerName to list remote computer shares.
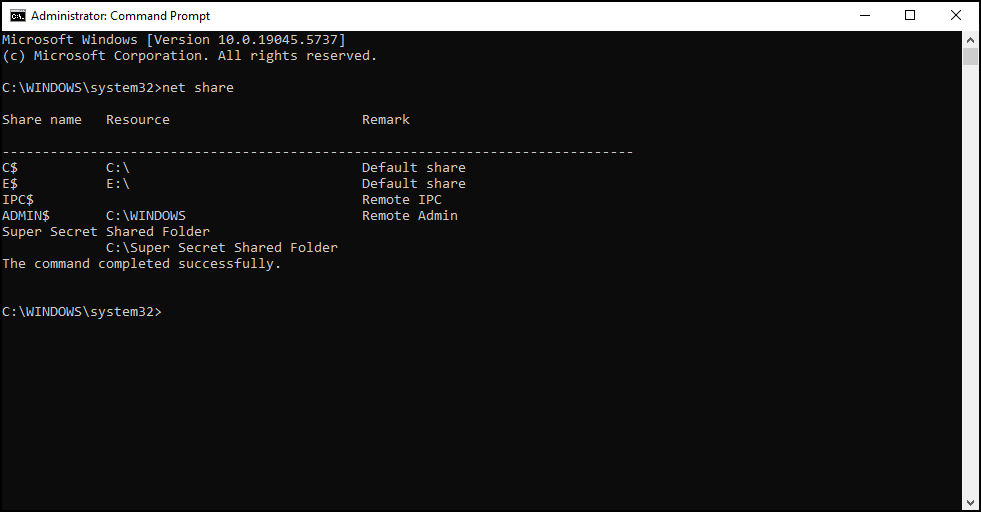
The Command Prompt method is the fastest if you’re just looking for an overview or list of shared items.
Option 3: List Network Shares with PowerShell (For detailed information)
- From Start, search and open PowerShell.
- Type Get-SmbShare and press Enter.
💡Note: On older systems, use Get-CimInstance -ClassName Win32_Share. Get-WmiObject is legacy and no longer recommended for modern Windows versions.
Option 4: View Network Shares with Computer Management (For GUI-based management)
- Search Computer Management from the Start menu or open Run and type compmgmt.msc to get started.
- Navigate to System Tools → Shared Folders → Shares
- A list of all shared folders on the PC will be displayed.
Troubleshooting network share issues
There are a few known issues you may encounter when managing shared files. Here are some basic troubleshooting steps to address them:
Issue: Shared folders are not visible on the network
Ensure Network Discovery and File Sharing settings are enabled:.
- Open Control Panel
- Navigate to Network and Internet →Network and Sharing Center → Advanced sharing settings
- Toggle the ✅ Turn on network discovery and ✅ Turn on file and printer sharing options under Private.
- Press Save changes to proceed.
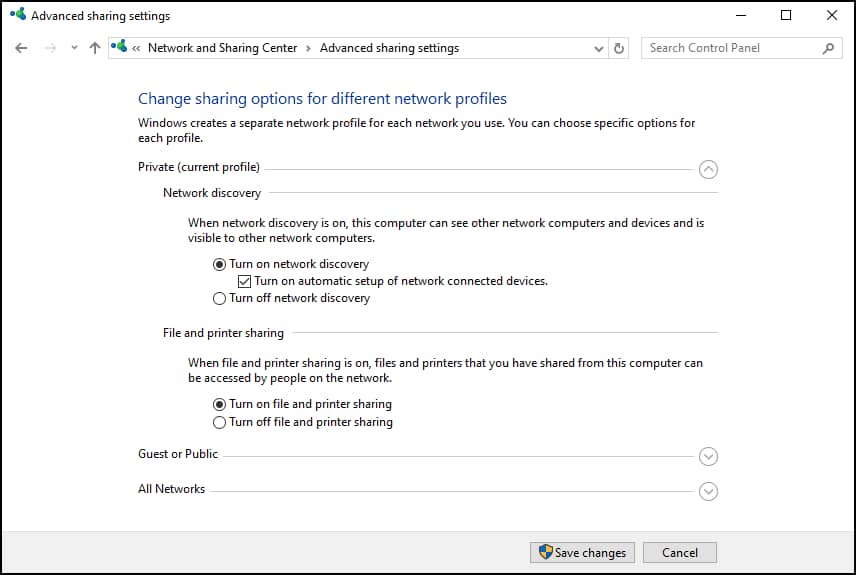
This page will also display whether you have a public or private profile enabled for network sharing.
🥷 Tip: See the FAQ below for more details on each network-sharing profile.
Issue: Can’t access a shared folder
Validate if you have permission to access the target folder or if you have the correct user account to do so. Double-check your credentials if password-protected sharing is enabled.
Issue: Network shares are slow or unresponsive
Restarting the network adapter and router is recommended to diagnose connection and network issues. In some cases, turning off third-party firewalls can also interfere with network connections or sharing.
→ Slow network connection? Here are some essential troubleshooting tips for common network connectivity issues.
Quick-Start Guide
NinjaOne provides tools that allow you to access and review network shares on Windows devices. Below are a few key details to get started.
Here are a few insights:
- NinjaOne offers remote tools that can help you access and manage devices.
- There are scripts in the NinjaOne script library that might assist with network-related tasks.
Rounding up Windows network file-sharing best practices
Network sharing is a great way to expedite resource management for personal tasks and collaborative projects. It’s also incredibly efficient in managed environments, allowing IT operators to deploy with ease and minimal intervention.
That said, file-sharing over a network also carries its own set of risks. Hence, it’s essential to regularly and thoroughly check or update protocols to prevent unauthorized access and mishandling of sensitive data.


