

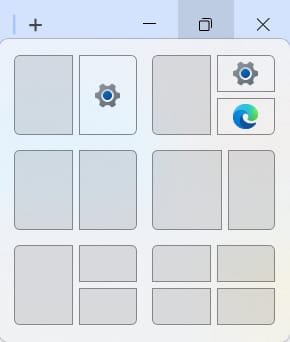
The Windows 11 snap layouts feature gives users visual cues and templates to quickly and automatically organize windows on their screen. It appears when you drag a window to the top of the screen or when you hover over the maximize button.
This feature can help users arrange their windows more easily and optimize their workspaces to their own liking, especially if they’re multitasking. However, some users might find the snap layout suggestions unintuitive and distracting. It can also prove to be disruptive for managed environments, such as for kiosk and VDI configurations.
Because of this, it’s essential for an IT administrator to master the different ways to enable and disable snap layouts. This gives them more flexibility when managing different desktops and will help them ensure that user experiences are standardized and aligned with their organization’s goals and requirements.
For a visual breakdown of this topic, watch How to Enable or Disable Snap Layouts on Top of Screen in Windows 11.
Different ways to enable or disable snap layouts in Windows 11
Snap layouts can be enabled or disabled through Settings or the Windows Registry. If you manage multiple desktops, you can also use a Windows PowerShell script to automate the process of making registry edits across different devices.
Prerequisites
Before you get started, take these things into account first:
- The GUI, Registry Editor, and Windows PowerShell methods are available to all Windows 11 users.
- The snap layouts feature is only available for Windows 11 build 22621.1344 (22H2) or later.
- If you’re going to enable or disable snap layouts in Windows 11 using the Registry Editor or Windows PowerShell, you will need administrator privileges. To check if you have that, open the Start Menu > Settings > User Accounts. The word “Administrator” should be written underneath your username.
Method 1: Enable/Disable via Settings (GUI)
This is the most straightforward method and is ideal for end-users who wish to manage their own device preferences.
- Open the Start Menu > Settings > Multitasking.
- Go to the Snap windows section to enable or disable it.
- Click the dropdown arrow under Snap windows. There, you’ll find other ways to customize your snap window experience. Check or uncheck each option according to your preferences:
- When I snap a window, suggest what I can snap next to it
- Show snap layouts when I hover over a window’s maximize button
- Show snap layouts when I drag a window to the top of my screen
- Show my snapped windows when I hover over taskbar apps, in Task View, and when I press Alt+Tab
- When I drag a window, let me snap it without dragging all the way to the screen edge
Method 2: Enable/Disable via Registry Editor
This method can be used for multi-user environments. The IT administrator can restrict access to the GUI and manage snap layouts using the Registry Editor. This will ensure that the user experience and tools are standardized across different accounts and devices.
*Note: Make a backup before editing the Windows Registry to prevent any loss of data.
- Open the Start Menu, search for Registry Editor, and open the program.
- Navigate to this address: HKEY_CURRENT_USER\Software\Microsoft\Windows\CurrentVersion\Explorer\Advanced
- Look for the value EnableSnapBar. If you can’t find it, follow these steps:
- Right-click the Advanced key > New > DWORD (32-bit) Value.
- Name the value EnableSnapBar.
- Double-click the EnableSnapBar value.
- If you want to enable Snap Layouts, change the value data to 1. If you want to disable it, set it to 0.
- Press OK.
- Restart File Explorer. To do that, press Win+X and select Task Manager. Find and click Windows Explorer > Restart task.
Method 3: Enable/Disable via PowerShell
This method is ideal for enterprise environments where the IT administrators manage multiple devices. They can deploy the script using a Remote PowerShell tool to optimize their workflows and ensure that all devices have standardized settings.
- Open the Start Menu, search for Windows PowerShell, and open the program.
- To enable snap layouts, type
Set-ItemProperty -Path "HKCU:\Software\Microsoft\Windows\CurrentVersion\Explorer\Advanced" -Name "EnableSnapBar" -Value 1 -Type DWord>Enter. - To disable snap layouts, type
"HKCU:\Software\Microsoft\Windows\CurrentVersion\Explorer\Advanced" -Name "EnableSnapBar" -Value 0 -Type DWord>Enter. - Restart File Explorer. To do that, press Win+X and select Task Manager. Find and click Windows Explorer > Restart task.
Additional things to consider when enabling/disabling snap layouts in Windows 11
- The overall behavior of snap layouts can be controlled through the same Multitasking section mentioned in this guide.
- Having snap layouts disabled in highly controlled and managed environments, such as Kiosk and VDI configurations, can help simplify and optimize UI for end users.
- There is no group policy that can manage snap layout settings. Use the Registry Editor or Windows PowerShell instead.
Why manage snap layouts on top of the screen?
Having the snap layout enabled can make things more convenient for the end user. It will allow them to more easily view multiple windows at the same time, which can be a great help for multitasking and optimizing workflows.
On the other hand, disabling snap layouts can prevent interference in virtual desktops, kiosk, and VDI configurations. Having the feature turned off can also improve UI focus and minimize virtual clutter in a user’s workspace.
Whether you want to keep snap layouts enabled or disabled, managing the feature will help in standardizing desktops across your organization. This will make training easier, especially for kiosk VDI environments, and ensure that everyone has a consistent user experience.
Mastering the different methods to manage the Windows 11 snap layouts feature
The Windows 11 snap layouts feature makes viewing and arranging multiple windows on the same screen easier. It’s a useful tool for certain users, especially people who prefer multitasking. However, some people might find it distracting and unintuitive.
Everyone has their own preferences, and learning how to manage the feature gives people a greater degree of control over their own experiences. Individual users can enable the feature and manage its settings according to their own preferences through the GUI.
For IT administrators, managing the feature will help them align their managed devices with their organization’s goals, preferences, and requirements. You can use the Registry Editor to turn the feature on or off in multi-user settings. If you’re managing multiple devices, you can also use scripted deployments to optimize and simplify your workflow further.


