

Windows Developer Mode is a powerful tool for advanced users and IT administrators, particularly because it unlocks advanced features used in app development and debugging. However, leaving it accessible for end-users is usually a big, if not costly, oversight for any managed environment.
On that note, this guide details how and why you might want to disable Developer Mode for your IT network.
Methods for disabling Developer Mode in Windows 10
There are three main options for disabling Developer Mode in Windows 10:
✔️ Settings
✔️ Registry Editor
⚠️ Warning: Unintended changes to the Windows Registry can affect the performance and stability of your device. To safeguard data and security, check out this guide on how to back up the Registry and set a restore point.
🎥 Follow the on-screen guide in the video “How to Disable Developer Mode in Windows”.
Method 1: Disable Developer Mode via Settings
For select and small-scale deployment, disabling Developer Mode can be quickly done through Settings.
- Open Settings → Update & Security → For developers.
- Under the For Developers section, toggle ❎ Developer Mode off.
This is also the default setting for Windows 10 devices.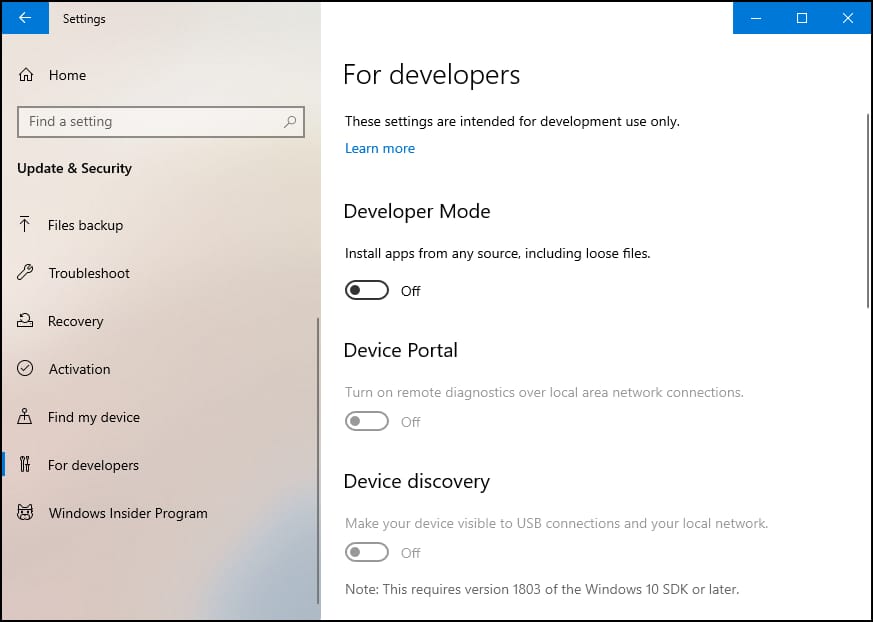
Method 2: Disable Developer Mode via Group Policy
The GPO is ideal for domain or policy deployment. However, the Local Group Policy Editor is only available for Windows Pro, Enterprise, and Education editions.
If you’re running a suitable build, here are the steps:
- Press Win + R, type gpedit.msc in the dialog box, and tap OK.
- Navigate to:
- Computer Configuration\Administrative Templates\Windows Components\App Package Deployment
- Find and double-click Allow development of Windows Store apps and installing them from an integrated development environment (IDE)
- Set it to Disabled, then click OK.
This action will also prevent the Developer Mode from being enabled via the GUI or Registry.
Method 3: Disable Developer Mode via Registry Editor (Advanced)
For environments without Group Policy Editor, like Windows 10 Home, you may follow these steps:
- Press Win + R, type regedit in the dialog box, and tap OK.
- 2. Navigate to:
- HKEY_LOCAL_MACHINE\SOFTWARE\Microsoft\Windows\CurrentVersion\AppModelUnlock
- Find or create a DWORD (32-bit) value: AllowDevelopmentWithoutDevLicense.
- Double-click it and set the Value data to 0.
🥷 Optional: You can also set AllowAllTrustedApps to 0 to prevent users from side-loading trusted apps without authorization.
Verify if Developer Mode has been disabled
After making changes, you need to confirm if Developer Mode has been disabled.
- Go to Settings and check if Developer Mode is switched off or grayed out.
- Open the Registry Editor and confirm the related Registry keys are set to 0.
- Try to install an unsigned UWP app to test if the action will be denied as intended.
Wondering what happens when you turn off Developer Mode? Essentially, you restrict end-users from accessing powerful tools that are usually reserved for software developers and advanced users.
In addition, disabling Developer Mode prevents the user from installing rogue software and unsigned applications.
Notes for administrators about disabling Developer Mode
Before we wrap up, here are some outcomes and additional information worth considering.
- Group Policy overrides user settings.
- Changes via Settings may not take effect until after a restart or user sign-out.
- It won’t remove tools like WSL or Device Portal unless they’re manually uninstalled.
🥷 Tip: Since Group Policy will override device settings, it’s highly preferred and efficient to use it for mass deployment in enterprise environments.
Why it’s recommended to switch off Developer Mode
It’s common practice to disable Developer Mode in most controlled environments. For IT stacks and administrators, this action will help limit security vulnerabilities and streamline many troubleshooting paths. There are still instances when enabling this advanced feature is essential, but these are more or less due to specific business demands or prerequisites.


