

This complete tutorial demonstrates how to generate a virtual machine repository for Hyper-V Quick Create by making a custom gallery. It includes instructions for moving your virtual machines to a central location, writing the gallery JSON files for them, and adding them to the Hyper-V Quick Create list using the Windows Registry.
What is Hyper-V Quick Create?
Hyper-V is a virtualization platform available in Windows 10 and Windows 11 Pro and Server editions. It is used for the creation, management, and running of virtual machines (VMs): isolated, virtual computers that run their own operating system and software, acting as if they were a separate device.
Hyper-V Quick Create lets you spin up new virtual machines from a gallery of pre-configured virtual machine images (files containing the VM hard drive and configuration). This allows users to one-click deploy VMs that are ready-to-use, with software and other configuration all set up in advance.

By default, the Hyper-V Quick Create tool loads a gallery provided online from Microsoft which includes Windows and Linux development images.
You can replace this default gallery to deploy your own custom images with a click, either for your own convenience, or to make images available to other users in your organization, providing them with a streamlined interface for deploying custom VMs.
Tutorial: Creating a Hyper-V Quick Create Virtual Machine repository
The following instructions detail how to create a virtual machine repository, and add the virtual machines in it to a custom Hyper-V Quick Create gallery.
Note that only Generation 2 Hyper-V virtual machines are supported by Quick Create. Here’s a video on “How to See if Your Hyper-V Virtual Machine is Generation 1 or Generation 2”
Step 1: Create a file repository for disk images and resources
You can use any existing Hyper-V virtual machine in your custom Hyper-V Quick Create gallery.
Hyper-V virtual machines are stored in .vhdx virtual hard disk files. These are the files that will be used to deploy new Virtual Machines using Hyper-V Quick Create, and will need to be in a repository where Hyper-V can access them. In addition to .vhdx files, you can also store the Quick Create gallery files, thumbnails, and other assets in the same repository to keep things organized.
If you are only creating a virtual machine repository for use on your own PC, it can be on an internal or external hard disk. If you’re creating a repository for sharing with other users on a network, you should store it on a network share that is accessible from each device. This can be a Windows file share, web server, or even Azure blob storage accessed via HTTP.
To keep things simple, this tutorial will assume either a local drive, or a Windows network share mapped to a drive letter is being used to host the repository. You should copy your virtual hard disk files to a folder in this location (for example, M:\my_virtual_machine_repository), and place each .vhdx file in its own subdirectory within it (so there’s a folder for each virtual machine, with its hard disk file in it, e.g., M:\my_virtual_machine_repository\virtual_machine_1).
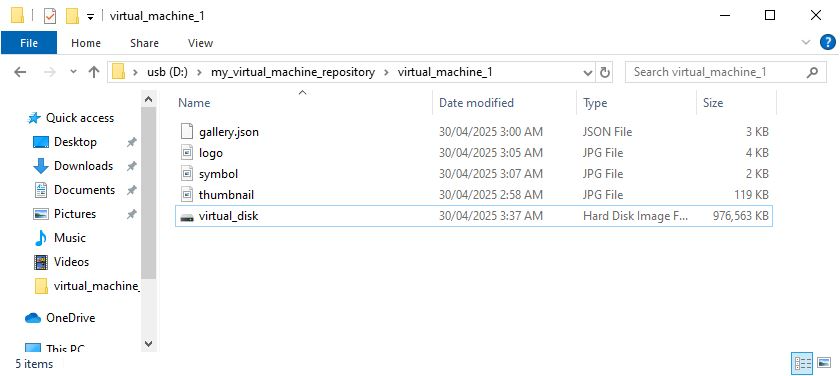
Within the same directory, you will also store the JSON file and other files required to add each VM to the Quick Create gallery.
Step 2: Create configuration files and thumbnails for your custom gallery
To display the virtual machines in the repository in the Hyper-V Quick Create gallery interface, you will need to define a gallery configuration, and create thumbnails and icons.
Within the directory for each virtual machine created above, create a file named gallery.json, and add the following JSON formatted template to it:
{
“images”: [
{
“name”: “My Windows 10 Pro Dev environment”,
“version”: “22H2 19045.5371”,
“locale”: “en-US”,
“publisher”: “ninjaone.com”,
“lastUpdated”: “2025-04-22T22:10:40Z”,
“description”: [
“My default custom dev environment including:\n”,
“- Node.js 22\n”,
“- Visual Studio Code\n”,
“- Python 3.12\n”,
“———–\n”,
“Edit the name, version, locale, publisher, description, and details lines to say whatever you want!”
],
“config”: {
“secureBoot”: true
},
“requirements”: {
“diskSpace”: 0
},
“disk”: {
“uri”: “file://V:/my_virtual_machine_repository/virtual_machine_1/disk_image.vhdx”,
“hash”: “sha256:DISK_FILE_HASH”,
“size”: 111,
“archiveRelativePath”: “”
},
“logo”: {
“uri”: “file://V:/my_virtual_machine_repository/virtual_machine_1/logo.jpg”,
“hash”: “sha256:LOGO_FILE_HASH”,
“size”: 111,
“archiveRelativePath”: “”
},
“symbol”: {
“uri”: “file://V:/my_virtual_machine_repository/virtual_machine_1/symbol.jpg”,
“hash”: “sha256:SYMBOL_FILE_HASH”,
“size”: 111,
“archiveRelativePath”: “”
},
“thumbnail”: {
“uri”: “file://V:/my_virtual_machine_repository/virtual_machine_1/thumbnail.jpg”,
“hash”: “sha256:THUMBNAIL_FILE_HASH”,
“size”: 111,
“archiveRelativePath”: “”
},
“details”: [
{
“name”: “Warning”,
“value”: “Default user has no password! Be sure to set one.”
},
{
“name”: “Additional notes”,
“value”: “Be sure to run Windows Update before use!”
}
]
}
]
}
You will then need to edit this file to match the details of your virtual machine image. Visual Studio Code is a good tool for doing this, and can automatically format and validate JSON so you can more easily spot mistakes.
| Gallery configuration item | Description | Example value |
| name | The name of the virtual machine as it will appear in the gallery | My Windows 10 Pro Dev environment |
| version | The version as it will appear in the gallery. There is no specific format required, but it’s useful to include the OS version | 22H2 19045.5371 |
| locale | The locale of the guest operating system | en-US |
| publisher | A custom publisher value that will be displayed under the virtual machine name when it is selected, useful for MSPs who provide virtual machines to clients | My organization |
| lastUpdated | A date value for keeping track of when the virtual machine image was last updated (see below for details on how to generate this) | 2025-04-22T22:10:40Z |
| description | A multi-line description of the virtual machine and its contents. Note that each line is specified as a separate string, and that line breaks must be added using \n | “Line 1\n”, “Line 2\n” |
| config > secureBoot | Whether secure boot is enabled for the guest VM | true or false |
| requirements > diskSpace | Specified in bytes, setting this value will show a warning to the user if they do not have this amount of space free | Set to 0 for no warning, or set to the amount of disk space in bytes |
| disk | Set the uri (path to the .vhdx file), hash, and size, and leave archiveRelativePath empty | See below for how to calculate these values |
| logo | The logo image will appear under the thumbnail, ideal for promoting your organization in shared environments | See below for image details |
| thumbnail | The thumbnail is intended as a preview of the virtual machine, for example a screenshot of it running | See below for image details |
| symbol | The symbol is the icon displayed next to the virtual machine in the list on the Hyper-V Quick Create interface | See below for image details |
| details | Extra details can be added here, defined as name/value pairs | { “name”: “Warning”, “value”: “Default user has no password! Be sure to set one.” } |
As these configuration files will be used on multiple machines, paths must always be a full path that is consistent and accessible across all devices. For example, if you are using drive M:\ to store your virtual machine repository files, you must assign the same drive letter on every machine.
To generate the lastUpdated time and copy it to your clipboard, use the following command:
Get-Date -UFormat “%Y-%m-%dT%TZ” | clip.exe
To get the SHA256 file hash for a file, use the following PowerShell command (replacing the path to the file with your own):
Get-FileHash -Path “c:\path\to\file” -Algorithm SHA256

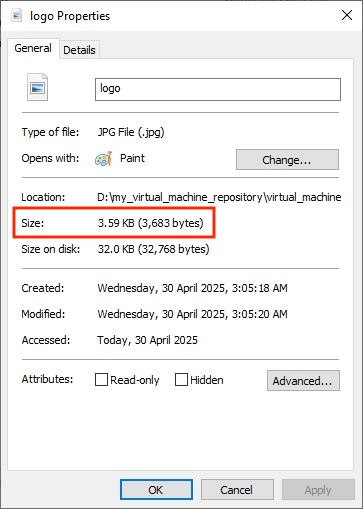
To get the correct size for a file, right-click on it and select Properties and look for the Size property (do not use the Size on disk property for this). Only include the numerical digits, and do not include any commas or any other characters in the file size value.
When creating images for the logo, symbol, and thumbnail configuration, use the following specifications:
- Logo should be as 130×30 pixel JPG image
- Symbol should be a 30×30 pixel JPG image
- Thumbnail should be an 800×450 pixel JPG image
Step 3: Integrating your repository with Hyper-V Quick Create
Next, you need to tell Hyper-V where these gallery configuration files are. This is done in the Windows Registry Editor.
You must be logged in as an administrator to use the Registry Editor. It’s also recommended to create a backup of your registry before making changes in case you need to restore it back to its original state.
- Right-click on the Start button and select Run
- Enter the command regedit.exe and click OK to open the Registry Editor
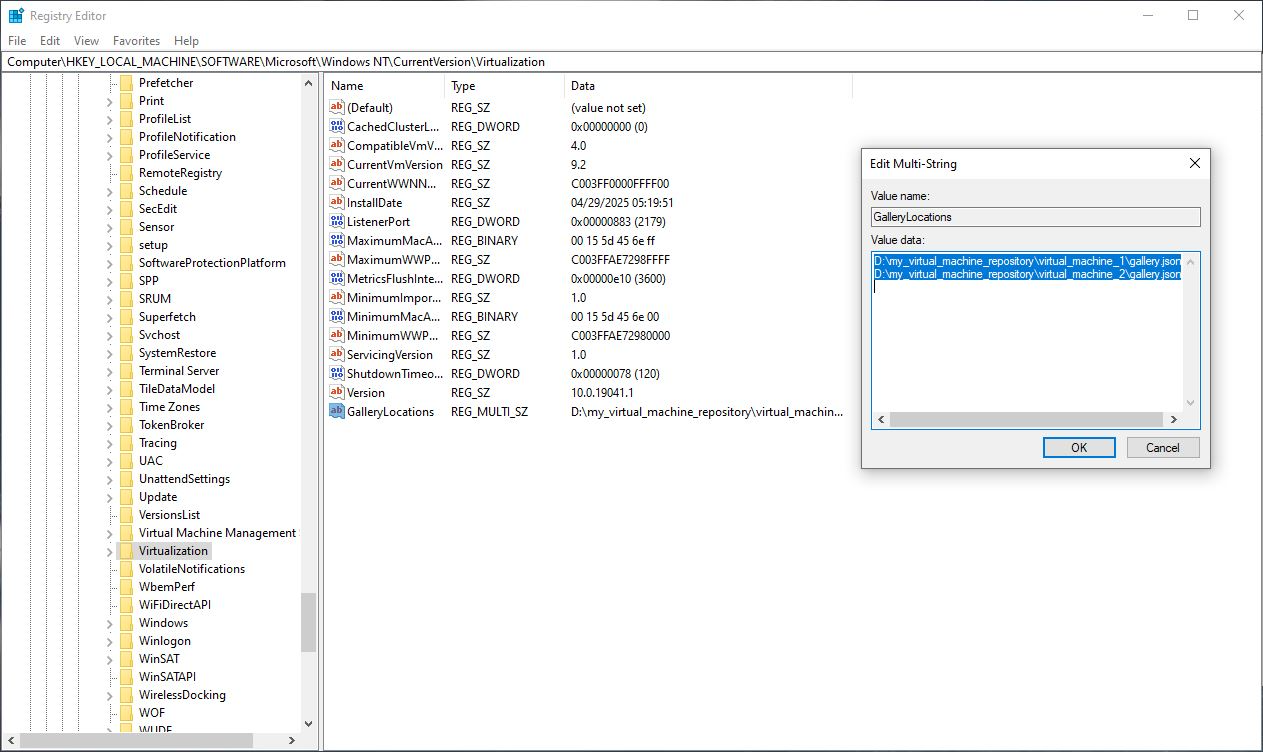
- Navigate to Computer\HKEY_LOCAL_MACHINE\SOFTWARE\Microsoft\Windows NT\CurrentVersion\Virtualization (you can copy and paste this location into the navigation bar)
- With the Virtualization key highlighted in the navigation tree, select Edit > New > Multi-String Value from the toolbar
- Name the new value GalleryLocations
- Double-click on the GalleryLocations value to edit it
- Add the paths to your gallery.json files created above, ensuring there is one path on each line
- Click OK to save the multi-string value
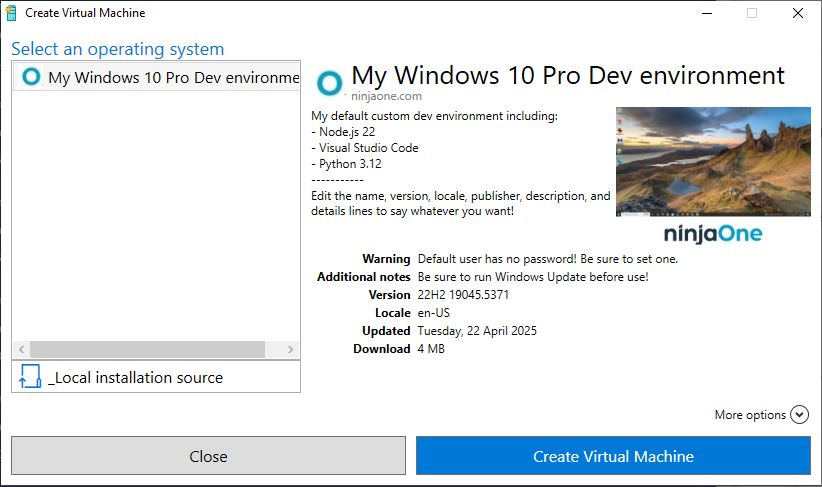
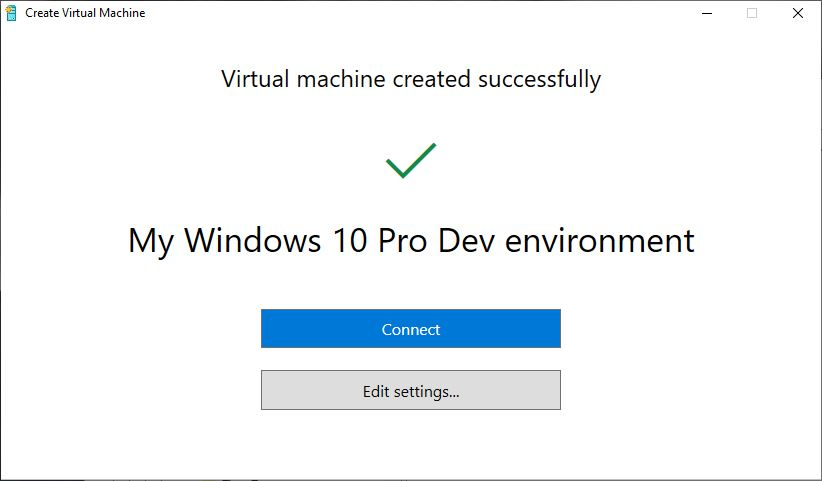
Re-open Hyper-V Quick Create, and you should see your virtual machines added to the gallery, with the details pulled from your custom gallery.json files. When you click on a VM image from the gallery, you will have the option to Create Virtual Machine from it that, when successful, will give you the option to connect to and start using it.
If you do not, carefully check that:
- Your JSON files contain valid JSON syntax and the required values
- Your hashes and file sizes are correct
- The file paths used in the JSON file and in the GalleryLocations registry value are correct, and accessible from every machine you want to use your Hyper-V Quick Create repository from
Best practices for managing your custom VM repository
There are a few best practices you should follow when managing your virtual machine repository:
- Version your virtual machines and keep the descriptions and details in gallery.json up-to-date so that you can quickly see what software your users are running to assist with troubleshooting
- Periodically update your images with the latest software and OS updates, so that users don’t have to wait for updates when they use them
- You can pause a VM and use the paused image, allowing you to launch a VM to a specific state (e.g., right before user creation after a fresh installation of Windows, or a fully updated Windows desktop with software opened and ready to use)
- Make images read-only for your users so they cannot be accidentally modified
- Ensure that images are not publicly accessible, and are only available to the intended users (especially if they are preloaded with sensitive files or credentials)
If you encounter problems launching virtual machines from your custom Hyper-V Quick Create Gallery, you can use the Windows Event viewer under Windows Logs > Application and look for errors from VMCreate.
Managing development environments for teams
In addition to IT teams and MSPs testing software and providing managed environments for clients, one of the most popular use-cases for Hyper-V is creating consistent environments for developing and testing software.
Endpoint management by NinjaOne provides a unified web interface for managing fleets of devices. You can monitor security, and automate the deployment of configuration (including custom virtual machine repositories for Hyper-V Quick Create). You can also manage the virtual machine guests themselves and keep an always up-to-date inventory of all IT infrastructure, ensuring they are secure, patched, and accessible for remote support.
FAQ
Can I use cloud-hosted images?
Yes, you can use files from any storage provider that allows access via HTTP, including blob storage like AWS S3 and Azure Blob Storage.
What file formats are supported?
Hyper-V Quick Create supports VHDX and ISO disk image file formats.
Do I need a specific version of Windows?
Hyper-V is only included in Pro and Server editions of Windows for hosting virtual machines. You can use any guest operating system supported by Hyper-V as a guest OS.


