

Ever notice when your system seems to claim a chunk of your drive you can’t use? That’s reserved storage in Windows 11 working for you. It sets aside roughly 7GB of storage space for critical system tasks like updates and temporary files. It acts as a safety net to keep operations smooth. This guide will walk you through how to manage this feature.
How to configure Windows 11 reserved storage
Manage Windows 11’s reserved storage to free up disk space (e.g., on tablets) or enable reserved storage for reliable updates. Note that this guide’s procedures can only be done on Windows 11 Pro, Enterprise, or Education.
📌 Prerequisites: Ensure that reserved storage is enabled by default on clean installs, and you have administrator privileges to use tools like DISM, Registry, or PowerShell.
If you plan to disable reserved storage, you must reboot and run disk cleanup to free space. We recommend checking ⚠️Things to look out for before proceeding.
📌 Recommended deployment strategies:
| Click to Choose a Method | 💻 Best for Individual Users | 💻💻💻 Best for Enterprises |
| Method 1: Command Prompt (DISM) | ✓ | |
| Method 2: Registry Editor | ✓ | ✓ |
| Method 3: PowerShell | ✓ | |
| Method 4: .reg file | ✓ |
How to check the reserved storage status
First, verify whether reserved storage is active by using DISM.
📌Use Case: Use this procedure when unsure if reserved storage is enabled or disabled. This avoids unnecessary steps for your process.
- Open Command Prompt as Administrator:
- Press Win + X, then select Terminal (Admin).
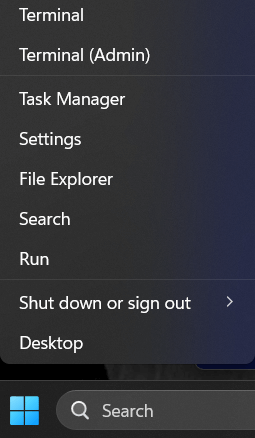
- Click the ▼ dropdown arrow in the tabs above, then select Command Prompt (if needed).
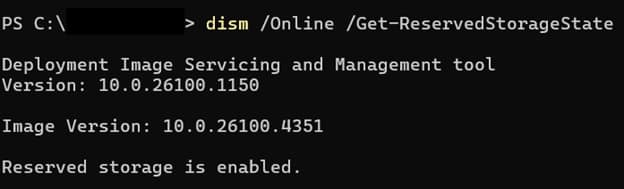
- Run the status command:
dism/Online /Get-ReservedStorageState
- Read the results:
- Reserved storage is enabled: Reserved storage is active.
- Reserved storage is disabled: You’ve already disabled it.
Method 1: Enable or disable reserved storage via DISM
DISM is Microsoft’s official deployment tool for modifying Windows system settings offline or online. It communicates directly with the Windows reserved storage manager to toggle the feature state.
📌Use Case: Use this when you need the quickest, scriptable solution without manually editing the registry.
- Launch Command Prompt (Admin):
- Press Win + X, then select Terminal (Admin).
- Click the ▼ dropdown arrow in the tabs above, then select Command Prompt (if needed).
- Run the DISM commands:
- To disable reserved storage:
dism /Online /Set-ReservedStorageState /State:Disabled
- To enable reserved storage:
dism /Online /Set-ReservedStorageState /State:Enabled
- Reboot immediately:
- Restart your device for the changes to take effect.
💡Note: Disk space may become fully free or reclaimed after 1-2 reboots.
Method 2: Configure via Registry Editor
The Registry Editor can modify the ShippedWithReserves DWORD, which directly controls whether Windows reserves space for system tasks.
📌 Use Case: Use this for targeted control of your system’s reserved storage, support automation, and deployment across multiple devices.
⚠️ Warning: Making mistakes with the code input can lead to potential data loss. Check ⚠️ Things to look out for to learn how to fix this.
- Open Registry Editor as Administrator:
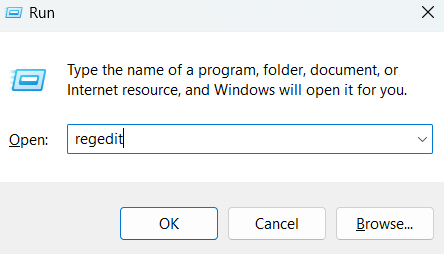
- Press Win + R to open Run.
- Type regedit, then press Ctrl + Shift + Enter to open the Registry Editor as Administrator.
- Confirm the UAC prompt if shown.
- Navigate to the key:
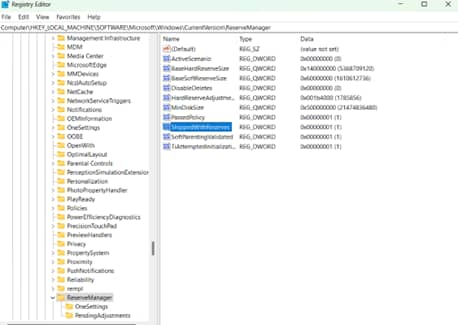
- Paste or go to this address key: Computer\HKEY_LOCAL_MACHINE\SOFTWARE\Microsoft\Windows\CurrentVersion\ReserveManager

- Modify the DWORD value:
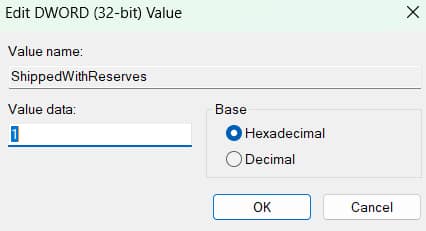
- Double-click the ShippedWithReserves DWORD.
- If it does not exist, right-click the right pane, then select New > DWORD (32-bit) Value.
- Name it ShippedWithReserves.
- Double-click the ShippedWithReserves DWORD.
- Set the value to:
- 1 to enable reserved storage
- 0 to disable reserved storage
- Set the value to:
- Confirm changes:
- Reboot your device for the changes to take effect.
Method 3: PowerShell script for automation
Automate your reserved storage configuration for scalable deployments using PowerShell.
📌 Use Case: Use this method when you plan to script mass deployments, provision tools, or build custom Windows 11 OS images where manual editing isn’t practical.
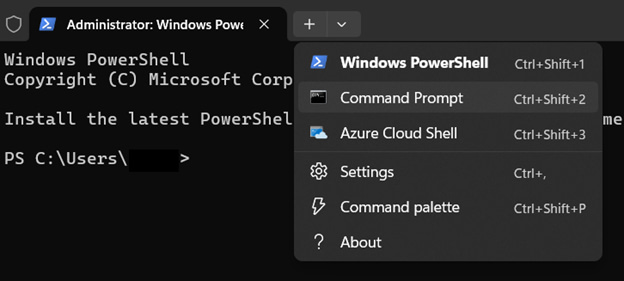
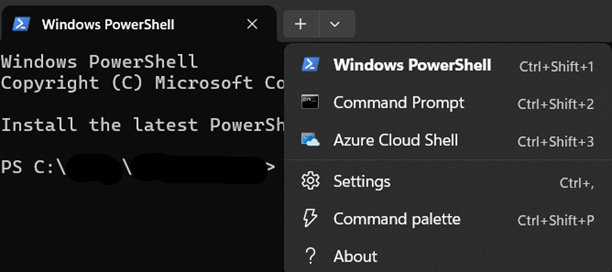
- Open PowerShell as Administrator:
- Press Win + X, then select Terminal (Admin).
- If PowerShell is not the default command-line tool, click the ▼ dropdown arrow, then select Windows PowerShell.
- Run these commands:
- To disable reserved storage:
Start-Process dism -ArgumentList "/Online /Set-ReservedStorageState /State:Disabled" -Verb RunAs
- To enable reserved storage:
Start-Process dism -ArgumentList "/Online /Set-ReservedStorageState /State:Enabled" -Verb RunAs
- Reboot your device:
- You can either restart your device manually or run this script in PowerShell:
Restart-Computer -Force
Method 4: One-click configuration via .reg file
Deploy registry changes instantly using .reg files. It directly modifies the ShippedWithReserves registry DWORD through scripted imports, functioning identically to manual registry edits.
📌 Use Case: Use this for helpdesk scenarios, provisioning packages, or users who need to disable reserved storage across multiple devices without CLI expertise.
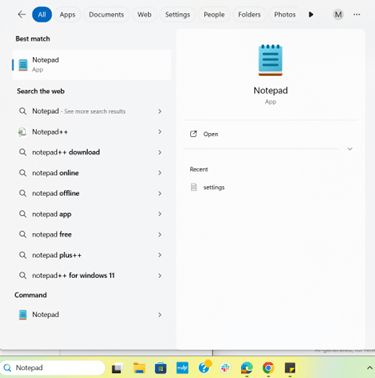
- Create the .reg file:
- Press Win + S, search for Notepad, then open the application.
- Paste/write the relevant code:
- To disable reserved storage:
Windows Registry Editor Version 5.00[HKEY_LOCAL_MACHINE\SOFTWARE\Microsoft\Windows\CurrentVersion\ReserveManager]"ShippedWithReserves"=dword:00000000
- To enable reserved storage:
Windows Registry Editor Version 5.00[HKEY_LOCAL_MACHINE\SOFTWARE\Microsoft\Windows\CurrentVersion\ReserveManager]"ShippedWithReserves"=dword:00000001
⚠️Warning: Making mistakes with the code input can lead to potential data loss. Check ⚠️ Things to look out for on how to fix this.
- Save and execute:
- Save the file as Disable_Reserved_Storage.reg or Enable_Reserved_Storage.reg (file type: All Files).
- Right-click the .reg file, then select Run as administrator and confirm prompts.
- Reboot and verify:
- Restart your system.
- Use the How to check status procedure to verify.
⚠️ Things to look out for
This section highlights potential challenges to keep in mind while following this guide.
| Risks | Potential Consequences | Reversals |
| 1. Disabling Reserved Storage when disk space is low | Low disk space with disabled reserved storage can cause Windows update failures (error 0x80070070). | Re-enable reserved storage immediately via dism /Online /Set-ReservedStorageState /State:Enabled |
| 2. Accidental/wrong Registry edits | Corrupted OS, boot failures, system instability | Always back up the registry first: File > Export in Regedit. Use System Restore for recovery. Watch How to Back Up and Restore Windows Registry for more details. |
| 3. Incorrect DISM/PowerShell Syntax | Command fails, partial configuration | Verify syntax with dism /?. Check the state with dism /Online /Get-ReservedStorageState. |
| 4. Untrusted .reg Files | Malicious registry changes, data loss | Inspect .reg files in Notepad before running. Ensure the code is error-free. Deploy only from trusted sources. |
| 5. Skipping Reboot | Changes not applied, inconsistent system state | Always reboot after configuration. Script reboots: shutdown /r /t 0 (CMD) or Restart-Computer -Force (PowerShell). |
| 6. Ignoring Disk Cleanup | Disk space may not be reclaimed after disabling | Run cleanmgr post-disable + reboot. Select System files > Windows Update Cleanup. |
Key considerations when configuring reserved storage
Here are additional things to note when enabling or disabling reserved storage in Windows 11. These factors can impact your system’s health and management.
Applies per installation
The new reserved storage configuration affects only the active Windows device. Dual-boot setups, virtual machines, or multi-drive installations need individual modification.
For instance, disabling this feature on a C:\ Windows install will not affect a separate D:\ installation or VM. Reprovision each system using DISM or PowerShell.
No native GUI control
As designed by Microsoft, reserved storage is intentionally excluded from Settings to prevent accidental disruption by non-administrator users. Direct control for this feature is reserved for the methods mentioned above.
Enterprise imaging strategy
Disable Reserved Storage in Windows 11 golden images (e.g., for VDI/thin clients) to save around 7GB during provisioning. Re-enable it post-deployment on critical systems to ensure reliable updates.
For kiosks or Azure Virtual Desktop (AVD), disable Reserved Storage but enforce disk quotas or enable automatic storage expansion to maintain update safety.
Control Windows reserved storage for better disk space management
Reserved Storage in Windows 11 safeguards updates but consumes 7GB or more of disk space. You can disable reserved storage via DISM (/State:Disabled), Registry (ShippedWithReserves=0), or scripts to free space. Always reboot afterward and run Disk Cleanup (cleanmgr) to reclaim storage.
For enterprises, disable during imaging (e.g., VDI templates), then re-enable on critical systems using automation tools. Most users should keep it enabled for reliable updates, but on tight storage, disabling it offers breathing room.
Related topics:


