

The Choose privacy settings for your device screen pops up when a user signs in after a clean Windows 11 installation, a system reset, or a major feature update. This screen shows the option to toggle various privacy settings, which helps create a tailored experience for private devices. However, it can be counterproductive in environments where uniformity and consistency are necessary.
Controlling how this screen behaves during initial sign-ins allows for more streamlined onboarding and faster post-update uptime. Additionally, having this disabled prevents end-user alteration of preconfigured privacy policies, ensuring compliance with organizational data handling policies.
This guide will discuss different methods for configuring the sign-in privacy experience screen in Windows 11 and walk you through additional considerations when implementing this change for a local machine or environment.
Ways to manage the Choose privacy settings for your device screen
Before proceeding further, ensure that you have the following prerequisites for a smoother experience when configuring the privacy settings screen:
- Administrator access. Modifying system-level privacy settings requires elevated account permissions, particularly those that influence how an end user’s Out-of-Box Experience (OOBE) behaves post-update or during their initial sign-in.
- Group Policy Editor access. The Local Group Policy Editor is only accessible via Windows 11 Pro, Enterprise, and Education editions. If you want to utilize Group Policy to configure the Choose privacy settings for your device screen, ensure that you’re running the editions mentioned above.
- Registry Editor access and backup. Unlike the Local Group Policy Editor, the Registry can be accessed using any Windows 11 edition. However, due to its technical nature and limited documentation, it’s advisable to back up your Windows Registry settings before proceeding for easy rollback in case things go wrong.
Method 1: Configure via Local Group Policy Editor
If you want to provide a standardized privacy setting policy in a domain-controlled environment, the Local Group Policy Editor is your first step. This method allows you to test a policy on a local machine before deployment, which is a crucial step in GPO formulation.
📝 Note: This method only applies to all users in a local system. Deploying this change for an Organizational Unit (OU) requires replicating this method during the editing phase of a GPO in the Group Policy Management Console (GPMC).
- Press Win + R, type gpedit.msc, and then press Ctrl + Shift + Enter.
- Navigate the following path: Computer Configuration > Administrative Templates > Windows Components > OOBE
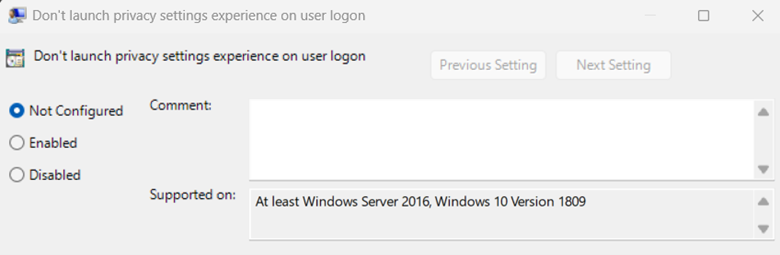
- Find and double-click Don’t launch privacy settings experience on user logon.
- Set the policy to match the privacy settings experience you want:
- Enabled: Hides the Choose privacy settings for your device screen.
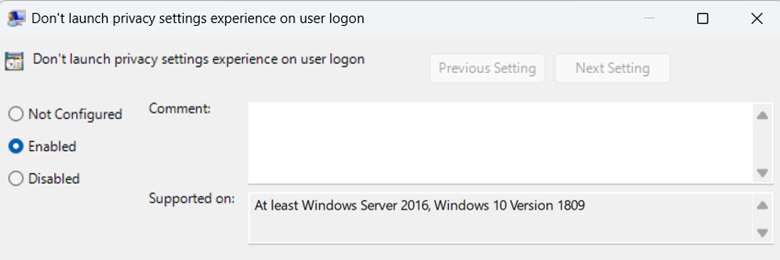
- Disabled or Not Configured: Allows the privacy settings screen to show.
- Enabled: Hides the Choose privacy settings for your device screen.
- Once done, navigate to the bottom of the window, click Apply, and then OK.
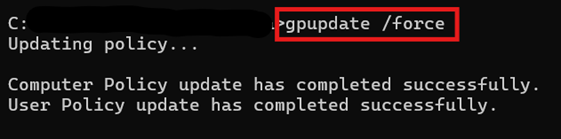
- Open an elevated Command Prompt and run gpupdate /force to refresh the Local Group Policy settings.
Method 2: Modify privacy settings experience via Registry Editor
Modifying a system’s privacy settings screen behavior can be done through the Registry Editor. This method is ideal for Windows 11 Home Edition users who don’t have access to the Local Group Policy Editor. You can also use this method when applying this change in small, non-domain systems.
- Press Win + R, type regedit, and then press Ctrl + Shift + Enter.
- Navigate to: HKEY_LOCAL_MACHINE\SOFTWARE\Policies\Microsoft\Windows\OOBE
- If the OOBE key doesn’t exist, right-click Windows and press New > Key.
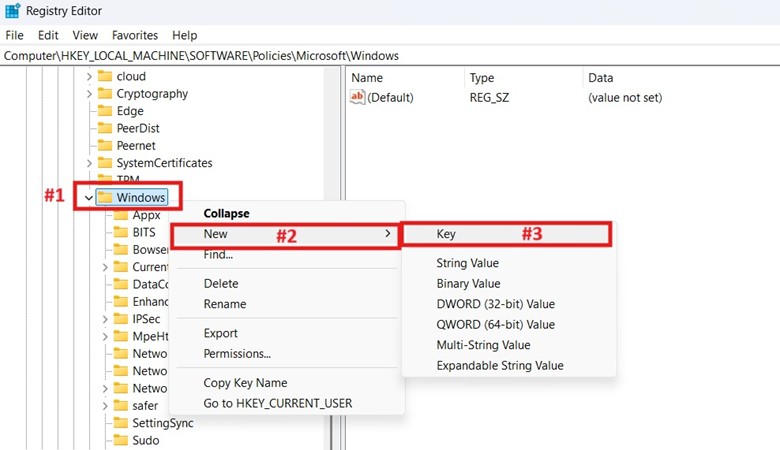
- Name the newly-created key OOBE.
- If the OOBE key doesn’t exist, right-click Windows and press New > Key.
- Inside OOBE, find and double-click the DisablePrivacyExperience DWORD.
- If it doesn’t exist, right-click OOBE and select New > DWORD (32-bit) Value.
- Name the newly-created DWORD DisablePrivacyExperience.
- Double-click DisablePrivacyExperience.
- Set the value data inside DisablePrivacyExperience according to the behavior you prefer:
- Set it to 1: Disables the Choose privacy settings for your device screen.
- Set it to 0: Enables the appearance of the privacy settings screen.
- Restart the system to apply the change.
🥷 Quick tip: Manually applying this registry change across an environment is tedious and prone to human error. If you want to scale this easily while maintaining consistency, consider automating the process using the optional PowerShell section below.
Optional method: Implement the registry method as a PowerShell command
With PowerShell, you can easily implement the Registry method through commands and scripts. Aside from that, PowerShell is capable of validating input and detecting syntax errors, helping you catch mistakes before they affect the system—making them a safer alternative when compared to manual registry edits.
- Press Win + R, type powershell, and then press Ctrl + Shift + Enter.
- Enter the command that best reflects the change you want:
To prevent the Choose privacy settings for your device screen from showing:New-Item -Path “HKLM:\SOFTWARE\Policies\Microsoft\Windows\OOBE” -Force New-ItemProperty -Path “HKLM:\SOFTWARE\Policies\Microsoft\Windows\OOBE” `
-Name “DisablePrivacyExperience” `
-PropertyType DWord `
-Value 1 `
-Force
To restore the privacy settings screen to its default behavior:
Remove-ItemProperty -Path “HKLM:\SOFTWARE\Policies\Microsoft\Windows\OOBE” ` -Name “DisablePrivacyExperience” -Force
- Once done, you can close the PowerShell prompt.
- Optionally, you can save the commands as .ps1 scripts by following the steps below:
- Copy and paste the script into a newly created Notepad file.
- Click File and Save as…, then name the file with a .ps1 extension.
- Set its Save as type to All Files.

- Pick a location to save your newly created .ps1 script.
- Press Save.
💡 Remember: Although PowerShell can’t deploy scripts automatically, you can export the commands above as a .ps1 script. Once saved, the script can be easily stored using an external drive or shared over a network if the target endpoint is inside the same local environment. Additionally, you can use an endpoint management solution for broader remote deployments at scale.
Deploy PowerShell scripts remotely and at scale with NinjaOne.
→ Download our Quick Deployment Guide to learn more.
How do I choose privacy settings in Windows?
Suppose you hide the Choose privacy settings for your device screen during the OOBE startup procedure. In that case, you can still manage a device’s privacy preferences later through the Windows Settings app.
Using the Windows Settings app
- Press the Win + I hotkey to open the Windows Settings app.
- On the left pane, find Privacy & Security and click it.
- Inside Privacy & Security, you’ll see sections under Windows permissions and App permissions located on the right pane.
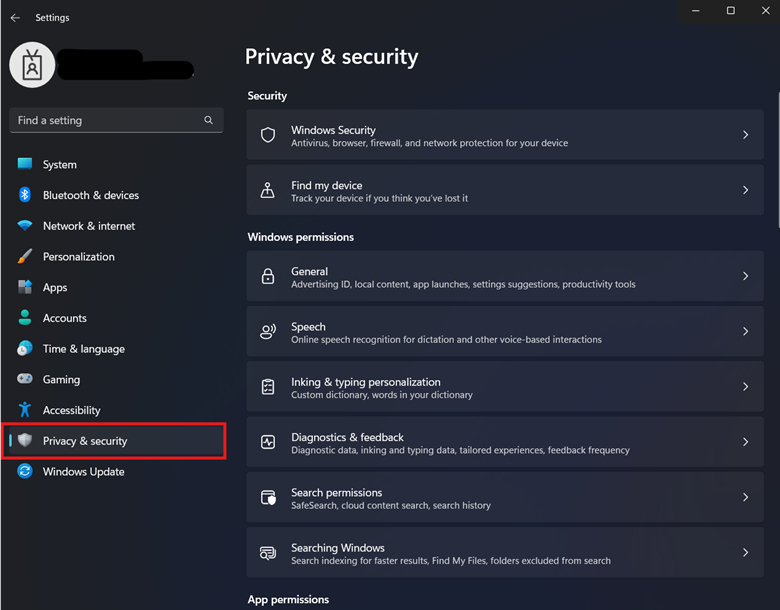
- Click on each category and configure them manually to match your privacy preference.
Prevent Windows Settings app access for standard user accounts
If your environment enforces its privacy preference, then it’s best to prevent standard users from accessing the privacy settings in Windows Settings by following these steps:
- Open the Local Group Policy Editor as an administrator.
- Go to: Computer Configuration > Administrative Templates > Control Panel
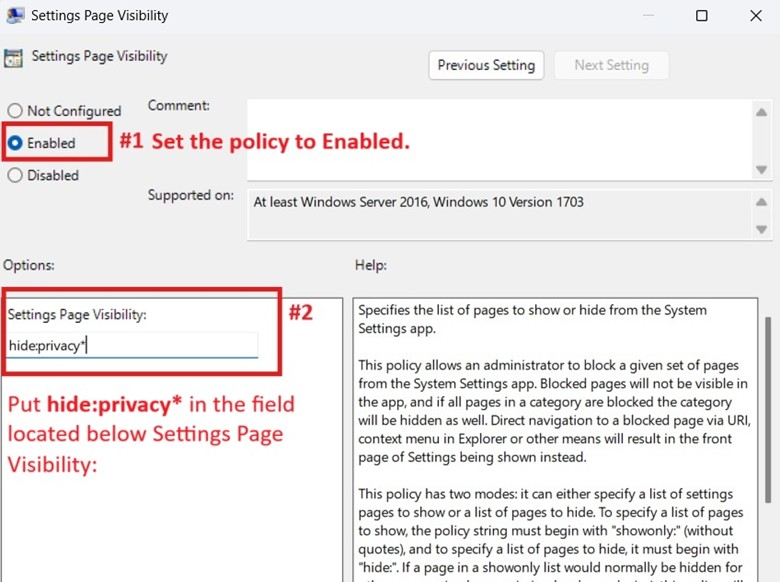
- Find and double-click the Settings Page Visibility policy.
- Set the policy to Enabled and put hide:privacy* in the field found under Settings Page Visibility.
- Press Apply and OK under the policy’s Window and close the Local Group Policy Editor.
Additional considerations about the privacy experience screen
OOBE/Feature update trigger
The Choose privacy settings for your device setup only appear during the Out-of-Box Experience (OOBE) phase. This setup phase automatically launches after a clean installation, system reset, or major feature update.
Preconfigure privacy settings
Set your preferred privacy configurations before disabling the privacy experience screen to avoid reverting to the system’s default settings. You can preconfigure your privacy settings via the Local Group Policy Editor by managing the policies listed below:
| Privacy Setting | Local Group Policy Editor Path | Policy Name |
| Advertising ID | Computer Configuration > Administrative Templates > System > User Profiles | Turn off the advertising ID |
| Tailored Experiences | Computer Configuration > Administrative Templates > Windows Components > Cloud Content | Do not use diagnostic data for tailored experiences |
| Inking and Typing | Computer Configuration > Administrative Templates > Control Panel > Regional and Language Options | Turn off inking and typing personalization |
| Location Services | Computer Configuration > Administrative Templates > Windows Components > Location and Sensors | Turn off location |
| Diagnostic Data | Computer Configuration > Administrative Templates > Windows Components > Data Collection and Preview Builds | Allow diagnostic data |
Audit logs
There’s no standard method to track the impact of disabling the privacy experience screen. Nevertheless, you can look for OOBE-related events by opening Event Viewer (evntvwr.msc) and going to Applications and Services Logs > Microsoft > Windows.
From there, you can check the following folders, such as Setup, OOBE, WindowsUpdateClient, and SetupPlatform, to verify OOBE completions, feature upgrade entries, and the absence of privacy prompts.
User experience (UX)
Disabling the privacy experience screen can improve user experience by reducing setup complexity and simplifying the startup process. However, a downside of having faster uptime is that users cannot review or configure their own privacy settings from the start. Still, they can choose to personalize their privacy settings later via the Windows Settings app.
Quick-Start Guide
NinjaOne offers several scripts and management capabilities that can help control privacy-related configurations:
1. NinjaOne provides script that can: Block Microsoft Account Creation
2. For Android and Apple devices, NinjaOne has robust privacy preference management through MDM policies. For Windows, similar granular controls exist through scripts and policy management.
3. There are specific scripts that can help manage privacy-related settings, such as:
– Blocking certain account creations– Controlling system settings– Managing device restrictions
Disable “Choose privacy settings for your device” to simplify startup
Configuring the behavior of the privacy experience screen helps streamline onboarding and post-update workflow, providing a consistent user experience during Windows 11 deployments and after major feature updates. If you want to implement the change on a local machine or across your environment, you can use the Local Group Policy Editor or Registry Editor as a starting point.
The Local Group Policy Editor is ideal for standardized privacy policy management in Windows 11 Pro, Enterprise, or Education editions. On the other hand, the Registry Editor allows for the configuration on any edition, including Windows 11 Home, and when paired with PowerShell, it can be used for script-based enforcement. Remember to first test on a local machine before deploying across an environment.


