

When you attempt to shrink a volume or partition, logs are created in the Event Viewer, which you can utilize later for debugging and troubleshooting if the operation fails. These records usually include diagnostic data that is very useful for IT management and power users. In this guide, we’ll go over how you can read shrink volume logs in Event Viewer.
Access the shrink volume logs in Event Viewer
To start, let’s recap how you can access the Event Viewer.
- Press Win + R, type eventvwr.msc, and click OK to open the Event Viewer.
- Expand Windows Logs and select Application.
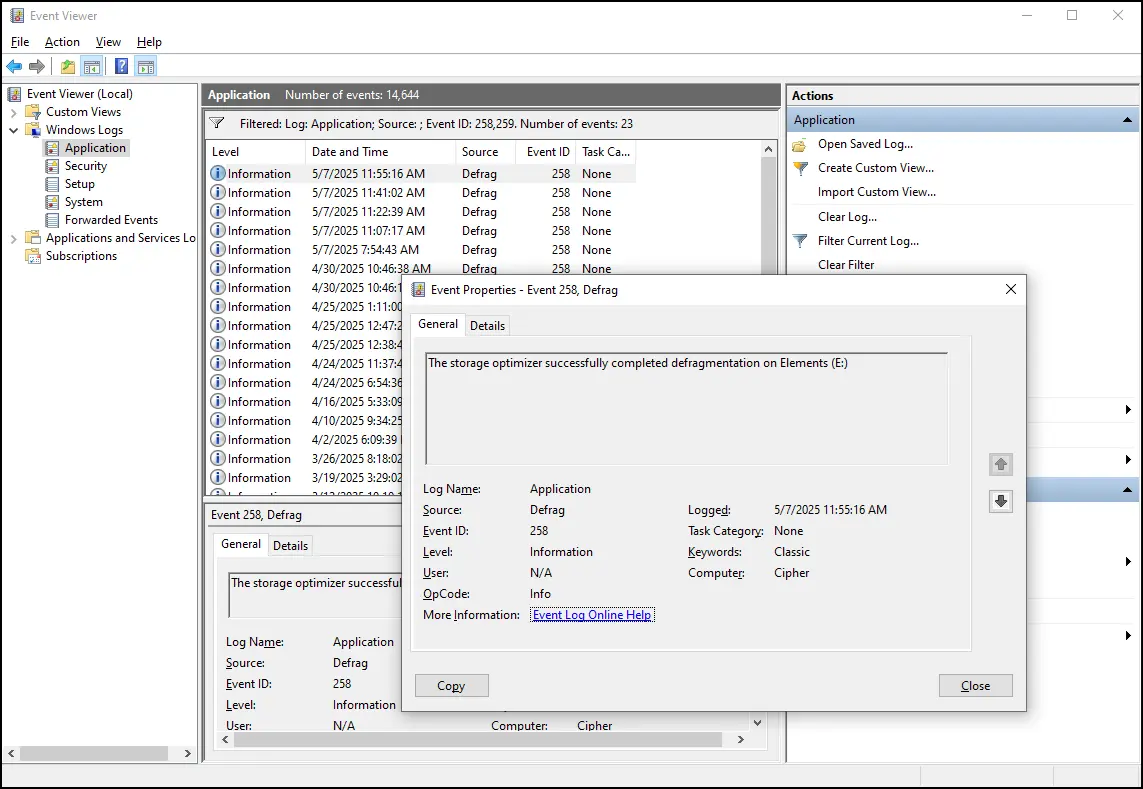
- Click Filter Current Log… and input 258,259 in the <All Event IDs> field.
- Click OK to apply this filter.
The Application pane will now display events related to volume shrink operations.
If you haven’t yet modified your storage volume, we have a guide on how to shrink a partition that can help you get started.
Read the content of Event Viewer logs
To analyze a log or event data, double-click on it to view additional information like:
- The specific unmovable file is causing an error or limitation.
- Diagnostic details such as the last cluster of the file and NTFS file flags.
- Recommendations for further analysis using fsutil or volume querycluster.
These records, typically gathered from the “defrag” application, contain valuable insights about why a shrink operation may have failed or been limited.
Troubleshooting common issues with shrink volume logs
Now that you can view the relevant logs, here are some common issues that the records might indicate and possible troubleshooting steps.
Issue: Cannot shrink volume beyond a certain point
This issue is typically due to unmovable files such as pagefile.sys, hiberfil.sys, or
system restore points. Here are some instructions on how you can remove or disable these file types moving forward.
Disable page files (pagefile.sys)
Page files are created to help your PC use some disk space in place of RAM. It’s not recommended to disable page files unless you’re troubleshooting or in dire straits about your storage space.
On that note, here’s how you can disable it.
- Press Win + R, type sysdm.cpl, and tap OK to open System Properties.
- Navigate to Advanced → Performance → Settings to view Performance Options.
- In the Advanced tab, click Change… to open the Virtual Memory panel.
- Select No paging file and click OK to apply.

Make sure that ☐ Automatically manage paging file size for all drivers is toggled off, so that No paging file will not be grayed out.
Watch our quick video tutorial on how to reduce or delete pagefile.sys, or check out the full guide to learn more about managing your page file.
Disable hibernation
Hibernation files are created to allow fast boot. But you can disable this feature using the Command Prompt:
- In Windows Search, select Command Prompt → Run as Administrator.
- Type powercfg.exe /hibernate off to disable and remove Hibernation in the power options.
Hibernation files will also be removed after running this command.
If you want to learn more about hibernation settings, check out our guide on specifying hibernation file type in Windows 10.
Delete system restore points
- Press Win + R, type sysdm.cpl, and tap OK to open System Properties.
- Under System Protection, select the drive you want to modify and click Configure.
- Press Delete under Disk Space Usage to delete restore points for the selected drive.
Having system restore points is almost second nature to any established tech stack. If you wish to learn how to make the most of this feature, take a look at our guide on how to enable or disable System Restore.
Issue: Event Viewer does not display shrink volume events
This issue indicates that the shrink operation may not have been logged because it didn’t proceed far enough, or if logging was previously disabled.
To diagnose this issue, ensure that the Virtual Disk Service and Defragment and Optimize
Drives services are running. You can then repeat the shrink operation to generate new logs.
Key learnings on interpreting shrink volume logs
Understanding how Event Viewer operates is essential for properly reading shrink volume logs—or any record. In this particular case, remember that shrink operations are recorded under Event IDs 258 and 259, which you can filter for efficiency.
With that in mind, shrinking the partition or volume typically has more value for power users and IT personnel. Particularly those who may need to reallocate space for better disk utilization, assign a dedicated volume for a virtual machine (VM), or create new partitions for dual-boot setups.


