

The Universal Windows Platform (UWP) File Explorer offers a touch-optimized UI developed for use with Windows 10X and tablets. While not officially promoted by Microsoft for general use, this File Explorer alternative remains accessible through a hidden system Unified Resource Identifier (URI).
Although it lacks the classic ribbon UI and full context menus, the UWP File Explorer’s clean interface and lightweight operation make it ideal for touch-based workflows, kiosks, and low-resource environments where speed and simplicity are crucial. Additionally, its limited access prevents endpoint users from modifying system files, installing apps, or running scripts for better security in controlled environments.
If this fits your environment’s use case, read on—this guide will walk you through multiple ways to create a UWP File Explorer app shortcut in Windows 10, along with answers to FAQs and solutions to common issues.
3 ways to make a UWP File Explorer shortcut in Windows 10
⚠️ NOTE: Ensure you’re running at least Windows 10 ver. 1703—the earliest official version where the UWP File Explorer became accessible. Additionally, having administrative privileges and familiarity with shell URIs are recommended if you’re going to access this feature through script or group policy.
Method 1: Manually create a shortcut to the UWP File Explorer
- Press Win + D to go to Windows Desktop.
- Right-click the desktop to open the context menu and press New > Shortcut.
- In the Location field, enter: explorer.exe shell:AppsFolder\c5e2524a-ea46-4f67-841f-6a9465d9d515_cw5n1h2txyewy!App.
- Select Next and enter the shortcut’s name (e.g., UWP File Explorer), then click Finish.
Optionally, you can change the folder’s icon to avoid confusion with File Explorer.
- Right-click the shortcut, then select Properties.
- Inside Properties, click the Change Icon button located at the bottom.
- Enter the path: %SystemRoot%\System32\imageres.dll under Look for icons in this file, and press OK to browse other File Explorer icons.
- Left-click your preferred icon, select OK, then press Apply in Properties.
- Once you’re done, close Properties.
Method 2: Create the shortcut to the UWP File Explorer app via PowerShell
- Left-click the Windows Start Button, type PowerShell, and press Enter.
- Use the following PowerShell script to automate shortcut creation:
$ShortcutPath = “$env:USERPROFILE\Desktop\UWP File Explorer.lnk” $WshShell = New-Object -ComObject WScript.Shell
$Shortcut = $WshShell.CreateShortcut($ShortcutPath)
$Shortcut.TargetPath = “explorer.exe”
$Shortcut.Arguments = “shell:AppsFolder\c5e2524a-ea46-4f67-841f-6a9465d9d515_cw5n1h2txyewy!App”
$Shortcut.IconLocation = “$env:SystemRoot\System32\imageres.dll,3”
$Shortcut.Save()
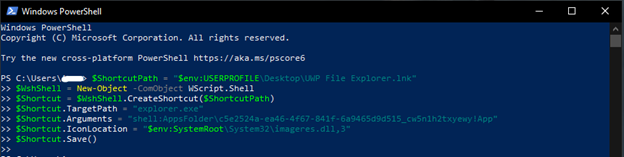
- Entering this command in PowerShell will automatically create a UWP File Explorer shortcut named UWP File Explorer on your desktop.
Method 3: Deploy the shortcut via Group Policy Preferences
⚠️ IMPORTANT: The steps below are intended for administrators managing multiple device settings through Group Policy. Applying this change affects multiple devices, and even a small mistake can potentially cause downtime for an Organizational Unit. It’s important to create a Group Policy backup first before proceeding for easy recovery in case something goes wrong.
- Press Win + R to open Run, type gpedit.msc, and press Enter.
- Navigate to the path: User Configuration > Preferences > Windows Settings > Shortcuts.
- Right-click Shortcuts and select New > Shortcut.
- Configure the shortcut with the following settings:
Setting
Value
Action Create Name UWP File Explorer Target Type File System Object Location Desktop Target Path explorer.exe Arguments shell:AppsFolder\C5E2524A-EA46-4F67-841f-6A9465D9D515_cw5n1h2txyewy!App Icon File Path %SystemRoot%\System32\imageres.dll Icon Index 0 Run Normal Window - You can change the Location to the Start Menu or anywhere you prefer.
- Both Icon File Path and Icon Index are optional; you can change them according to preference.
- Click OK to save the UWP File Explorer shortcut.
- Link the Group Policy Object (GPO) to the Organizational Unit (OU).
- Right-click the OU you want to manage (e.g., Marketing, Sales, etc.)
- Select Link an Existing GPO, then select the appropriate GPO from the list.
- Click OK.
- Force update the policy on a client machine to verify.
- Open cmd as an administrator, then enter the command: gpupdate /force.
Troubleshooting issues related to UWP File Explorer shortcuts
Issue: The shortcut doesn’t launch the UWP File Explorer
If the shortcut you’ve made doesn’t work as intended, verify if you’re using at least Windows 10 version 1703, as this version was the earliest Windows build to introduce the UWP File Explorer. Once you have verified that you’re running the proper Windows version, double-check if you’re inputting the correct URI, explorer.exe shell:AppsFolder\c5e2524a-ea46-4f67-841f-6a9465d9d515_cw5n1h2txyewy!App, when making a shortcut.
If you’re leveraging PowerShell to automate this task, ensure that you’re not committing typographical errors in your script.
Issue: Icon not displaying correctly
After setting the shortcut’s icon, it typically applies instantly or sometimes after a desktop refresh. However, if this doesn’t work out for you, find the location of the target icon and verify if it has the proper .ico format and at least 256×256 pixels. Other image formats, such as .png and .jpg, typically don’t get properly displayed when used as a shortcut icon.
You can reassign the icon by right-clicking the shortcut, selecting Properties, pressing Change Icon, and browsing for your preferred .ico file. Lastly, to prevent accidental deletions, remember to store your custom .ico files in a permanent folder and not within temp folders that the system periodically clears.
Issue: Group Policy shortcut not appearing
When implementing the creation of UWP File Explorer shortcuts via Group Policy Preferences, ensure that the GPO containing the policy is properly linked and applied to the target OU. After doing that, you can verify the change by opening an elevated Command Prompt and inputting gpresult /r for user policy status. If it still hasn’t applied, refresh the group policy by entering gpupdate /force using the same cmd.
Frequently Asked Questions about the UWP File Explorer app
Is the UWP File Explorer a full replacement for the classic File Explorer?
The Windows UWP File Explorer is optimized for touch-based devices like computer tablets and is a limited version of the traditional File Explorer. Additionally, it lacks many features of the classic File Explorer interface, such as a ribbon and context menu. That said, the UWP File Explorer shouldn’t be considered a full replacement for the classic File Explorer.
Does the shortcut work on all Windows 10 editions?
As long as you’re running Windows 10 ver. 1703 or later, the UWP File Explorer shortcut will work on your computer. To verify if the UWP shell is available on your device, do the following steps:
- Press Win + R, type cmd, and press Enter.
- Input the following command: explorer.exe shell:AppsFolder\c5e2524a-ea46-4f67-841f-6a9465d9d515_cw5n1h2txyewy!App.
- Click Enter and check which of the two options happens:
- If you’re successful in launching the UWP File Explorer, then it’s available on your device.
- If you see an error, it’s not available for use, and the shortcut will not work on your Windows device.
Can the icon be customized further?
Yes, you can use any icon you want for the UWP File Explorer shortcut as long as it’s a valid .ico or resource file. The icon you prefer should also have an accessible path within your device.
Once you have created the shortcut, right-click on it and choose Properties. Under Shortcut, select Change Icon…, and then browse the .ico or resource file you want to use as an icon. Once you’re done, click OK on the first window and Apply on the next one.
Experience touch-optimized navigation through Windows UWP File Explorer
Accessing the hidden UWP version of File Explorer unlocks a simple and minimalist interface perfect for low-resource or touch-oriented environments. Additionally, cutting traditional File Explorer features like the ribbon and context menu creates distraction-free navigation while also providing better security by preventing users from altering system files and running scripts.
Individual users can manually create a UWP File Explorer shortcut by right-clicking the desktop and manually locating the app’s URI. To scale this process easily, administrators can leverage PowerShell to automate the shortcut creation or deploy the shortcut creation process via Group Policy Preferences for consistency across an Active Directory.
Always remember to validate the UWP File Explorer’s compatibility and functionality on target devices before widespread deployment by ensuring they are running at least Windows 10 version 1703. This helps guarantee that the script or group policy you’ll deploy will work as intended.


