

Windows doesn’t have a built-in GUI to find empty folders, making workspace organization time-consuming and tedious. In this guide, we will provide you with methods that will allow you to instantly find empty folders to speed up the organization process and keep your files in order, using the registry and PowerShell.
How to add a “Find empty folders” option to the context menu
📌 Use Case: Adding “Find empty folders” to the context menu allows you to instantly scan unused directories for empty, impractical folders, such as old projects, backups, or shared drives. Not to worry, this function won’t delete these items if you still have a purpose for them.
📌 Prerequisites: Ensure you have administrative privileges and basic familiarity with batch files (.bat) as well as Registry navigation. When following the procedures below, make sure to store the script in a permanent, non-elevated location like C:\Scripts\.
If any of these requirements are unmet, you may experience Access Denied errors, Registry failures, and other instabilities. We recommend checking the ⚠️Things to look out for before proceeding.
📌Recommended deployment strategies:
Click to Choose a Method | 💻 Best for Individual Users | 💻💻💻 Best for Enterprises |
| Method 1: Registry Tweak + Batch Script | ✓ | |
| Method 2: PowerShell Automation | ✓ |
Method 1: Add via Registry tweak and batch script
📌 Use Case: Directly create this option on personal devices by creating a batch script to look for empty folders, and a registry edit to add a functional button in the context menu.
- Create the batch script.
- Open Run (Win + R) or Search, then type and open Notepad.
- Input the following script:
@echo off
set “folder=%1”
echo Scanning for empty folders in: %folder%
for /f “delims=” %%d in (‘dir /ad/b/s “%folder%” ^| sort /R’) do (
dir /a “%%d” | findstr /r “^$” >nul && echo Empty folder found: “%%d”
)
pause - Save the file as C:\Scripts\FindEmptyFolders.bat.
💡 Note: You can use a different path location, as long as the Registry entry matches it.
- Add the context menu entry via the Registry.
- Open a new Notepad.
- Input this registry text:
Windows Registry Editor Version 5.00 [HKEY_CLASSES_ROOT\Directory\shell\FindEmptyFolders]
@=”Find Empty Folders”
“Icon”=”cmd.exe”[HKEY_CLASSES_ROOT\Directory\shell\FindEmptyFolders\command]
@=”\”C:\\Scripts\\FindEmptyFolders.bat\” \”%1\”” - Save the file as Add_FindEmptyFolders.reg.
- Double-click the saved .reg file to merge it into the Windows Registry.
- Click Yes if prompted.
Now, when you right-click any folder, you should see the Find empty folders option.
Method 2: Add via PowerShell scripting
📌 Use Case: This method is for tech-savvy users who want a faster setup. Executing this via script will also allow you to deploy this function across multiple machines in an enterprise environment.
- Create the batch script in the first step of Method 1.
- Press Win + X, then select Terminal (Admin).

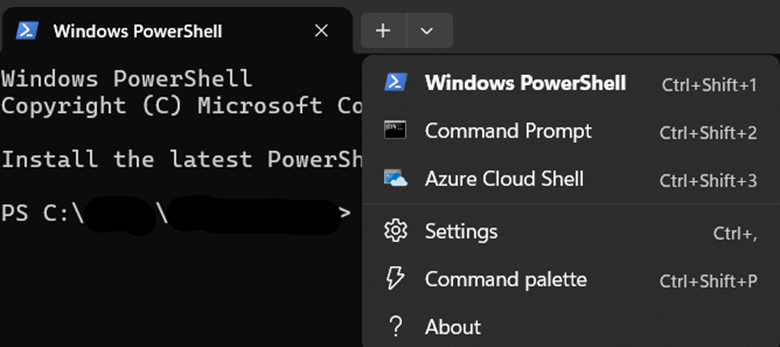
- ccIf PowerShell is not the default command-line tool, click the ▼ dropdown arrow in the tabs above, then select Windows PowerShell.
- ccIf PowerShell is not the default command-line tool, click the ▼ dropdown arrow in the tabs above, then select Windows PowerShell.
- Run these commands to create the context menu entry.
- Create the shell entry:
New-Item –Path “HKCR:\Directory\shell\FindEmptyFolders” -Force | Out–Null
Set-ItemProperty –Path “HKCR:\Directory\shell\FindEmptyFolders” -Name “(default)” –Value “Find Empty Folders”
Set-ItemProperty –Path “HKCR:\Directory\shell\FindEmptyFolders” -Name “Icon” –Value “cmd.exe” - Link to the batch script:
New-Item –Path “HKCR:\Directory\shell\FindEmptyFolders\command” -Force | Out–Null
Set-ItemProperty –Path “HKCR:\Directory\shell\FindEmptyFolders\command” `
-Name “(default)” –Value “`”C:\Scripts\FindEmptyFolders.bat`” `”%1`””💡 Note: Make sure C:\Scripts\FindEmptyFolders.bat matches your script’s actual path.
- Create the shell entry:
- Test it out. Right-click any folder, then check if the Find Empty Folders option appears and works.
How to remove the “Find empty folders” from the context menu
📌 Use Case: If the feature is not useful to you, here’s how to remove “Find Empty Folders”.
Option 1: Remove via Registry Editor
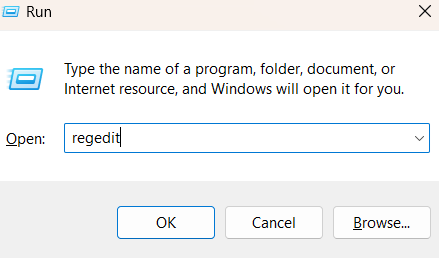
- Press Win + R to open Run.
- Type regedit, then hit Enter to open the Registry Editor.
- Confirm any UAC prompt that pops up.
- Confirm any UAC prompt that pops up.
- Paste on the address bar or go to HKEY_CLASSES_ROOT\Directory\shell\FindEmptyFolders.
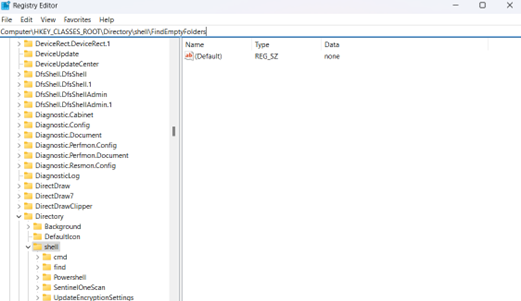
- Right-click the FindEmptyFolders key, then select Delete.
Option 2: Remove via PowerShell
- Press Win + X, then select Terminal (Admin).
- Run this command: Remove-Item -Path “HKCR:\Directory\shell\FindEmptyFolders” -Recurse -Force
Whether you’re simplifying your workflow or deploying changes across a network, these steps ensure clean removal of the feature. For advanced users, consider automating this process through Group Policy or deployment scripts.
⚠️ Things to look out for
This section highlights potential challenges to keep in mind while following this guide.
| Risks | Possible consequences | Reversals |
| 1. Incorrect file paths | Feature fails to launch; error messages | Double-check the script location in Registry. Use copy/paste from the File Explorer address bar. |
| 2. Restricted folders | “Access Denied” errors; script won’t execute | Store scripts in neutral locations (C:\Scripts\); verify folder permissions. |
| 3. Antivirus blocking | Scripts/.reg files quarantined; setup fails | Temporarily disable real-time scanning; whitelist the script folder. |
| 4. Enterprise policies | Registry edits blocked; execution prevented | Obtain IT approval first; use approved deployment tools (Group Policy/Intune). |
| 5. Deletion script errors | Accidental data loss; critical folders removed | Test deletion scripts on dummy folders; keep the default list-only version. (See Pro tips below for details.) |
| 6. Hidden folder oversight | Misses hidden/system empty folders (e.g., .git, AppData) | Add /a parameter to dir command: dir /a /ad/b/s |
| 7. Cloud drive failures | Permission errors on OneDrive/SharePoint/network shares | Run scans directly on local synced copies or server storage |
Pro tips for modifying Find Empty Folders in the context menu
Before finalizing your Find Empty Folders context menu setup, keep these important factors in mind to ensure smooth operation and flexibility.
Batch script behavior
The default script only lists empty folders. It doesn’t delete them, preventing accidental data loss. To delete empty folders automatically, modify the script by adding this line after echo Empty folder found: “%%d”:
rd “%%d” && echo Deleted: “%%d”
⚠️ Warning: Test this on non-critical folders first, before proceeding with the actual folders.
Customization
The script can be tailored for different workflows such as logging results, moving folders, or integrating with other tools. You can log results by adding this line after the echo command:
>> C:\Scripts\empty_folders_log.txt
You can also extend its functionality with PowerShell for advanced filtering, like excluding hidden or system folders.
File Explorer refresh
Unlike some Registry tweaks, context menu updates appear instantly. No need to restart Explorer or reboot. If the option doesn’t appear, check if the Registry path matches the script location or if the .bat file has been moved or renamed.
Enhance your workflow with “Find empty folders”
Adding a “Find Empty Folders” option to your Windows context menu transforms cluttered directory management into a one-click task. For best results, remember to store scripts in accessible locations, customize behavior as needed, and leverage instant Explorer updates without reboots.
With these tools, you can now quickly identify unused directories directly from your right-click menu. Try it today and simplify your file management system.
Related articles:
- How to Add or Remove Previous Versions from the Context Menu and Properties in Windows 11
- How to Add Reset Permissions to the Context Menu in Windows
- How to Add “Take Ownership” to the Context Menu in Windows
- How to Add Copy Path to Context Menu in Windows 10
- How to Add Copy Path to Context Menu in Windows 10


