

Are you constantly juggling countless apps in your Start menu? In Windows 11, grouping pinned apps into tidy folders can instantly declutter your view.
In this guide, we will help you create, manage, and remove these folders for a streamlined layout, whether you’re organizing your shortcuts or making the workflow easier for teams in an enterprise environment.
Step-by-step methods for configuring pinned apps in Windows 11
Organizing pinned apps into folders streamlines your Windows 11 Start menu in seconds.
📌 Use cases: Users usually organize their Start menu pinned apps to reduce visual clutter and lay them out according to their needs. It helps maintain consistent and intuitive access for all users, improving workflow.
📌 Prerequisites: Before you start organizing, ensure your system is on Windows 11 version 22H2 or newer for this feature to be available. Keep in mind that the methods below only apply to pinned apps in Start. Any user can do these procedures, making administrative privileges or tools, like GPO, optional. Just be sure to read ⚠️Things to look out for before proceeding.
📌 Recommended deployment strategies:
| Click to Choose a Method | 💻 Best for Individual Users | 💻💻💻 Best for Enterprises |
| Creating a folder for pinned apps via GUI | ✓ | |
| Rename or Reorganize Folders | ✓ | |
| Remove a Folder | ✓ |
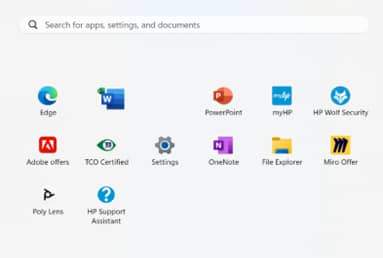
How to create a folder for pinned apps via GUI
This method uses Windows 11’s native Start Menu grouping feature. When you drag one pinned app onto another, the system automatically generates a folder container and preserves app shortcuts.
📌Use case: This is ideal for quick organizational needs, improving visual clarity without being too technical.
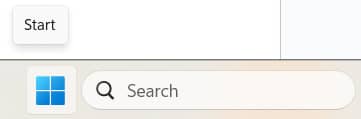
- Open Start menu:
- Click the Windows icon in the taskbar or press the Win key.
- Drag and drop to create:
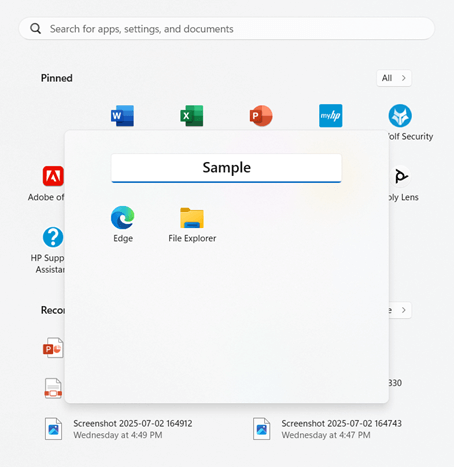
- Hover over a pinned app.
- Click, hold, and drag the pinned app directly on top of another pinned app, then release it.
💡 NOTE: A folder tile will instantly form with both apps inside.
- Customize your folder:
- Drag other pinned apps onto the folder tile to add more to it.
- Click the folder, select Edit name, then type a label for it.
You’ve now grouped your pinned apps in a single folder, similar to how folders are done on mobile devices.
How to rename and reorganize pinned app folders
Pinned app folders are dynamic, customizable folders. Their names update in real time, and they are automatically removed when one app is left to prevent empty folders. Their layouts adapt when apps are moved around.
📌 Use case: This helps simplify the process when auditing app access and rapidly changing Start menu layouts.
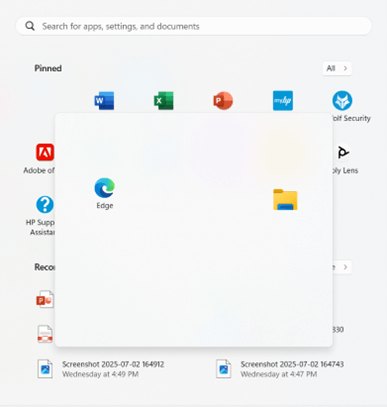
- Open the pinned apps folder:
- Click any pinned apps folder on your Start menu.
- Rename instantly:
- Select the text field, type a new label for the folder, and then press Enter.
- Add or remove apps:
- Remove an app: Drag a pinned app out of the folder, then release it back into the pinned apps area of the menu.
💡 Note: After removing apps until only one remains, the folder will automatically vanish.
- Add an app: Drag a new app from the menu into the open folder.
How to delete a pinned apps folder
These folders are treated as temporary containers and are deleted automatically when only one app is left in it.
📌Use case: You can do this when resetting layouts in your Start menu and decluttering workstations.
- Open a folder:
- Click any pinned apps folder on your Start menu.
- Remove apps individually:
- Drag each app out of the folder. You can either drag it:
- Back into the pinned apps area of the Start menu,
- OR release it anywhere outside the Start menu, like on the desktop, to unpin it completely.
- Drag each app out of the folder. You can either drag it:
- Trigger auto-deletion:
- When only one app remains, the folder vanishes instantly.
⚠️ Things to look out for
This section highlights potential challenges to keep in mind while following this guide.
| Risks | Potential Consequences | Reversals |
| 1. Accidental folder creation during app reorganization | Unintended folders clutter the Start Menu layout. | Drag all apps out to auto-delete the folder. Re-pin apps individually if needed. |
| 2. App unpinning during removal (Dragging apps outside the pinned area) | Critical shortcuts disappear from the Start Menu. | Re-pin via the All Apps list by right-clicking the app > select Pin to Start. |
| 3. Folder auto-deletion when one app remains during cleanup | The folder dissolves unexpectedly if the last app is moved. | Recreate folder: Redrag the remaining app onto a new partner app. |
| 4. Name reset after a Windows update | Windows feature updates may reset custom folder names. | Reapply names manually or via Group Policy XML backup. |
| 5. Touchscreen misplacement (Imprecise drag/drop) | Apps land in the wrong folders or are unpinned. | Use the mouse/trackpad for precision. Enable Press and hold in touchscreen settings. |
| 6. Sync conflicts for multi-device users | Folder layouts mismatch across devices if the backup is disabled. | Enable them by going to Settings > Accounts > Windows Backup > Start layout sync. |
Key considerations when grouping pinned apps into folders
Policy control for enterprises
While Windows 11 allows individual users to create app folders manually, IT administrators should note that Group Policy (GPO) or XML provisioning is required for enterprise-wide deployment.
You can export a configured Start Menu layout (including folders) via PowerShell or Settings, but app groupings won’t automatically apply via standard policies. This means manual setup remains necessary unless you distribute custom layout files.
Touchscreen compatibility
For touch-enabled devices, grouping apps in Start Menu folders works seamlessly. The drag-and-drop gestures mirror smartphone interfaces, such as pressing and holding an app to drag it onto another. This ensures tablets or 2-in-1 devices retain full functionality without mouse dependency.
Folder limitations
Windows 11’s implementation has intentional constraints:
- No nested folders: You cannot place one folder inside another.
- Grid rigidity: Folders show apps in fixed grids.
- Capacity limits: Folders can hold up to 48 apps before requiring you to scroll to see the rest.
- No customization: Custom backgrounds, spacing, or collapsible sections aren’t supported. Only renaming of the folder and sorting of pinned apps inside it.
Roaming profiles and sync
By default, your pinned app folders won’t roam across devices. To sync layouts:
- Enable via Settings > Accounts > Windows Backup > Remember my preferences for personal Microsoft accounts.
- Use Enterprise State Roaming or exported XML layouts in Active Directory environments.
Without these, you’ll need to recreate the folders manually on each device.
Declutter your Start menu with grouped pinned apps
Grouping pinned apps in Windows 11 transforms your Start Menu from a cluttered app list into an efficient, role-specific dashboard—all through intuitive drag-and-drop. This native feature requires zero technical overhead yet delivers maximum organization. Use this guide to improve layout clarity, leading to better productivity.
Related topics:


