The Windows 10 operating system is a cornerstone for millions of users worldwide. Amidst its many features, the Start Menu plays a pivotal role as the launchpad to a vast array of applications and functionalities.
If you’ve ever found yourself wishing for a more personalized and efficient Windows computing experience, you’re in the right place. In this article, we’ll go over how to customize the Windows 10 Start Menu to match your preferences, enhance productivity, and bring a touch of individuality to your digital workspace.
This exploration won’t require an advanced degree in computer science; instead, it’s a user-friendly look at simple, effective tips that empower you to shape your computing environment. Whether you’re seeking a streamlined layout, unique visual aesthetics, or a more intuitive organization of your favorite apps, we’ve got you covered.
Understanding the Windows 10 Start Menu
What is the Start Menu? Well, this versatile gateway sits at the core of the Windows 10 user interface and plays a pivotal role in navigating the operating system’s expansive landscape.
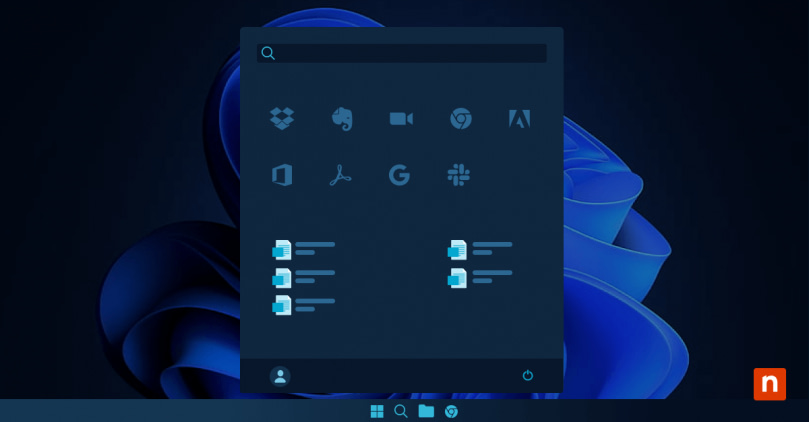
The basic layout of the Start Menu is a two-column design, with the left column featuring a list of frequently used and recently added applications, as well as access to power options and user account settings. Meanwhile, the right column is dedicated to customizable tiles, offering quick access to apps, live updates, and personalized shortcuts. This intuitive layout ensures easy navigation and efficient access to a wide variety of functions.
Beyond its structural elements, the Start Menu serves as the nerve center for daily computing tasks. The Windows Start Button acts as a launchpad, enabling users to swiftly open applications, search for files, and access various settings.
With its user-friendly design and central placement in the Windows ecosystem, this shortcut plays a crucial role in streamlining workflows, enhancing productivity, and providing a seamless experience for users across a spectrum of computing needs. Understanding its components and functions unlocks the potential for a tailored, efficient, and personalized computing experience.
Where is the Start Menu in Windows 10?
On the center or left end of the taskbar, depending on your Windows settings. Select the Windows Start Menu icon to activate the complete menu with tiles and applications.
How to customize the Windows 10 Start Menu with these techniques
Adding and removing apps
Pinning and unpinning apps: Customizing your Start Menu begins with managing the apps you use most frequently. To pin an app to the Start Menu, simply right-click on the desired application and select “Pin to Start.”. To declutter and remove apps, right-click on the tile and choose “Unpin from Start.” This straightforward process ensures your Start Menu is populated with the applications that align with your daily tasks.
Organizing apps into folders and groups: For a more organized approach, you can create folders and groups on the Start Menu. Drag and drop an app onto another to automatically create a Windows 10 Start Menu folder. This enables you to categorize and group related apps, providing a cleaner and more streamlined experience.
Personalizing the layout
Resizing the Start Menu and tiles: Tailor the size of your Start Menu by dragging its edges to make it more compact or expansive, depending on your preferences. Similarly, Windows tiles can be resized for a more visually balanced user interface. Right-click on a tile, choose “Resize,” and select the preferred size to create a personalized and aesthetically pleasing arrangement.
Changing the color and theme: Give your Start Menu a touch of personal style by changing its color and theme. Navigate to “Settings,” select “Personalization,” and then click on “Colors.” Here, you can choose an accent color and toggle between light and dark modes to match your preference.
Using Live Tiles
Activating and configuring Live Tiles: Bring your Start Menu to life with Live Tiles, which provide real-time updates from your favorite apps. Right-click on a tile, select “More,” and choose “Turn live tile on.” Customize the content and layout according to your preference to stay informed without opening individual applications.
Managing notifications and updates: Stay in the know by managing notifications and updates through Live Tiles. Control the information displayed and receive timely updates directly on the Start Menu, ensuring you’re informed without disrupting your workflow. This dynamic feature transforms your Start Menu into an interactive and efficient hub tailored to your specific needs.
Advanced customization features
Exploring third-party software options
For users seeking a more extensive range of customization beyond Windows 10’s native capabilities, third-party software solutions offer advanced tools.
Applications like “Start10” and “Open-Shell” provide in-depth customization options, allowing users to modify the Start Menu appearance, behavior, and additional features. While using third-party software can enhance customization, it’s important to only choose trusted add-ons from reputable sources to ensure compatibility and security.
Tweaking registry settings for advanced users
For the tech-savvy users, delving into the Windows Registry provides a wealth of customization options.
Exercise caution, however, as modifying the registry can have system-wide implications if done incorrectly. Navigate to the Registry Editor by typing “regedit” in the Start Menu search bar. Here, you can adjust various settings related to the Start Menu, such as icon spacing, animation speed, and more. Always create a backup before making changes, and only modify settings if you are confident in your understanding of the registry.
Cautionary Note: Modifying registry settings is inherently risky. Proceed with caution, and only make changes if you are familiar with the consequences. Incorrect alterations may lead to system instability or even data loss. If uncertain, seek guidance from reliable sources or enlist help from an IT professional.
Customizing the Start Menu for multiple users or enterprise environments
In scenarios involving multiple users or enterprise environments, Windows 10 provides Group Policy settings to centrally manage and customize the Start Menu. IT administrators can use Group Policy to enforce specific Start Menu configurations across all users or certain user groups.
This ensures a consistent user experience, facilitates efficient deployment of applications, and streamlines management in large-scale environments. Group Policy settings offer a powerful toolset for tailoring the Start Menu to organizational needs, enhancing user productivity, and maintaining a standardized computing environment.
Troubleshooting common issues
Customizing the Windows 10 Start Menu can sometimes lead to unexpected issues. Here are some common problems and their solutions:
- Missing or blank tiles: If tiles disappear or appear blank after customization, try restarting the Windows Explorer process. Press Ctrl + Shift + Esc to open Task Manager, locate Windows Explorer under the Processes tab, right-click it, and select Restart.
- Start Menu not opening: If the Start Menu fails to open after customization, a system restart may resolve the issue. Additionally, running the Windows Start Menu troubleshooter can automatically detect and fix problems related to Start Menu functionality.
- Inconsistent layout: If the layout changes unexpectedly or fails to save, ensure that the “Auto arrange tiles” option is disabled. Right-click on an empty area of the Start Menu, select More > Settings, and toggle off “Automatically arrange tiles.”
- Slow performance: Excessive customization can sometimes impact system performance. Consider reducing the number of live tiles or removing unnecessary customizations to improve responsiveness.
What is the Windows Start Menu troubleshooter?
Microsoft created a Start menu troubleshooter for Windows 10 that will troubleshoot and attempt to automatically fix your Start Menu problems.
Here’s how to use it:
1. Download the Start menu troubleshooter ZIP file from Microsoft, and save the Start_Menu_troubleshooter.zip file to your desktop.
2. Open the Start_Menu_troubleshooter.zip file, and extract (drag and drop) the startmenu.diagcab file to your desktop.
3. Run the startmenu.diagcab file. The Start menu troubleshooter will only run and will not install any additional files.
4. Click/tap on the Advanced link in the Start menu troubleshooter.
5. Check the Apply repairs automatically box, and click/tap on Next.
6. The Start menu troubleshooter will now check for problems with the Start menu.
7. If the troubleshooter finds any problems, it will attempt to automatically fix them. You can click/tap on View detailed information to see the troubleshooting report details.
Restoring default settings in case of errors or preference changes
When troubleshooting fails or if you wish to revert to the original Start Menu layout, restoring default settings is a straightforward solution:
- Resetting the Start Menu: To reset the Start Menu layout to its default state, right-click on an empty area of the taskbar, select Taskbar settings, then scroll down and click on “Reset” under the “More options” section. Confirm the action to reset the Start Menu layout.
- Using System Restore: If customization issues persist, you can utilize System Restore to revert your system to a previous state. Search for “Create a restore point” in the Start Menu search bar, click on “System Restore,” and follow the prompts to select a restore point before the customization changes were made.
- Creating a New User Profile: As a last resort, creating a new user profile can resolve persistent Start Menu issues. Go to Settings > Accounts > Family & other users, click on “Add someone else to this PC,” and follow the prompts to create a new user account. Log in with the new account to access the default Start Menu layout.
By addressing these common problems and knowing how to restore default settings, you can ensure a smooth and hassle-free experience with customizing the Windows 10 Start Menu.
In summary
Customizing the Windows 10 Start Menu empowers users to customize the taskbar and tailor their computing experience to suit their own preferences and workflows. From adding and organizing apps to leveraging advanced customization techniques, the Start Menu offers a wealth of possibilities for enhancing productivity and efficiency.
The already low risk of error can be minimized further, of course. By troubleshooting common issues and knowing how to restore default settings when necessary, you’re able to navigate the customization process with confidence.
Now, it’s time to embrace the flexibility and creativity afforded by the Windows 10 Start Menu and unlock the full potential of your digital workspace!

