

Key points
- File History is a legacy Windows 11 backup feature that automatically saves copies of files in your library folders to an external drive or network share.
- Enable File History via Control Panel: Connect an external drive, open Control Panel > System and Security > File History, and select “Turn on.”
- Disable or Manage File History Settings Easily: Revisit the same Control Panel path and select “Turn off.”
- Compare File History vs. Modern Windows Backup Options: In Windows 11, Microsoft recommends Windows Backup and OneDrive Folder Backup as default cloud-sync solutions. File History remains a local, offline alternative.
- Troubleshoot File History Errors: If File History is disabled, Windows 11 Pro users can reenable it via the Local Group Policy Editor. Home users can adjust the registry key (HKEY_LOCAL_MACHINE\SOFTWARE\Policies\Microsoft\Windows\FileHistory) by setting “Disabled” to 0.
This step-by-step tutorial shows you how to enable or disable File History in Windows 11. File History is one of Windows’ built-in backup features, and while it’s now a legacy tool, it can still be used to make sure your data is safe and protected from data loss. In addition to instructions on how to configure File History, this guide explains how this feature works and how to properly use it, as well as suggests more effective alternatives that can replace it.
Need to manage file versions fast? Watch how to enable or disable file history in Windows 11 now.
Prevent the loss of critical data with reliable backup software.
What is Windows File History, and how does it work?
File History was introduced in Windows 8 as a file backup option. While it still exists (and can be used) in Windows 11, it has been mostly neglected by Microsoft and is no longer the recommended way to back up a Windows PC.
File History backs up your files by periodically copying them to an external drive or network share. It keeps these copies for a specified period, so if you accidentally delete or modify a file, you can go back to a previous version of it. If you set your File History drive to use an external device (like a USB hard drive or network share on a different machine), it also protects you from losing your files in the event that your computer is lost or stolen.
Windows File History isn’t a comprehensive backup solution, and is limited to storing files in your default user libraries. For instance, in Windows 11, File History backs up specific folders (e.g., Documents, Desktop, Pictures) by default. While you can include other folders, it’s easy to forget to add them as they’re created, and this often creates a gap in backup coverage. This makes it one of the least preferable Windows backup solutions, but still a useful tool for the lack of other options.
When to use File History vs. other Windows Backup options
Other Windows 11 backup options that you can use instead of File History are as follows:
- OneDrive backup: This is Microsoft’s recommended solution for Windows 11 home users. Your files are synchronized to the online OneDrive service, and previous versions of your files can be restored from there. OneDrive backup can be configured from the Windows Settings app, where it’s prominently featured as the default backup option.
- Windows backup: Microsoft also emphasizes Windows Backup as a worthwhile backup option, which integrates OneDrive and local drives. This can be enabled via Settings → Accounts → Backup in your Windows 11 system.
- System image backup: This is a legacy feature, but it still exists in the Windows 11 Control Panel and allows you to take a full backup of your system, including the operating system, and all programs and files. Restoring a system image brings your computer back to the exact state it was in when the image was taken.
- Backup and Restore (Windows 7): The Backup and Restore tool that was introduced in Windows 7 is still available in Windows 11 from the Control Panel, but this is also a legacy feature and may be removed in future Windows builds.
- Third-party solutions: Enterprise-grade backup solutions with enhanced reliability and coverage are usually deployed in business-critical environments (this is discussed later in the article)
Despite being named similarly to other Windows backup features, Windows System Restore should not be relied on as a backup solution. System Restore creates restore points for Windows system files and settings only, and does not capture your personal files. It’s only suitable for rolling back after a Windows update or other software issue that affects your system’s stability or operation.
How to enable File History in Windows 11
If you wish to use File History in Windows 11 (either as a stop-gap measure or because you’re familiar and comfortable with its behavior and limitations), follow these steps:
- Ensure you have an external hard drive or network share connected for storing File History data.
- Open the Control Panel from the Start menu
- Select System and Security, followed by File History
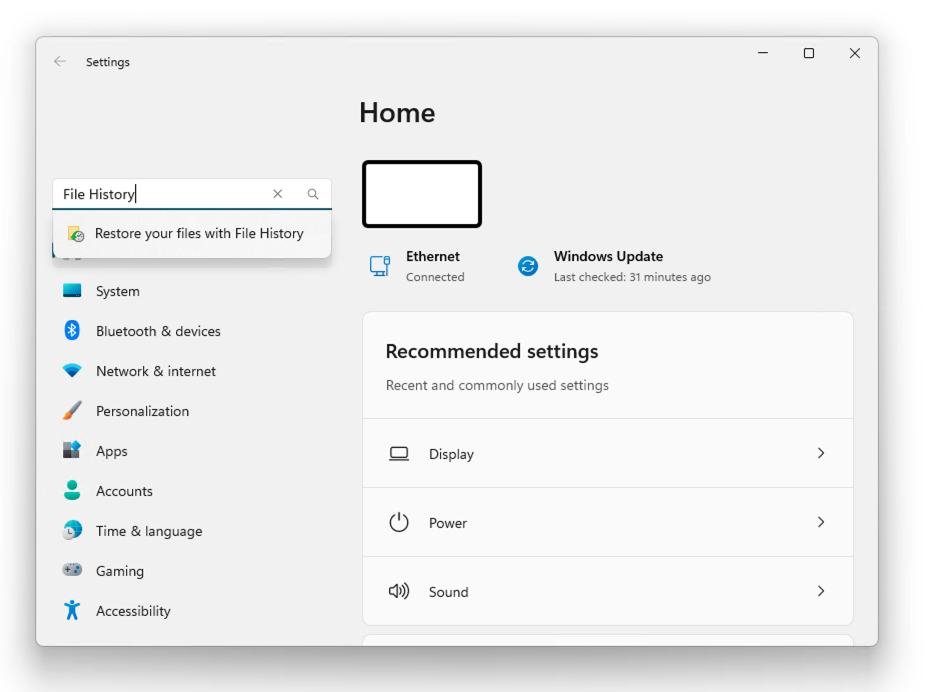
- Click Turn On next to the drive or network location that you want to store File History data in.

Note that the drive you enable Windows File History for isn’t the drive that will be backed up; rather, this drive will be the destination for backup data from your user libraries and other specified folders.
Once you’ve enabled File History, you can
- click Exclude folders and specify any directories you don’t want to be backed up or
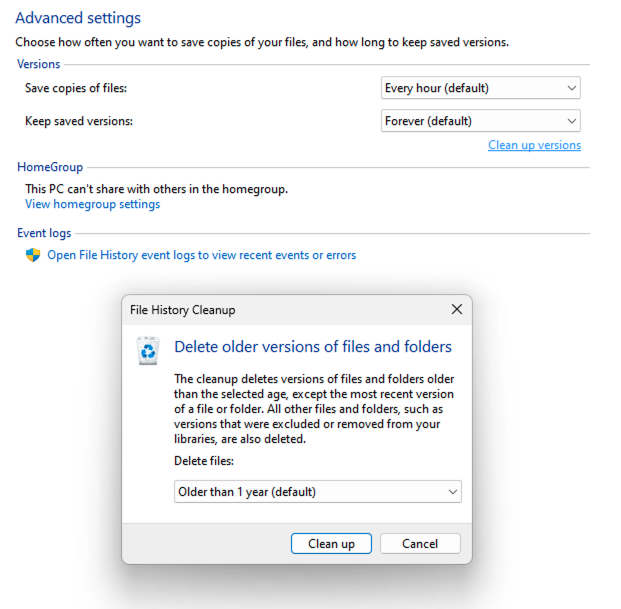
- use Advanced settings to set how frequently files should be backed up and how long those backups should be kept for.
How to disable File History in Windows
To turn off Windows 11, simply follow the steps above, but click Turn off next to each drive or network share that File History is saving data to.
Troubleshooting common File History issues
File History is relatively simple to use, but you may face some common issues:
- If your external File History drive or network share is disconnected, File History data will be cached on your local hard drive until your File History drive is reconnected. This can quickly eat up disk space on mobile devices that aren’t frequently connected to a backup location.
- It’s possible to select your local hard drive as your File History drive. While this is useful for keeping previous versions of files to roll back to if you accidentally delete or edit something, it provides no protection if your device is lost, stolen, or damaged (as the backups are stored on the same device).
- If you find that your backup drives are filling up too quickly, you can tweak the frequency and retention periods for previous versions of files. This can reduce the amount of space required for backups. You can also manually use the Clean up versions function to purge old backups.
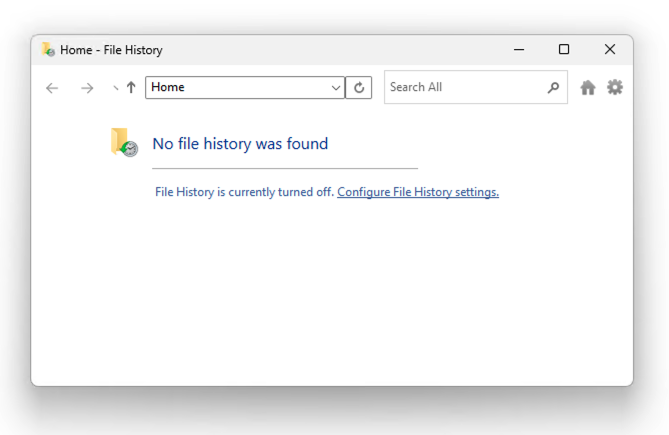
If you can’t access File History at all, it may be disabled via Group Policy. This is outside your control in an enterprise environment that uses a Windows Domain, but on Windows 11 Pro PCs that aren’t part of a domain, you can re-enable File History if you have Administrative privileges:
- Open the Local Group Policy Editor
- Navigate to this location Computer Configuration\Administrative Templates\Windows Components\File History
- Double click Turn off File History in the right panel
- Set the State to Not configured (the default) or Disabled to re-enable File History
- If you want to disable access to File History on your system instead, set the State to Enabled
- Click OK to save this change
- Reboot your machine, or run gpupdate /force from the Command Prompt to ensure the change has taken effect
If you’re running Windows 11 Home (and don’t have access to the Local Group Policy Editor), you can use the Registry Editor to re-enable File History instead:
- Open the Registry Editor
- Navigate to this key HKEY_LOCAL_MACHINE\SOFTWARE\Policies\Microsoft\Windows\FileHistory
- Delete the Disabled entry, or set its value to 0
To disable access to File History using the registry, set the value back to 1.
- If this key does not exist, right-click in the HKEY_LOCAL_MACHINE\SOFTWARE\Policies\Microsoft\Windows key, select New > Key and rename the new key to FileHistory
- Within the FileHistory key, right-click in an empty space in the right panel and select New > DWORD (320bit) Value
- Enter Disabled for the DWORD name and set its value data to 1
Strengthen your Windows data protection our comprehensive backup solution.
Windows built-in backup and imaging don’t always meet enterprise requirements
Windows includes a number of legacy backup tools, including
- File History,
- System Images, and
- System Restore.
Unfortunately, their purpose and functionality can be unclear, undermining confidence that important files are frequently and comprehensively backed up. In the long term, these legacy options may receive only maintenance updates; for critical or enterprise data, organizations should consider modern supported full-system backup/replication solutions.
While OneDrive is a sufficient Windows backup solution for most home users, businesses require reliable backup solutions that protect vital business data and allow employees to get back up and running quickly in the event of a damaged, lost, or stolen device.
Cloud-based backup with NinjaOne safeguards your vital data across Windows, Apple, and Android devices, protecting you from data loss and allowing you to centrally monitor the status of each device, ensuring full backup coverage. Your data can be stored on-site or in the cloud, giving you full control, and users can perform self-service file restoration, streamlining IT support operations.


