

Windows Protected Print Mode (a.k.a. WPP) uses the modern print stack exclusively, eliminating the need for third-party apps and drivers. This simplifies and centralizes the printing process, minimizing the attack surface of environments that leverage the feature.
Methods to manage Windows 11 Protected Print Mode
WPP is disabled by default in Windows 11 systems, allowing users to connect and use any printer. However, relying on multiple printer drivers and software increases vulnerability to security threats. For organizations prioritizing security and simplicity, driverless printing with WPP offers better security is the way to go.
📌 Prerequisites:
- Windows 11 24H2 or later versions
- Administrator privileges
- Mopria-certified printers for WPP compatibility
📌 Recommended deployment strategies:
Click to Choose a Method | 💻 Best for Individual Users | 💻💻💻 Best for Enterprises |
| Method 1: Control WPP through the Windows Settings app | ✓ | |
| Method 2: Configure WPP via the Local Group Policy Editor | ✓ | ✓ |
| Method 3: Manage Windows Protected Print Mode via the Registry Editor | ✓ | |
| Method 4: Automate the Registry process using PowerShell scripts | ✓ | ✓ |
| Method 5: Use a .reg file for scriptless management of Windows 11 WPP | ✓ | ✓ |
(See ⚠️ Things to look out for.)
Method 1: Control WPP through the Windows Settings app
The easiest way to enable or disable Protected Print mode is through the Windows Settings app. By navigating the GUI, users are provided access to toggle the WPP feature.
📌 Use Case: This method is ideal if you want to quickly toggle the WPP system-wide locally.
- Press Win + I and navigate to Bluetooth & devices > Printers & scanners.
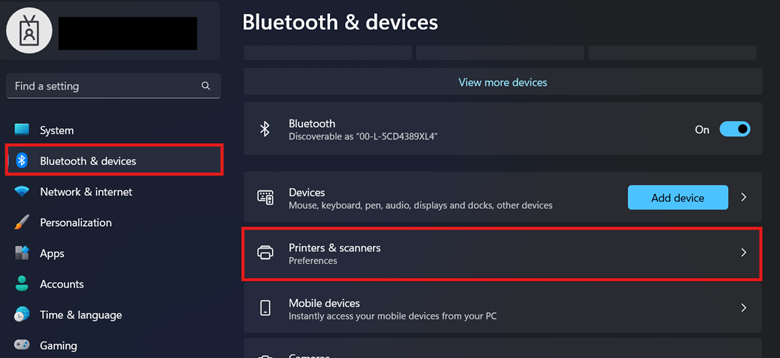
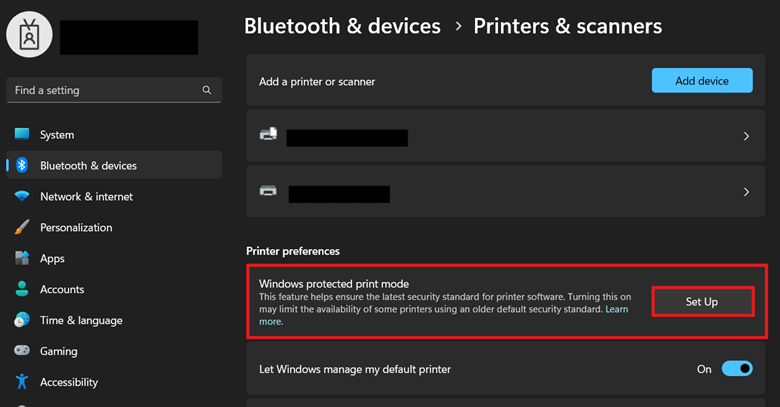
- Under Printer preferences, press Set up beside Windows protected print mode.
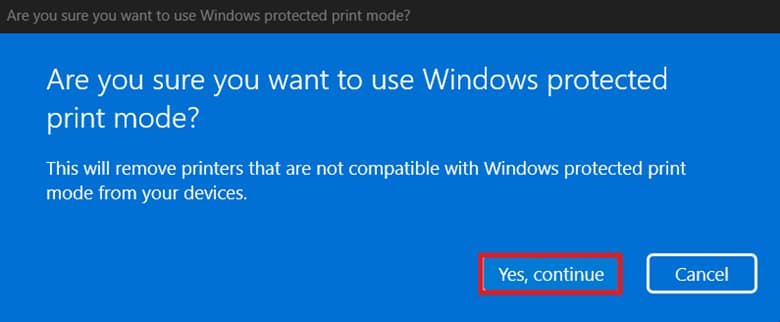
- Complete the subsequent prompts by pressing Yes, continue.
- To disable the feature, select Turn Off beside Windows protected print mode.
Method 2: Configure WPP via the Local Group Policy Editor
The Local Group Policy Editor provides Group Policy templates that are easy to modify and reverse. When paired with the Group Policy Management Console (GPMC), this can be centrally deployed across an Active Directory for WPP consistency.
⚠️ Important: Before deploying policies via GPMC, it’s recommended to first test configurations on a local machine. (See ⚠️ Things to look out for.)
📌 Use Cases: Managing WPP via Local Group Policy Editor locks out users from configuring the feature via Windows Settings. Additionally, this method is ideal for testing WPP policy configurations locally before deployment.
- Press Win + R, type gpedit.msc, and press Ctrl + Shift + Enter.
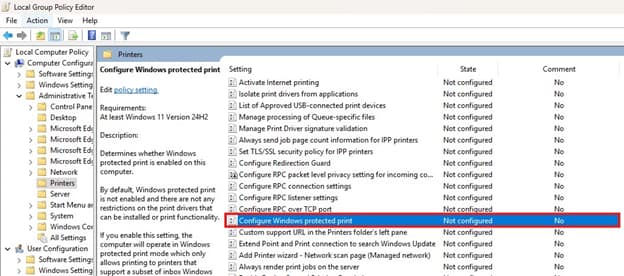
- Go to: Computer Configuration > Administrative Templates > Printers
- Double-click the Configure Windows protected print policy.
- Set the policy to match your preferred WPP behavior:

- Enabled: This turns on WPP for all local users.
- Disabled: This turns off WPP for all local users.
- Not Configured: Turns off WPP and allows end-users to configure the feature locally.
- Select Apply, OK, then reboot the device to apply the changes.
💡 Tip: Alternatively, you can stop the print spooler to avoid rebooting your device. Open an elevated PowerShell prompt and enter the following: Restart-Service spooler
Method 3: Manage Windows Protected Print Mode via the Registry Editor
The Registry offers direct control of WPP-related values, which is ideal for devices with no Local Group Policy Editor access.
⚠️ Warning: Registry changes apply instantly, and misconfigurations can negatively impact device performance and stability. (See ⚠️ Things to look out for.)
📌 Use Case: This method is suitable for enforcing WPP configurations for non-domain local devices.
📌 Prerequisite: Windows Registry backup
- Press Win + R, type regedit, and press Ctrl + Shift + Enter.
- Navigate the following path: HKEY_LOCAL_MACHINE\SOFTWARE\Policies\Microsoft\Windows NT\Printers\WPP
- If Printers doesn’t exist, right-click Windows NT.
- Select New > Key, and name it Printers.
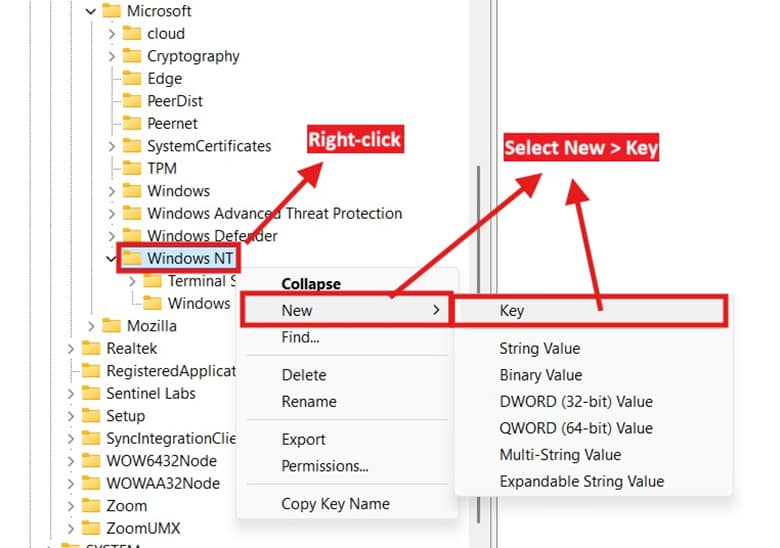
- Right-click Printers, select New > Key, and name it WPP.
- Find WindowsProtectedPrintMode and WindowsProtectedPrintGroupPolicyState DWORD values.
- If the DWORD doesn’t exist, right-click Windows NT.
- Select New > DWORD (32-bit) Value, and name it WindowsProtectedPrintMode.
- Repeat the same step for WindowsProtectedPrintGroupPolicyState.
- Modify the value data inside WindowsProtectedPrintMode:
- 1 = Enables protected print mode
- 0 = Disables protected print mode
- Press OK to apply the changes.
- Modify the value data inside WindowsProtectedPrintGroupPolicyState.
- 1 = Prevents end-users from toggling WPP via Windows Settings
- 0 = Allows end-users to toggle WPP via Windows Settings
- Press OK, and restart the device to apply the changes.
Method 4: Automate the Registry process using PowerShell scripts
You can implement the Registry process for multiple endpoints; however, it gets more repetitive and error-prone at scale. That said, you can use PowerShell to make the deployment process for non-domain endpoints easier.
📌 Use Case: PowerShell can help administrators automate the Registry process, ensuring consistent WPP configuration across all endpoints.
📌 Prerequisite: Windows Registry backup
- Press Win + R, type PowerShell, and press Ctrl + Shift + Enter.
- Enter the script that best reflects the WPP configuration you prefer:
- To enable Windows Protected Print Mode:
$regPath = “HKLM:\SOFTWARE\Policies\Microsoft\Windows NT\Printers\WPP”
New-Item -Path $regPath -Force -ErrorAction SilentlyContinue | Out-Null
New-ItemProperty -Path $regPath -Name “WindowsProtectedPrintMode” -Value 1 -PropertyType DWORD -Force | Out-Null
Restart-Service spooler - To disable Windows Protected Print Mode:
$regPath = “HKLM:\SOFTWARE\Policies\Microsoft\Windows NT\Printers\WPP”
New-Item -Path $regPath -Force -ErrorAction SilentlyContinue | Out-Null
New-ItemProperty -Path $regPath -Name “WindowsProtectedPrintMode” -Value 0 -PropertyType DWORD -Force | Out-Null
Restart-Service spooler
- To enable Windows Protected Print Mode:
- If you want to enforce this, add the following command:
New-ItemProperty -Path $regPath -Name “WindowsProtectedPrintGroupPolicyState” -Value 1 -PropertyType DWORD -Force | Out-Null - Wait for the script to finish applying, and then close the PowerShell prompt.
💡 Note: Since the PowerShell script restarts the print spooler automatically, there’s no need to restart your device.
Method 5: Use a .reg file for automated management of Windows 11 WPP
By using a .reg file, you can swiftly apply your preferred WPP registry configuration with two clicks.
📌 Use Cases: This method is ideal for quick enforcement of registry value changes for a small number of machines. It’s also suitable for deploying configurations for airtight environments without a domain controller or remote PowerShell access.
📌 Prerequisite: Windows Registry backup
- Open a new Notepad .txt file.
- Copy the text that reflects the WPP configuration you want:
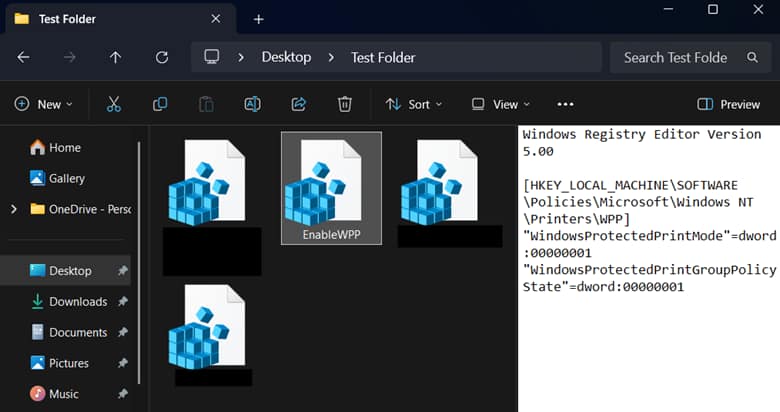
- Enable protected print mode:
Windows Registry Editor Version 5.00 [HKEY_LOCAL_MACHINE\SOFTWARE\Policies\Microsoft\Windows NT\Printers\WPP]
“WindowsProtectedPrintMode”=dword:00000001
“WindowsProtectedPrintGroupPolicyState”=dword:00000001 - Disable protected print mode:
Windows Registry Editor Version 5.00 [HKEY_LOCAL_MACHINE\SOFTWARE\Policies\Microsoft\Windows NT\Printers\WPP]
“WindowsProtectedPrintMode”=dword:00000000
“WindowsProtectedPrintGroupPolicyState”=dword:00000001
- Enable protected print mode:
- Once you’re done, press Ctrl + Shift + S.
- Select the path where you’ll save the .reg file.
- Add a .reg extension after your file’s name and change Save as type to All files.

- Press Save and find the newly created .reg file.
- Double-click the .reg file to merge its content into the Registry.
- Restart your device or print spooler to apply the changes.
⚠️ Things to look out for
Risks | Potential Consequences | Reversals |
| WPP removed access to other printers | Printer devices that utilize deprecated APIs will not function properly if WPP is enabled. | Audit your printer fleet and ensure they are all Morpia-certified to guarantee printer functionality after WPP configuration. |
| Not testing before deployment | Misconfigurations can negatively affect an environment if mistakenly deployed. | Always test configurations on a local machine to verify their impact before deployment. |
| Directly modifying registry values | Registry changes apply immediately, and misconfigurations can cause system instability. | Back up the Registry before making changes to allow easy rollback if needed. |
| Changes don’t apply after configuration | A restart of the print spooler is required for WPP changes to take effect. | Open an elevated PowerShell and enter Restart-Service spooler. Alternatively, you can reboot your device to achieve the same effect. |
Considerations when fixing Windows Protected Print Mode
Aside from managing policies and changing Registry values, you should also know the technical and operational impact of WPP configurations. Below are additional points you should know if you plan to enable Windows 11 WPP for your environment:
Event logging and monitoring
You can find operational logs within Event Viewer to get more insight into WPP-related activities on a local machine. To do this, launch Event Viewer and go to Application and Services Logs > Microsoft > Windows > PrintService.
User impact and network configuration
Once WPP is enabled system-wide, all users won’t be able to install or use non-Morpia-certified printers. On top of that, protected print mode relies on the Internet Printing Protocol (IPP). To ensure that the feature works smoothly, it’s important to ensure that the IPP isn’t blocked by any firewall policies.
Turn on Windows 11 WPP to enhance endpoint security
The Windows Protected Print Mode adds another layer of security for organizations seeking to minimize their attack surface. Enabling this feature restricts third-party drivers from interacting with the print stack, reducing exposure to print spooler exploits.
End-users can toggle this system-wide via Windows Settings, and administrators can enforce this change using Group Policy or the Registry. Additionally, the registry change can be automated with PowerShell or a .reg file.
Related topics:
- How to Uninstall a Printer Driver in Windows
- How to Back Up and Restore Printers in Windows
- How to Fix Printer Error 0x0000011B in Windows 11
Quick-Start Guide
Here’s how to enable or disable Windows Protected Print Mode in Windows 11:
Through Windows Settings:
1. Open Settings (Win+I)
2. Go to Bluetooth & devices > Printers & scanners
3. Scroll down and look for “Windows protected print mode”
4. Click the “Turn Off” or “Turn On” button to toggle the setting
Important Notes:
– Windows Protected Print Mode (WPP) is a security feature in Windows 11 version 24H2 and later.
– When enabled, it prevents the creation of print queues that are not IPP (Internet Printing Protocol) based.
– It forces a driverless printing model, eliminating risks associated with third-party printer drivers.
– Caution: Turning on WPP may remove older, non-compliant printer drivers.
NinjaOne does not have a specific built-in tool for managing this setting beyond the standard Windows settings. Administrators would need to configure this manually or through group policy on individual machines.
If you’re experiencing compatibility issues or need more precise control, you may want to consult with your IT department or the specific printer manufacturer for detailed guidance.


