

This tutorial demonstrates how to hide Account Protection in Windows 10 and Windows 11. This removes the Account Protection section from Windows Security, preventing users from seeing and altering the settings in it.
How to hide account protection for all users using the Local Group Policy Editor
The Local Group Policy Editor is only available in the Pro, Enterprise, and Education editions of Windows 10 and Windows 11 (you’ll need to use the Registry Editor method detailed below if you’re running Windows 10/11 Home). Before you begin, you should back up your Local Group Policy in case you need to restore it later.
You will need to be logged in as an administrator to use the Local Group Policy Editor. The steps below will work unmodified on both Windows 10 and Windows 11:
- Right-click on the Start button and select Run
- Enter the command gpedit.msc and click OK to open the Local Group Policy Editor
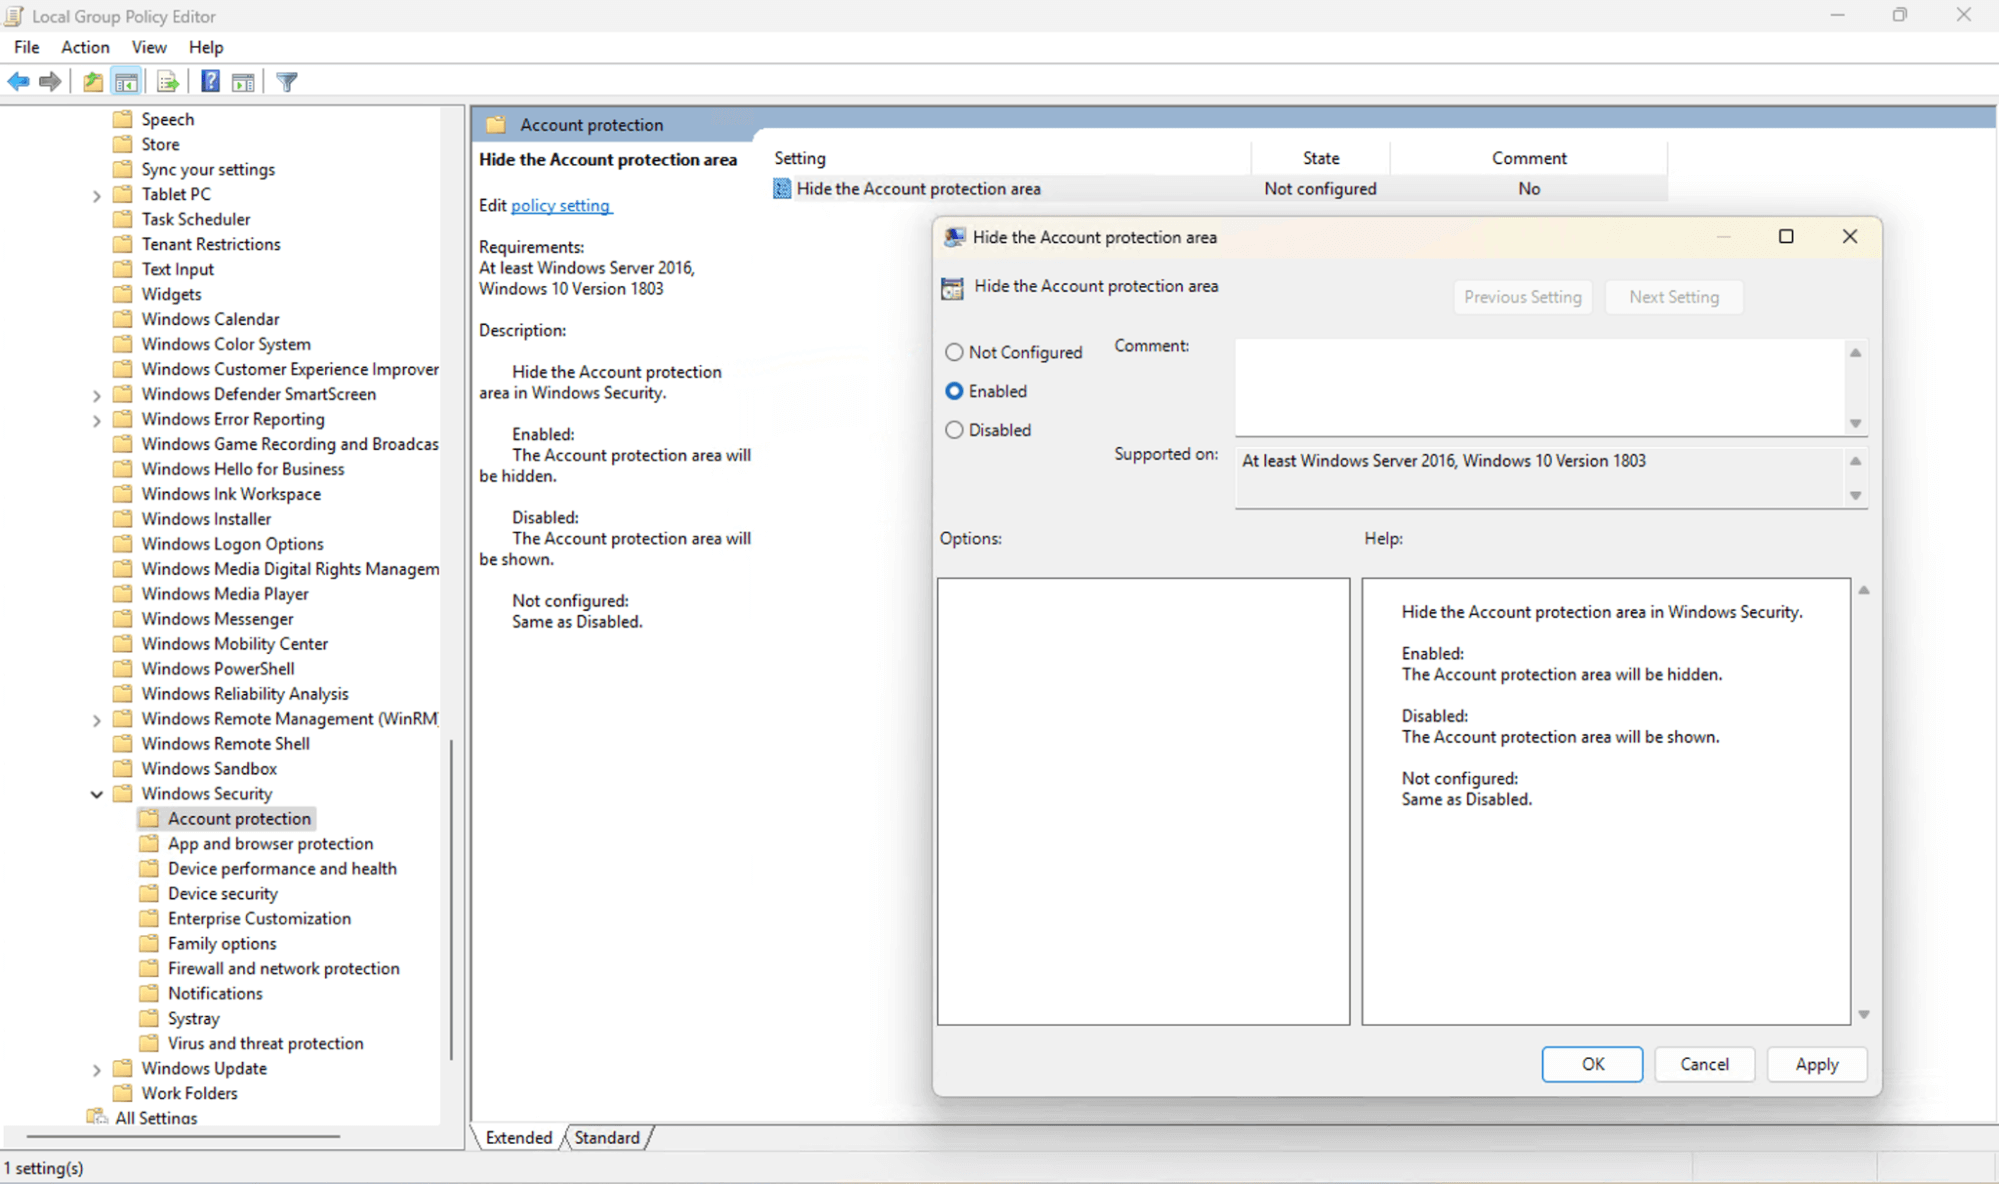
- Go to Computer Configuration\Administrative Templates\Windows components\Windows Security\Account protection
- Double-click on the Hide the Account protection area setting to edit it
- Change the setting to Enabled to hide the Account Protection area for all users, or Not configured to show it (this is the default)
- Click OK to apply the change and close the Local Group Policy Editor
You may need to re-open Windows Security to see the change applied.
How to hide Account Protection for all users using the Windows Registry Editor
The Registry Editor can be used to hide the Account Protection of Windows Security in all versions of Windows 10 and Windows 11 (including Home editions). Before you start, you should back up the Windows Registry, so any changes can be reverted if you make a mistake.
- Right-click the Start button and click Run
- Type regedit.exe and then press the Enter key to open the Windows Registry Editor
- Navigate to the registry key Computer\HKEY_LOCAL_MACHINE\SOFTWARE\Policies\Microsoft\Windows Defender Security Center\Account protection
- If the Account protection sub-key doesn’t exist at this location, highlight the Windows Defender Security Center key and then select Edit > New > Key from the menu bar and rename the new key Account protection
- With the Account protection key highlighted, select Edit > New > DWORD (32-bit) Value and name it UILockdown
- Double-click on the UILockdown and set its value to 1 to hide the Account Protection area for all users
- Delete the UILockdown value to restore access to the Account Protection area (the default behavior)

You will need to restart your Windows PC to apply this change.
What is Account Protection in Windows Security?
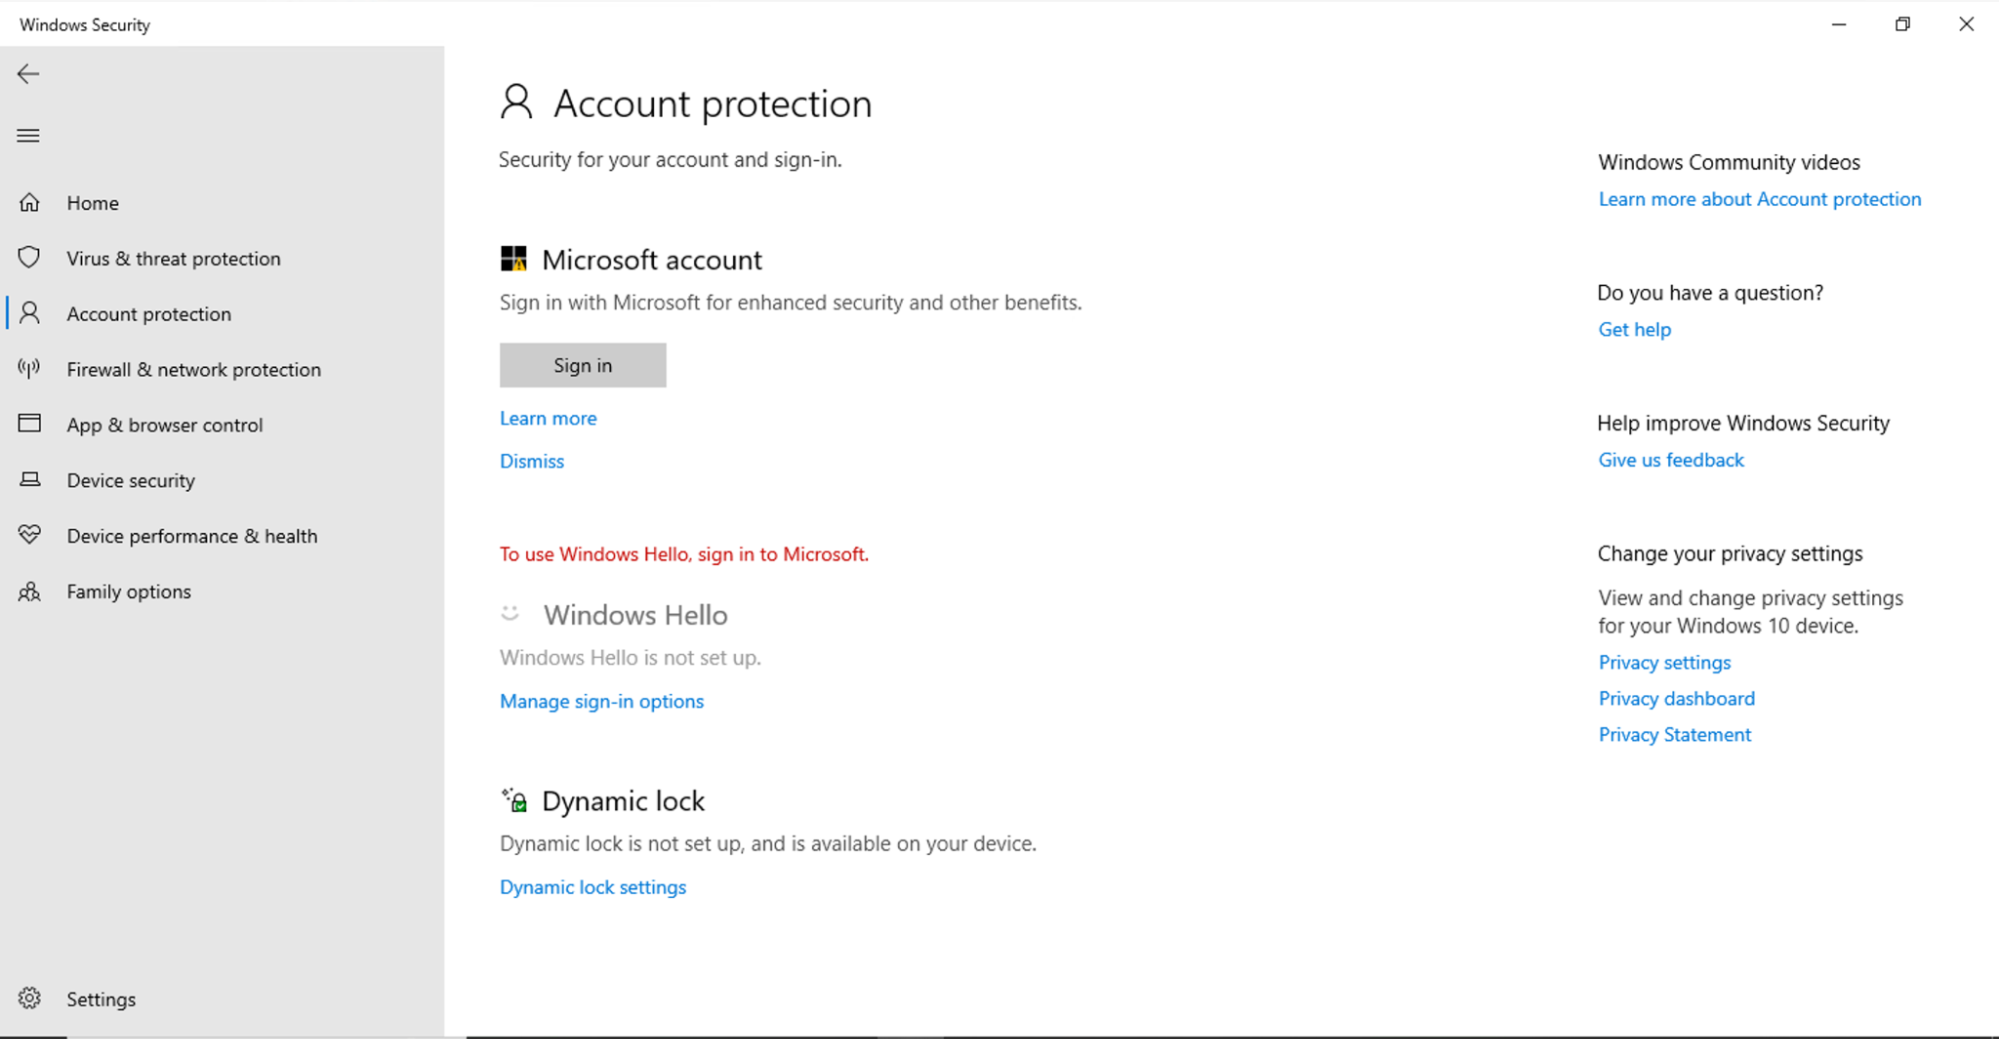
The Account Protection area of Windows Security allows users to change several settings, including their Microsoft Account, Windows Hello, and Dynamic Lock.
Windows Security can be opened from the Start menu (either under ‘W’ in the list of apps, or by searching for it).
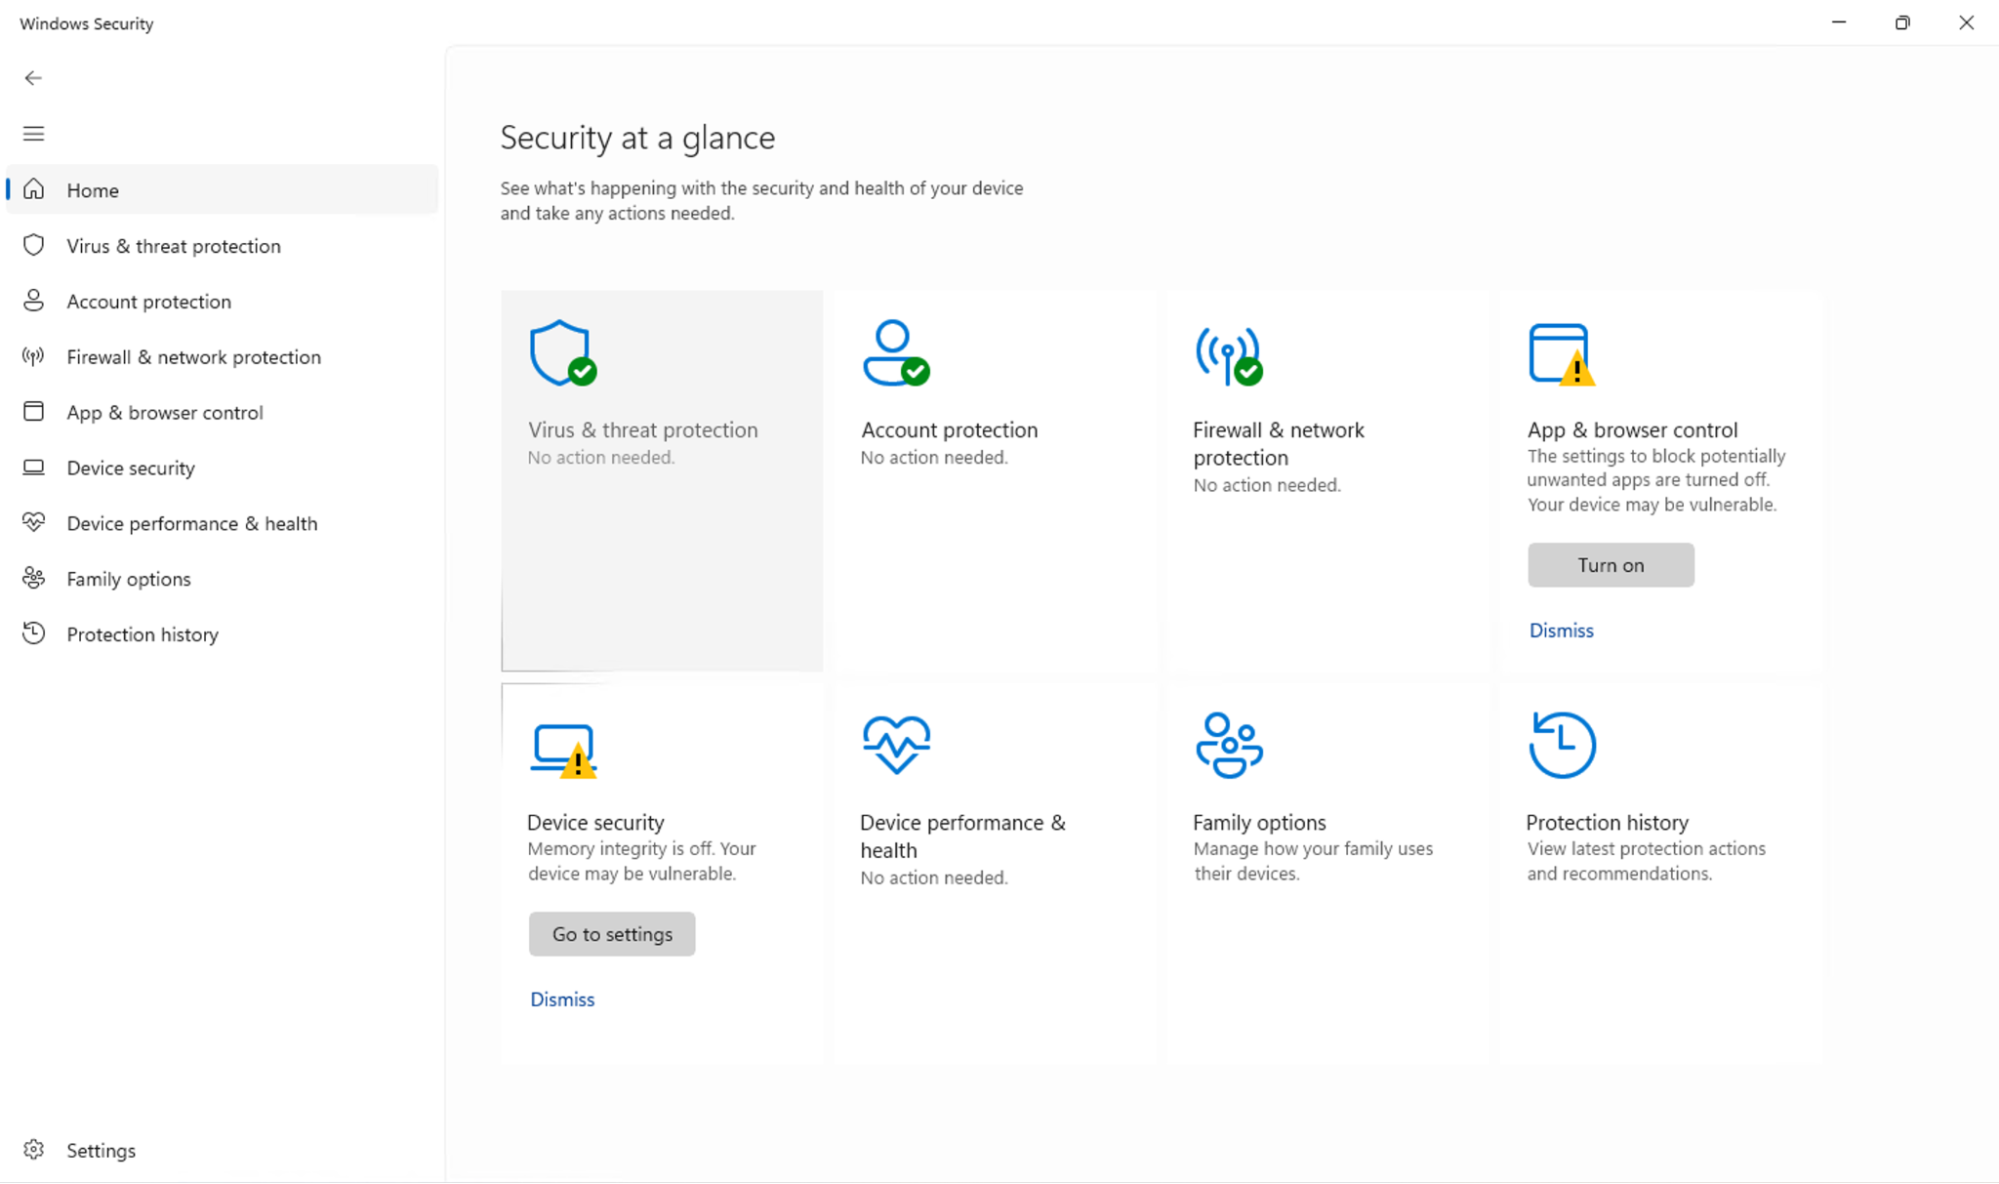
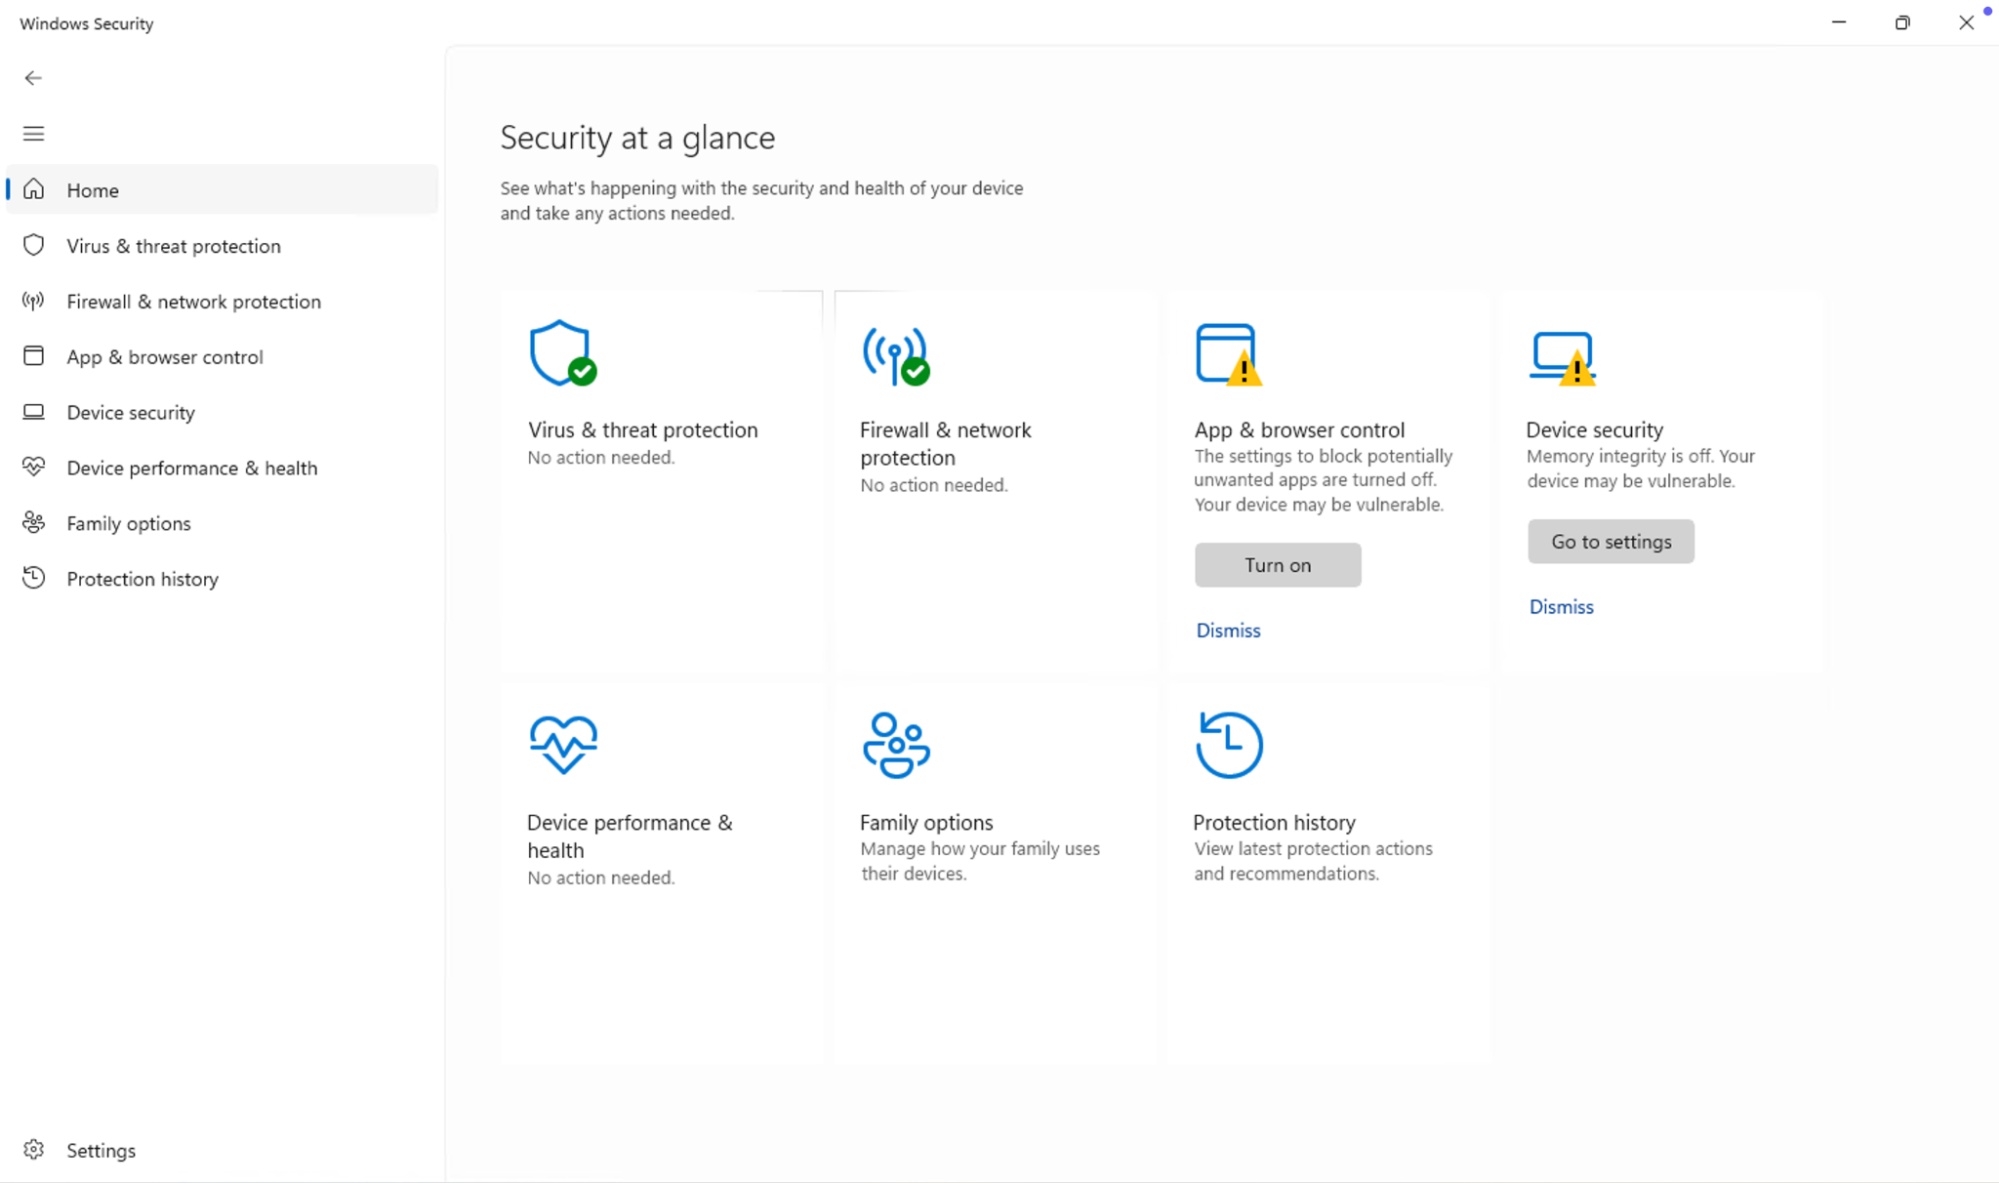
Other settings that can be configured via Windows Security are Virus & threat protection, App & browser control, Device security, Firewall & network protection, and Device performance & health. You can also view Protection history and manage parental controls through Family options.
Why disable the Account Protection area in Windows 10 and Windows 11?
When hidden using one of the above methods, the Account Protection area cannot be accessed from Windows Security at all.
Before hiding Account Protection in Windows Settings:
After hiding Account Protection in Windows Settings:
Disabling access to this area may be done for a number of reasons: in home environments, it can prevent novice users from accidentally making changes to their account that could lock them out of their Windows devices. In business scenarios, it may be preferable to limit what security settings users can change, either to prevent accidental changes or to prevent security features from being disabled (for example, disabling dynamic lock).
Note that disabling access to the Account Protection area in Windows Security is not a security feature itself: it does not prevent these settings from being altered through other areas of the settings app, and does not disable the features that are configurable through it. If you want to enforce individual security settings consistently in an enterprise scenario, you should use Group Policy in Active Directory.
Disabling access to Account Protection does not hide related notifications, which must be disabled by navigating to Settings > Notifications within Windows Security and toggling Get account protection notifications to off.
Remotely deploying Windows security settings
Mobile device management (MDM) by NinjaOne builds on the built-in Windows management features, allowing you to deploy policies to both domain-connected workstations and mobile devices. This can be used for hiding access to Account Protection in Windows Security, and enforcing user account and security policies.
Using NinjaOne MDM and its single view into your IT infrastructure, you can ensure the integrity and ongoing security of your IT infrastructure. It lets you deploy and enforce a consistent configuration, and monitor all of your employees’ devices (including Windows 10/11, Apple, Android, and Linux devices) for suspicious activity, whether they are on-site or working remotely.


