

By default, videos are saved to %USERPROFILE%\Videos within the system’s boot drive, consuming a large amount of space. We’ll show you how to change your default video folder location in Windows 11, alongside precautions and considerations during configuration.
Ways to change the video folder location on Windows 11
Videos can bloat the boot drive, especially with larger resolutions and longer recording times, leading to slower device performance. In this light, it’s advisable to transfer the default save location for videos elsewhere. Additionally, transferring important video files to a regularly backed-up drive makes data recovery easy.
📌 Prerequisite: Any Windows 11 operating system
📌 Recommended deployment strategies:
| Click to Choose a Method | 💻 Best for Individual Users | 💻💻💻 Best for Enterprises |
| Method 1: Move or restore the Videos folder using File Explorer | ✓ | |
| Method 2: Change the save location for videos via Registry Editor | ✓ | |
| Method 3: Use the Command Prompt to automate the Registry change | ✓ | ✓ |
| Method 4: Leverage PowerShell scripts to automate or deploy the change | ✓ | ✓ |
Method 1: Move or restore the Videos folder using File Explorer
Standard users can leverage the File Explorer’s settings to change their videos’ save location to another path.
📌 Use Case: End users can move the save location of videos for their accounts through the File Explorer.
- Press Win + E to open File Explorer.
- Create a new folder in the path where you want to transfer your video folder and name it Videos.
- For this example, we’ll transfer the videos folder from C:\Users\UserName\Videos (default) to D:\Videos (target path).
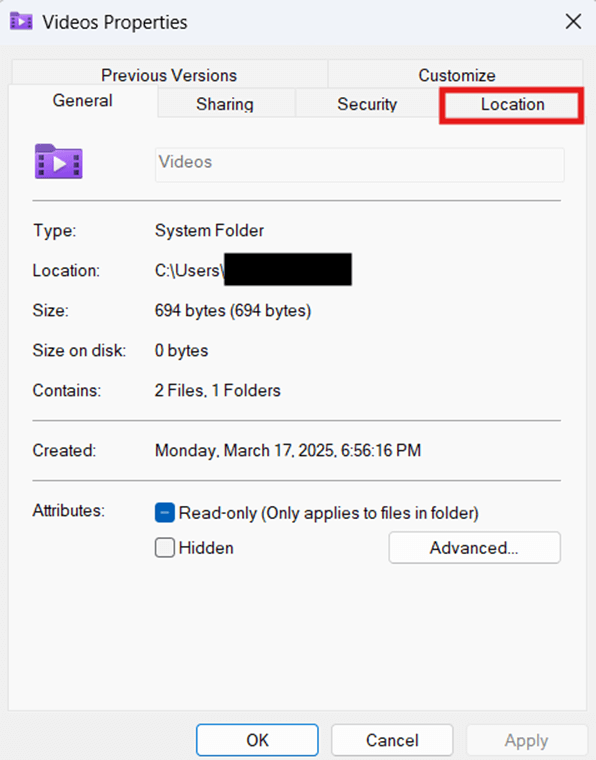
- Right-click the Videos folder and select Properties.
💡 Where is the Videos folder located in Windows 11?
You can find the Videos folder by opening File Explorer (Win + E) and scrolling down the navigation pane.
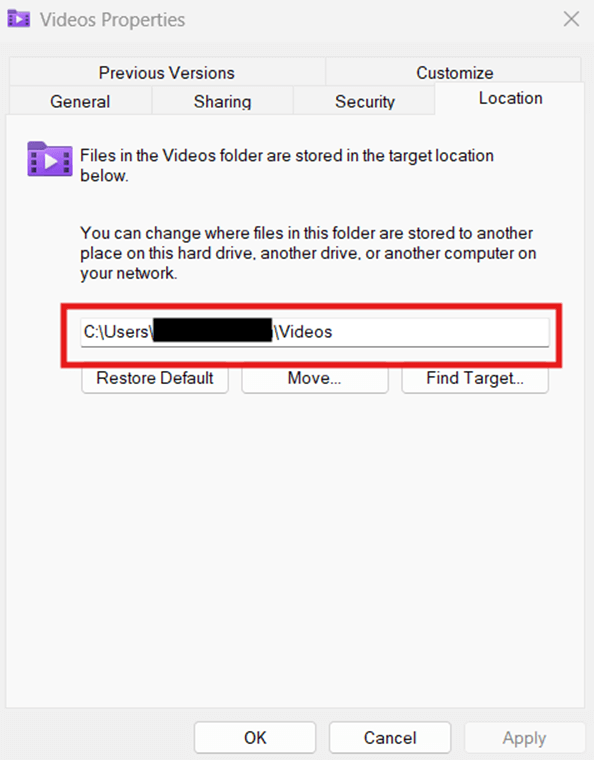
- Inside Videos Properties, press the Location tab.
Steps to move the Videos folder to another location:
- Inside the Location tab, find and click Move….
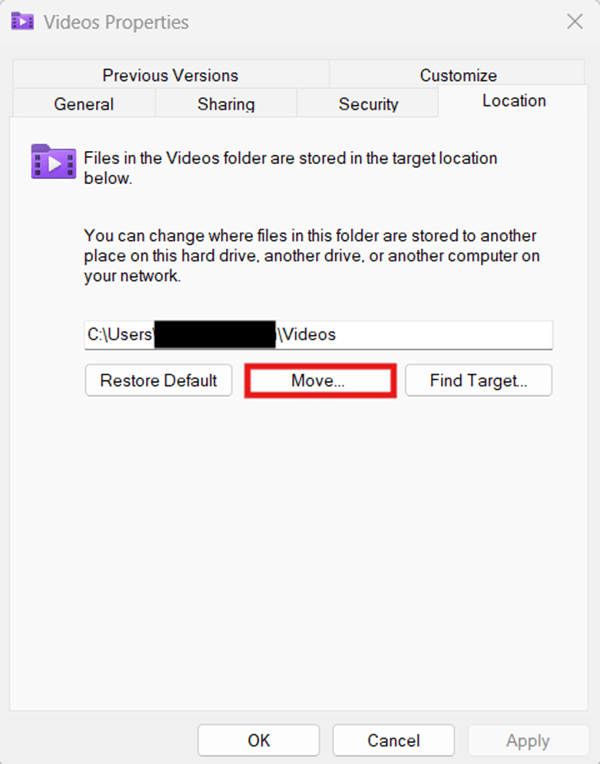
- Navigate to the location of your target path, click the folder, and press Select Folder.
- Select Apply and then OK.
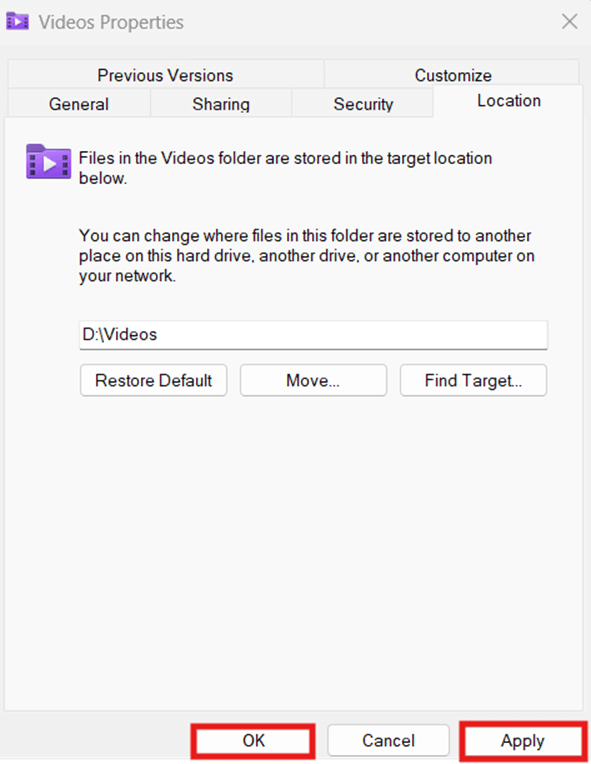
- If prompted, select Yes to change the default Videos folder location and move all the files from the old location.
Steps to restore the default Videos folder location:
- Right-click the Videos folder inside the navigation pane, and select Properties.
- Press the Location tab, select Restore Default, click Apply, then OK.
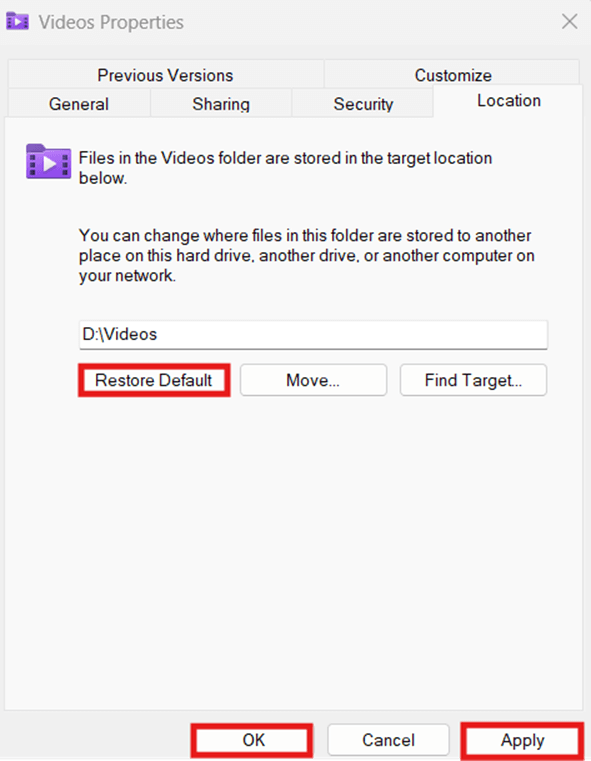
- If prompted, select Yes to apply the change.
💡 Note: The change applies instantly after confirming the prompt.
Method 2: Change the save location for videos via Registry Editor
The Registry contains values that control system settings, affecting the overall behavior of the operating system.
⚠️ WARNING: Manually editing the Registry is error-prone, and misconfigurations can break device functionality. (See ⚠️ Things to look out for)
📌 Use Case: Use the Registry to modify the value defining the default video save path.
📌 Prerequisites: Windows Registry backup and access.
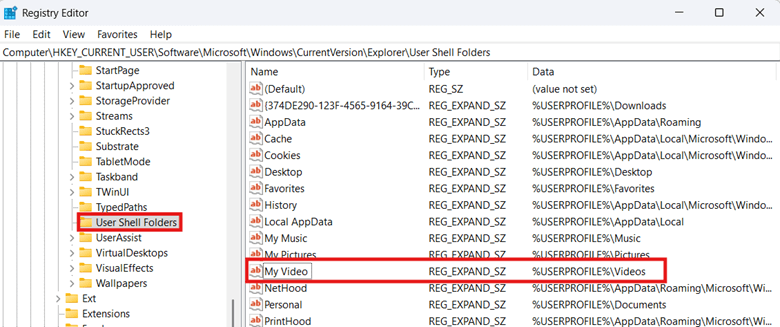
- Press Win + R, type regedit, and press Enter.
- Go to the following path:
HKEY_CURRENT_USER\SOFTWARE\Microsoft\Windows\CurrentVersion\Explorer\User Shell Folders
- Inside User Shell Folders, find and double-click the My Video string value.
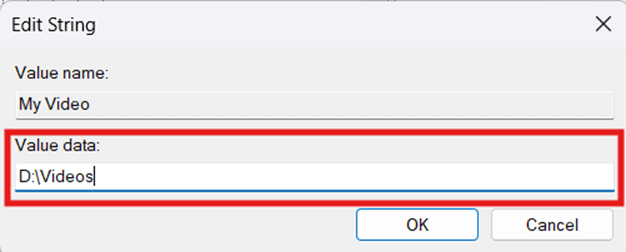
To change the default video folder location:
- Input your desired path to the Value data field.
- Enter the desired path to redirect the Video folder (e.g., D:\Videos).
- Enter %USERPROFILE%\Videos to revert to the default video path.
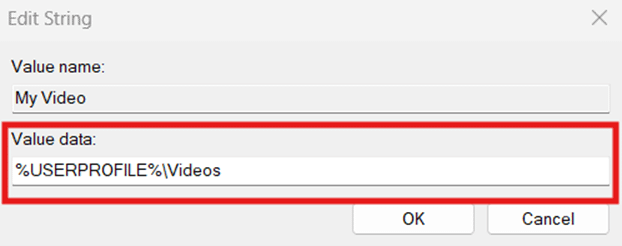
- Select OK to save the configuration.
- Restart File Explorer or the device to apply the change, then transfer your old Video files from the old location to the new one.
Method 3: Use the Command Prompt to automate the Registry change
Manual edits in the Registry are error-prone; automating the process via CMD ensures consistent configuration across users.
⚠️ IMPORTANT: Text and syntax accuracy are crucial when working with scripts, as typos can cause failures or misconfigurations in the Registry. (See ⚠️ Things to look out for)
📌 Use Cases: End users can leverage Command Prompt scripts to automate the Registry configuration process. Additionally, administrators can use CMD scripts as GPO logon scripts, ensuring consistent configuration for all users at scale.
📌 Prerequisite: Windows Registry backup and Command Prompt access.
- Press Win + R, type cmd, and press Enter.
- Execute the command that suits your preferred video location:
- Enter the following to change your default video save path:
reg add "HKCU\SOFTWARE\Microsoft\Windows\CurrentVersion\Explorer\User Shell Folders" /v "My Video" /t REG_EXPAND_SZ /d "PATH" /f
- Replace PATH with your target path (e.g., D:\Videos).
- Enter the following to revert to the default video save path:
reg add "HKCU\SOFTWARE\Microsoft\Windows\CurrentVersion\Explorer\User Shell Folders" /v "My Video" /t REG_EXPAND_SZ /d "%USERPROFILE%\Videos" /f
- Restart the device or the Windows Explorer app to apply the configuration.
Method 4: Leverage PowerShell scripts to automate or deploy the change
PowerShell automates Registry edits by leveraging scripts, eliminating the need for manual, error-prone configurations. Additionally, its built-in PowerShell remoting feature via the WinRM service makes it a strong network and environment deployment option.
⚠️ WARNING: Always verify configurations locally before deployment. (See ⚠️ Things to look out for)
📌 Use Cases: You can use PowerShell scripts to automate Registry configurations for your account. On the other hand, administrators can use this method for deployments using REG files or Remote PowerShell tools.
📌 Prerequisites:
- Windows Registry backup.
- PowerShell access.
- Admin rights are required when modifying another user’s Registry.
- Press Win + R, type PowerShell in the dialog box, and press Enter.
- Input the command that reflects the change you prefer:
- To change your default video location in Windows 11:
Set-ItemProperty -Path "HKCU:\Software\Microsoft\Windows\CurrentVersion\Explorer\User Shell Folders" -Name "My Video" -Value "PATH"
- Change PATH to your target transfer location (e.g., D:\Videos).
- To revert to the default video location in Windows 11:
Set-ItemProperty -Path "HKCU:\Software\Microsoft\Windows\CurrentVersion\Explorer\User Shell Folders" -Name "My Video" -Value "$env:USERPROFILE\Videos"
- Restart the computer or Windows Explorer to apply the changes.
⚠️ Things to look out for
| Risks | Potential Consequences | Reversals |
| Manual Registry configuration. | Manually editing the Registry is error-prone; one mistake can break device stability and functionality. | Back up the Registry before configuring to allow easy recovery from errors and misconfigurations. |
| Inaccurate syntax and typographical errors in CMD and PowerShell scripts. | Wrong syntax and typos prevent Windows from correctly interpreting the script, causing errors and misconfigurations. | To avoid this, double-check script syntax and spelling, or copy and paste the provided scripts for CMD and PowerShell. |
| Not testing configurations before deployment. | Misconfigurations can easily slip past without sufficient testing and cause issues for a user or across an environment. | Verify the effects of configurations and check their validity on a local machine before deployment. |
| Not enclosing paths in double-quoted string literals. | Not quoting paths and values with spaces causes command-line interfaces to interpret them as separate commands, leading to errors. | Wrap paths and values between double quotes when writing them as a script to avoid errors. For example,
|
Considerations when changing your video folder location on Windows
When transferring the folder location of videos, it’s important to know the following key considerations for a successful configuration.
Creation of the target transfer location of the Videos folder
When transferring via Videos Properties, preparing a path speeds up the process by preventing any additional confirmatory prompts from appearing. If the path doesn’t exist, Windows will still offer to create the folder if the path you enter is valid.
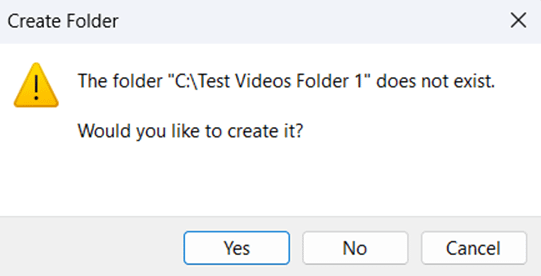
However, if you’re transferring via the Registry, Windows will accept but not create the folder if it doesn’t exist. This can potentially lead to error prompts, especially when File Explorer tries to access files within the Videos library. A workaround is to create the target path before configuring it, then transfer the old video folder’s contents manually after.
Validating the new Videos folder location
After changing the Video folder’s location, it’s important to verify if Windows Explorer correctly references the new path. To do this, open File Explorer, right-click Videos, select Properties, press Location, then check if it displays your target path.
Enterprise-wide deployment strategies
There’s no dedicated Group Policy that allows administrators to centrally change the Video folder’s location. However, administrators can deploy a GPO logon script using the Command Prompt and PowerShell scripts above. This ensures consistent redirection of the Videos folder across all users within an environment.
Easily change your video folder location on Windows 11
Managing the default Video folder file location is important, especially when working with limited space or ensuring video backups. Whether you’re saving boot drive storage or relocating videos to a regularly backed-up drive, there are multiple ways to do this.
File Explorer is best for per-user configurations thanks to its user-friendly interface and automatic folder path creation capabilities. Administrators can navigate the Registry to directly modify the string value that controls the save path of Videos. Additionally, Command Prompt and PowerShell scripts can help automate or deploy Registry configurations consistently across an environment.
Related topics:
- How to Change or Restore the Videos Folder Icon in Windows
- How to Change or Restore the Videos Folder Icon in Windows [Video Guide]
- How to Change the Default Location of the Screenshots Folder in Windows 11
- How to Change the Location of your OneDrive Folder in Windows
- Change the Default Folder When Opening File Explorer in Windows 10


