

Key Points
- Clean up the device: Remove legacy users, bloatware, outdated software, and residual data to establish a clean onboarding baseline.
- Configure endpoints: Apply standard system settings, network profiles, naming conventions, and user preferences automatically.
- Install required applications: Deploy security, productivity, backup, VPN, and line-of-business applications at first check-in.
- Secure the device: Enforce encryption, firewall policies, patching, firmware updates, and privileged access controls by default.
- Validate the setup: Verify onboarding success and automatically generate alerts or tickets when remediation is required.
This article is based on a webinar conducted by NinjaOne and is intended as a companion piece to help our users follow along. You can watch the full webinar here.
Onboarding new endpoints can be a particularly time-intensive task. Fortunately, the steps taken to configure, secure, and set up a new device or endpoint can often be standardized and automated to dramatically decrease the time investment required. With the right tools, you can even automate customized device setup at scale.
This article provides a framework for setting up NinjaOne automation and five step-by-step examples you can implement right away.
Onboard new devices in half the time.
The new device setup framework
We’ve broken the new device setup automation process into five steps:
- Cleanup the device
- Configure the endpoint
- Install required applications
- Deploy security resources, and
- Validate
For the first and last step the order matters, but for the middle three steps you will likely move back and forth between the steps as befits your needs.
Cleanup the device
This step will be incredibly relevant if you are recycling a previously-used device. It’s important to remove any data from that previous user and to reset the device to a baseline so the new user has the best possible experience. For new endpoints, some cleanup may still be required to (for example) remove bloatware.
Example cleanup steps include:
- Run Windows Update repair
- Remove unused users; admin accounts
- Remove pre-installed software
- Remove older versions of software and reinstalling
- Remove unused and pre-installed printers
- Clear temp folders, remove user data
Configure the endpoint
There are thousands of potential configurations changes you may make to an endpoint prior to an end-user taking control of their device. These changes are usually to improve security or improve the end-user experience.
Example configuration changes:
- Disable Fastboot
- Add wi-fi SSID profile
- Set power plans
- Set computer name
- Map network drives
- Set registry keys
- Enable and configure restore points
- Disable Windows 11 upgrading
- Setting local account expirations
- Configure end-user settings (language, time, regions, keyboard layout, set default apps)
Install applications
One of the easiest, and likely most common, use cases for automating device setup is deploying applications.
Example applications and application categories
- Security software (AV, NGAV, EDR, etc)
- Productivity applications (Office 365, Slack, Zoom)
- Backup software (NinjaOne Backup, Acronis)
- VPN (with server and domain configured)
- Line of business applications
- SSO
Deploy security resources
Whether it’s deploying security applications, hardening an endpoint through configuration changes, or getting an endpoint fully updated prior to hand-off, potentially the most important part of new device setup is securing the endpoint.
Example security configurations
- Create local administrator
- Setup password rotation for local admin
- Enable Bitlocker
- Enable the firewall and ensure the profile is turned on
- Get OS to the latest patch
- Run OEM firmware and BIOS updates
Validation
The validation step is the last and most critical step in the automated device setup process. Automation is an amazing timesaver but lacks the oversight a more hands-on approach provides. By also automating validation, you can ensure the new device is setup to specification (and take action if it’s not) before the end-user starts using their new device.
Automating new device setup in NinjaOne (Examples)
The five examples below follow the framework defined above, with one example per step. These examples are meant to be generic enough to be easily applied in any environment, broad enough to be applicable to many, and easily replicable. Each of these five examples would go into one policy to which new devices would be added in order to automate the setup.
You should be able to easily reuse these steps to build your own automated device setup process.
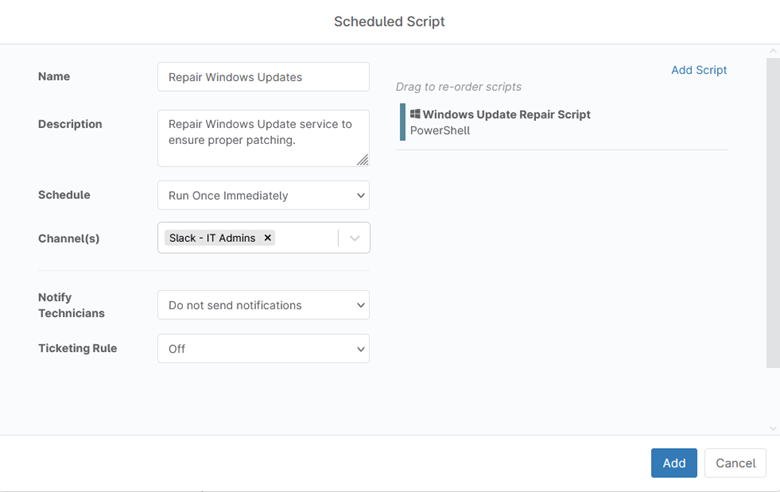
Example 1 – Cleanup – Run Windows Update repair
When reprovisioning a used device for a new user, you want to make sure that Windows Update will work as intended. To do so, you can run a Windows Update repair script before deploying any patching workflows.
How to setup your Windows Update repair automation
- Navigate to the scheduled scripts section of your device policy
- Create a new scheduled script
- Fill in the name and description
- Set the schedule to Run Once Immediately (this script will trigger only once, upon first check-in)
- Add your Windows Update Repair Script (Ninja users can see the scripts we used here).
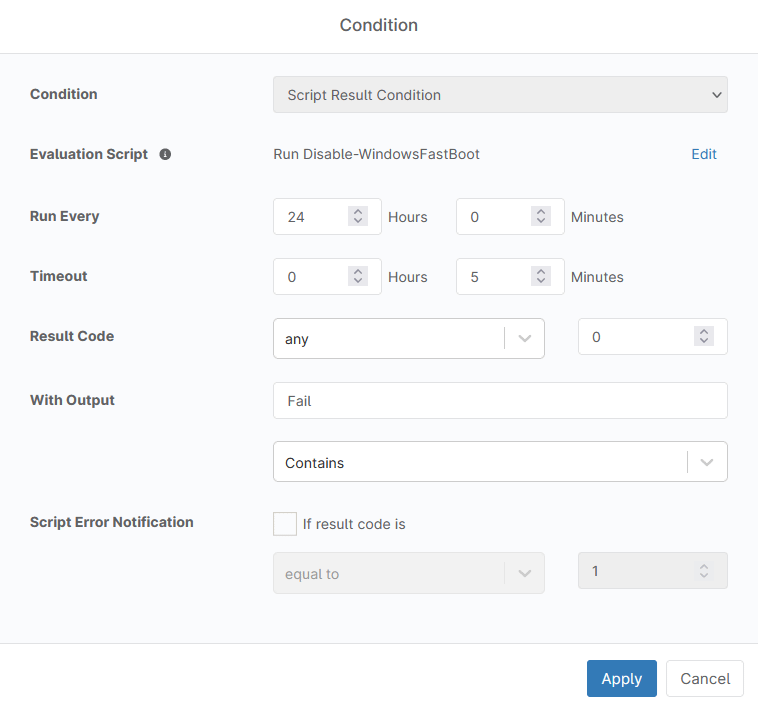
Example 2 – Configuration – Disable Fastboot
With Fastboot enabled, end-users may think they are restarting their computer when they are just putting it to sleep. This can cause some patches not to be installed, leaving endpoints vulnerable.
In this example, we are using a condition to continuously check whether Fastboot is enabled and disable it. If disabling Fastboot fails, we’ll send a notification and create a ticket as manual intervention is likely required.
How to set the Fastboot monitor and disable automation
- Import the ‘Disable-WindowsFastBoot’ script from the NinjaOne script template library
- Navigate to the conditions section of your device policy
- Create a new condition script of type Script Result Condition
- Set the Evaluation script to ‘Disable-WindowsFastBoot’ and With Output Contains ‘Fail’
- Fill in the name and description
- Add a notification and/or ticketing rule to ensure proper follow-up
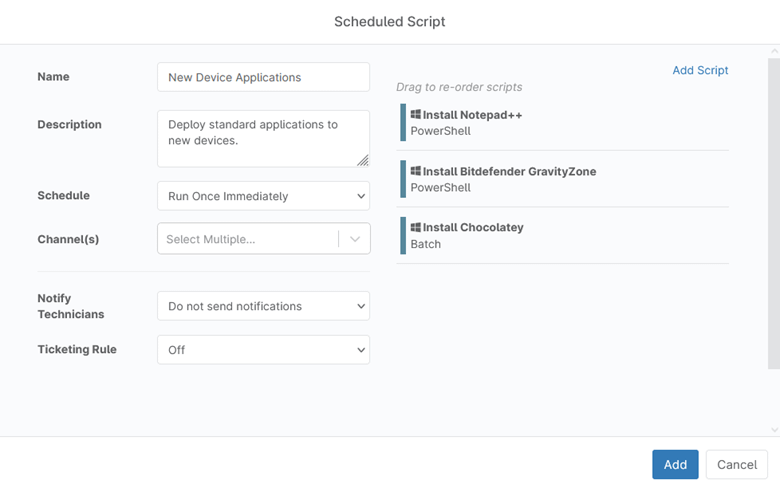
Example 3 – Install Applications
One of the most common steps in setting up a new device is deploying the required applications. Often you’ll have to deploy several applications to get the device ready.
How to deploy applications
- Navigate to the scheduled scripts section of your device policy
- Create a new scheduled script
- Fill in the name and description
- Set the schedule to Run Once Immediately
- Click ‘Add Script’ and select any application installation scripts you want to deploy
- You can use the built-in Install Application script to deploy most MSI / EXE / DMG / PKG packages
- Arrange the applications in the order you want them to install
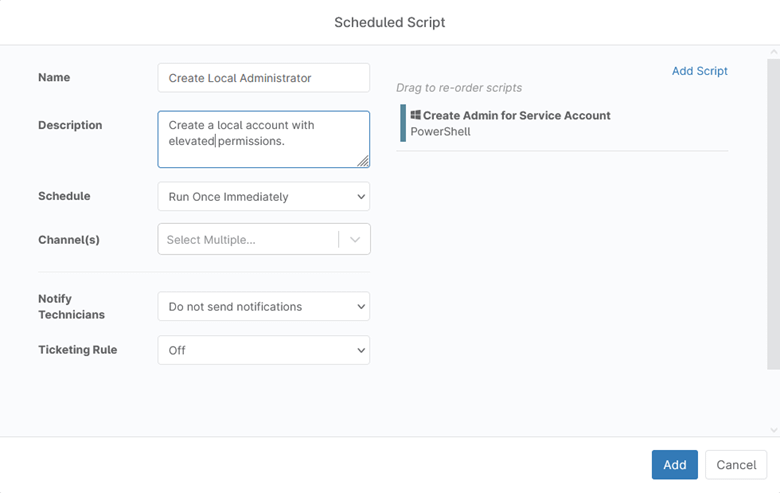
Example 4 – Security – Local Administrator
Many MSPs and IT teams use a local administrator account on endpoints to ensure they have a vehicle to take privileged actions on managed endpoints. Creating this local administrator account during setup helps ensure other actions during setup are more likely to succeed.
How to create a local administrator account
- Navigate to the scheduled scripts section of your device policy
- Create a new scheduled script
- Fill in the name and description
- Set the schedule to Run Once Immediately
- Add your Create Local Administrator Script (Ninja users can see the scripts we used here)
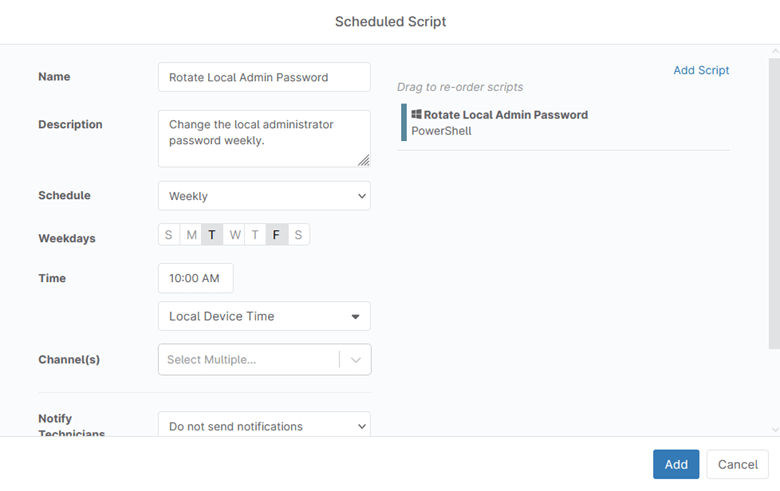
You’ll likely want to rotate the administrator password regularly to ensure better security.
How to rotate the administrator password
- Navigate to Global Custom Fields
- Create a new custom field with type equal ‘secure’
- In the linked script, the field name is ‘domainadminpassword’
- Navigate to the scheduled scripts section of your device policy
- Create a new scheduled script
- Fill in the name and description
- Set the schedule to run on an appropriate schedule (weekly, for example)
- Add your password rotation script (Ninja users can see the scripts we used here)
Example 5 – Validation
The final step, validation, ensures you are aware of any problems that arise during the automated new device setup process.
How to setup validation
- Navigate to Global Custom Fields
- Create a new custom field with type text for each step in your onboarding workflow
- Build error-checking code into each script in your onboarding process that writes success or failure outputs to the associated custom field.
- Create a new condition with the type equal to the custom field
- Check each custom field for a failure message
- Create a notification or ticket if a failure is detected
The validation step creates a ticket on failure as at this point the automation has identified a problem and manual intervention is likely required.
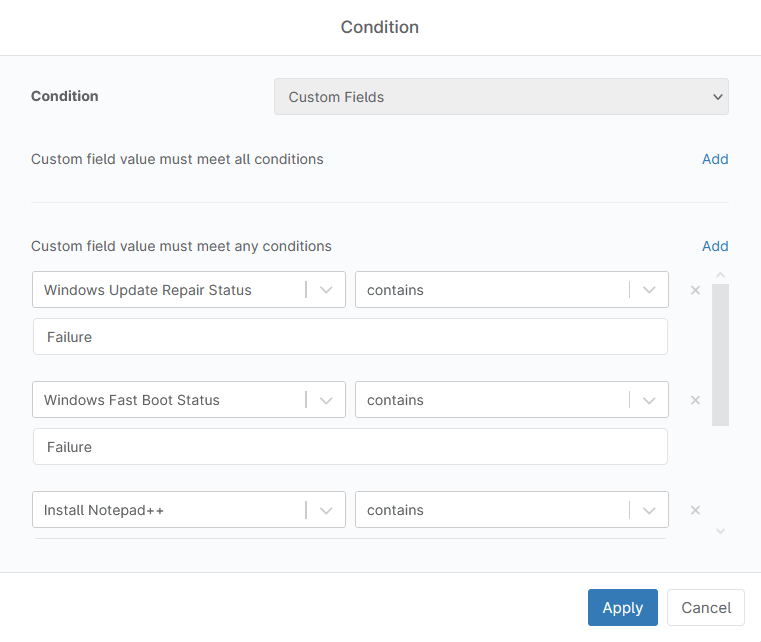
Image-based versus agent-based device setup automation
Traditionally, new devices were set up by deploying a golden image to the endpoint. This golden image would have all the requisite configurations and applications already deployed. The process above uses an agent-based approach. There are benefits and drawbacks to either approach which are outlined below:
| Image-Based | Agent-Based (NinjaOne) | |
| Ideal for |
|
|
| Benefits |
|
|
| Drawbacks |
|
|
If you’re managing remote and distributed endpoints and require customization at scale when setting up new endpoints, an agent-based approach is a much better fit.
See why 20,000+ clients worldwide trust NinjaOne with their endpoint management needs.
Ready to automate new device setup?
While the examples in this article are generic and relatively simple, they should provide a great starting point for building out your own new device setup automation. If you’re ready to start automating device setup, sign up for a free trial of NinjaOne.


