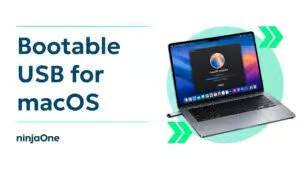
How to create a bootable USB for macOS. A bootable USB is essentially a portable installer that you can use with a compatible Mac. Whether you're recovering a system that won't start properly, doing a fresh install, or setting up multiple machines, having one ready can save you time. In this video, I'll show you exactly how to make one the right way so you're not starting over halfway through. Before we begin, be sure to subscribe to NinjaOne's IT video hub and our YouTube channel for more tech content like this. How to create a bootable USB for macOS. There are two main steps: formatting your USB drive correctly, then copying the macOS files onto it. Apple has made this easier over the years, but knowing what each step does will help you troubleshoot any issues along the way. Formatting your USB drive. Before continuing, back up anything important on the USB drive because formatting it will erase all existing data. First, you need to format your USB drive so it's ready to become a bootable installer. Here's how. Plug your USB drive into your Mac. Open Disk Utility, search for it in Spotlight, or go to Applications, Utilities. In the sidebar, select your USB drive, the drive itself, not anything listed under it. Click Erase at the top. Name it something recognizable, like macOS Installer. Set the format to macOS Extended Journaled. Set the scheme to GUID Partition Map. Click Erase and wait for it to finish. Installing macOS on the drive. Next, you need the macOS installer. Depending on the macOS version, you can download the full installer using Apple's available download options, and it will typically appear in your Applications folder when it's done. For older versions, refer to Apple's official macOS download instructions to find the appropriate installer. Bootable media creation methods. There are a couple of ways described in the blog for creating your bootable USB: Disk Utility and Terminal. Disk Utility. If you prefer a more visual approach, Disk Utility is a great option. It's not the most direct method, but it walks you through the process with a clear interface. Here's how to use it after formatting your drive. Open Disk Utility by navigating to Applications, Utilities, Disk Utility. Select your formatted USB drive from the sidebar. Click Restore in the top menu. Under Restore From, drag in the macOS installer or click Choose to find it. Make sure your USB drive is listed under Restore To. Click Restore and enter your administrator password. Wait about 20 to 30 minutes for it to finish. Terminal command. Prefer a faster, more direct approach? Terminal gets it done with a single command. It uses Apple's built-in createinstallmedia tool, which comes included with the macOS installer. Once your drive is formatted, open Terminal through Applications, Utilities, and enter the command for your macOS version. The basic structure looks like this. Make sure you use the exact command for the version of macOS you downloaded. Manage all your Apple devices from one place with NinjaOne's unified endpoint management platform. For more information, check out our official blog post on how to create a bootable USB for macOS linked in the description below.

How to Create a Bootable USB for macOS

Learn how to create a bootable macOS USB drive from scratch — the right way. This video walks you through formatting your drive, downloading the macOS installer, and two methods to build your bootable media: Disk Utility for a visual step-by-step experience, or Terminal for a faster, single-command approach. We also show you how to test it before you actually need it. Whether you’re recovering a crashed Mac, doing a clean install, or setting up multiple machines, this guide has you covered.

Read the full blog on How to Create a Bootable USB for macOS
Never miss a NinjaOne video!