

Windows libraries allow users to group content from multiple folders or drives under a single, logical category. For example, the Documents library can include both local folders and cloud-based locations like OneDrive. While useful, libraries can become cluttered or confusing, especially when unnecessary folders or removable drives are added.
Removing unused or irrelevant folders or drives from Windows libraries helps keep the view clean and easy to navigate. It also avoids broken links from disconnected or outdated drives. This practice supports a consistent file structure in shared or managed environments and reduces confusion by hiding folders users don’t need.
This guide explains how to remove a folder or drive from a library in Windows to keep File Explorer clean and organized.
How to remove a folder from a library in Windows
Before you begin, review these key points to ensure you meet all requirements for this task:
- No administrator rights are required.
- Libraries must be enabled and visible in File Explorer.
- This article applies to all editions of Windows 10 and Windows 11.
- The folder must already be part of an existing library.
Method 1: Remove a folder or drive via Library Properties (File Explorer)
Use this method to control which folders are linked to a library directly. This method Works the same on both Windows 10 and Windows 11.
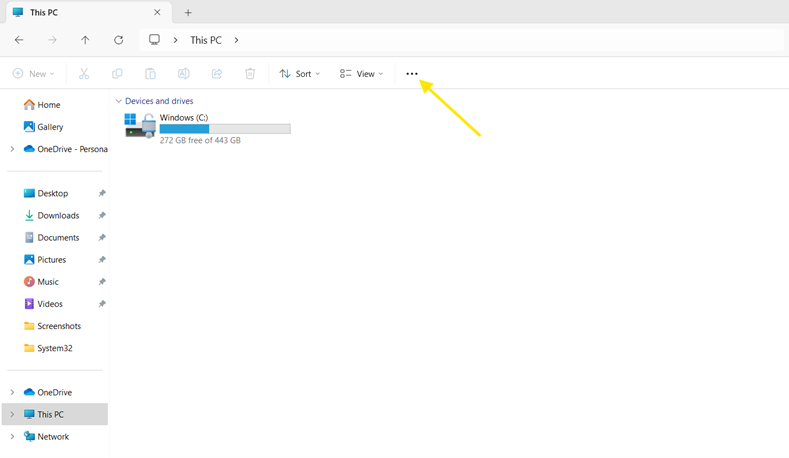
- Press Win + E to open File Explorer.
- In the navigation pane on the left, click Libraries.
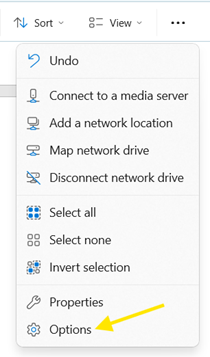
Note: If you don’t see Libraries, it’s likely because Windows 11 hides them by default. To make it visible:- Click the three-dot menu (···) on the top toolbar.
- Select Options to open Folder Options.
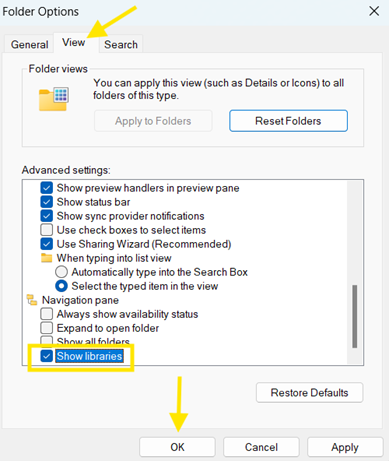
- Go to the View tab.
- Scroll down and select the Show libraries checkbox.
- Click OK.
Now, you’ll see a Libraries folder in the left pane.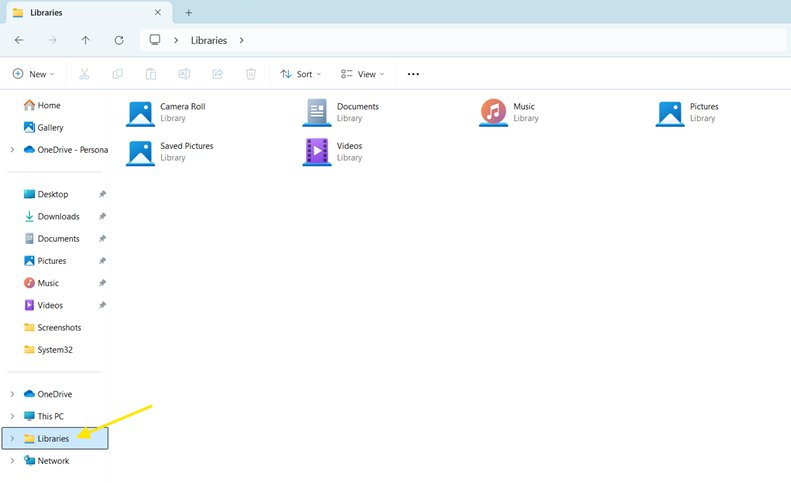
- Click the three-dot menu (···) on the top toolbar.
- Expand the Libraries section by clicking on it.
- Right-click the library (e.g., Documents, Pictures, Videos, etc.) that contains the folder or drive you want to remove.
- Select Properties.
- Select the folder or drive you want to remove from the list of included folders.
- Click Remove, then OK or Apply to confirm.

Remember: This action only removes the folder or drive from the library. It does not delete any files or folders from your system.
Method 2: Remove a folder from a library via the File Explorer ribbon (classic view)
If you’re using File Explorer with the classic ribbon interface (common in customized or legacy setups), you can remove folders this way:
- Press Win + E to open File Explorer.
- Navigate to Libraries and open the specific library (e.g., Documents, Pictures, Videos, etc.) that contains the folder or drive you want to remove.
- At the top, go to the Library Tools tab in the ribbon.
- Click Manage Library, then select Remove location from library.
This method is equivalent to the Properties method but is quicker in classic UI environments.
Note: This method works in both Windows 10 and Windows 11. The ribbon interface is standard in Windows 10 but may only appear in customized setups on Windows 11.
Method 3: Delete the library (optional cleanup)
If you no longer need a particular library, you can delete it entirely to reduce clutter:
- Press Win + E to open File Explorer.
- Go to the Libraries section.
- Right-click on the library you want to remove and select Delete.
Note: This method works in both Windows 10 and Windows 11. Deleting a library removes only the library shortcut—it does not delete any actual folders or files.
Important considerations for managing Windows Libraries
Here are some considerations you need to keep in mind when managing libraries in Windows:
OneDrive integration
If OneDrive is disabled, its folders will be removed from your libraries. However, if you later re-enable or reset OneDrive, those folders may automatically reappear in the library view. You may need to remove them again to keep your libraries organized.
Removable drives
Adding folders from removable or external drives (like USB flash drives or SD cards) works fine while connected. But if the drive is disconnected, it will appear in the library with a red “X” icon. To avoid confusion or delays in File Explorer, it’s best to remove any disconnected drives from your libraries.
Roaming profiles
In environments using roaming profiles, user settings, including library configurations, follow the user across multiple devices. So, a library that works on one machine may cause issues on another if it references local folders or drives that don’t exist there.
Custom libraries
Beyond default libraries, you can create and customize your own libraries. These are saved as .library-ms files in the following location:
C:\Users\<YourUsername>\AppData\Roaming\Microsoft\Windows\Libraries
You can use this path to back up or transfer your custom libraries between user profiles or devices.
Stop reacting—start leading. Learn how to shift to a proactive IT management strategy with our step-by-step guide. Get started.
Manage libraries in Windows for a streamlined File Explorer
Removing folders or drives from libraries helps maintain a clean, intuitive, and manageable user experience. The changes are quick to apply and easily reversible, whether you’re organizing your personal setup or managing multiple endpoints.
Libraries remain a powerful, though optional, feature for organizing user data in Windows. Use Library Properties to manage which folders or drives are included. Keep in mind that removing a folder from a library does not delete the folder or its contents. Only delete an entire library if it’s no longer needed or actively used.


