
PowerShell for IT Ninjas
PowerShell is an incredibly powerful tool that can help IT teams of all shapes and sizes automate and streamline their daily system administration tasks. Admins can install applications with no direct input, create directories, extract critical data, and so much more. Automating these types of tasks can help save time and bandwidth for your team to spend on more hands-on responsibilities.
In this guide, we’ll be walking through some basics of PowerShell automation along with practical real-world examples thanks to the expert guidance of Adam Bertram, AKA Adam the Automator. This guide assumes you have basic Windows system administration experience as well as some beginner PowerShell knowledge. By the end, you’ll have some core skills to help you tackle your own automation challenges using PowerShell.
Let’s get started!
PowerShell Basics
About Visual Studio Code
Visual Studio Code, or VS Code, is the de facto code editor to use when building PowerShell scripts. It has everything you need to build and run great PowerShell tools. It’s a powerful platform, but for now, you just need to know a few things.
1. The PowerShell Extension
Extensions within VS Code allow you to extend functionality for different languages, functions, and tools. On the left-hand side using this icon, you can search for extensions that might fit your needs.

For this guide, we’ll be specifically working with the PowerShell Extension, which you can also find details on here.
2. Code Editor Window
This is the area where you’ll be able to edit your code. You’re also able to open as many editors as you’d like both vertically and horizontally.

3. Integrated Terminal
The integrated terminal is a console built into VS Code that allows you to execute code without ever leaving. To get to this terminal, click on View > Terminal and you’ll see a terminal pop up at the bottom of the screen.

Whenever you’re building a script, you’ll probably want to only run portions of the script for testing. To do that, you can highlight the code in any PowerShell script and hit F8, and it will run in the integrated console.
PowerShell Objects, Functions, and Calls
Objects
PowerShell is all about objects. Objects are the building blocks of everything within PowerShell, collections of data that represent various items.
Calls
To get functions to run, they need to be called. Calling changes the objects and returns the updated object one at a time.
Functions
Using functions is a great way to break up components of a script. They’re like building blocks made up of PowerShell statements with a specific name.
Coffee Machine Automation Demo
These definitions can be hard to understand as standalone descriptions, so we’ll go ahead and walk through a demo of how objects, functions, and calls work together to execute a script.
Utilizing Objects
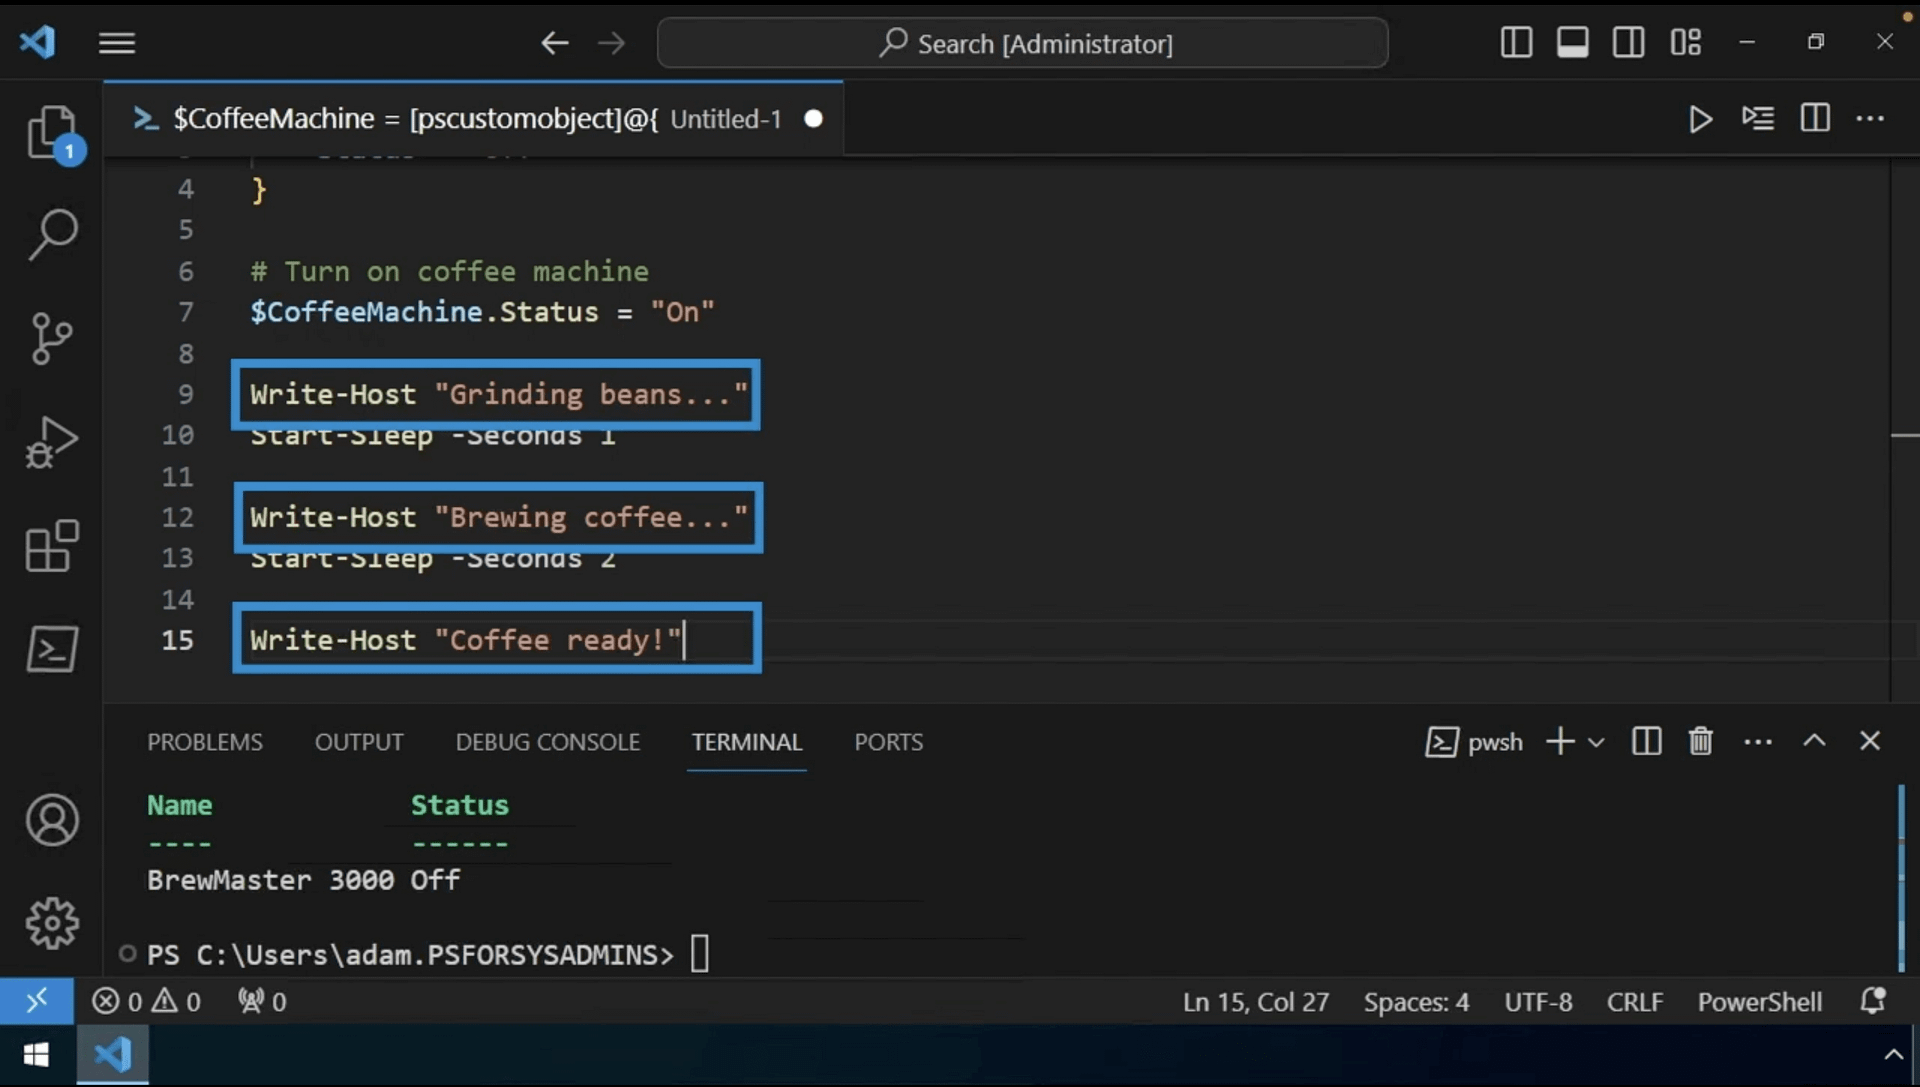
The coffeemaker here is represented as a PowerShell object. Having it set up as an object will allow you to store information about it. This is set up as a PSCustomObject, which is a type of object that consists of properties and values – in this case, the name and status. Name identifies the model and status will track whether or not it’s on or off.

Once we have the coffee machine object here, we can highlight it and hit F8. And that’ll bring it into our current session. We can now read it and see what it looks like.
Next, we’ll add some code to simulate the brewing process. Here, we’re using Write-Host to print status messages to the console.
We’re also using Start-Sleep to pause between steps, just to simulate time passing.

And as the last step here, we’ll turn off the coffeemaker by setting the status to Off.

Utilizing Functions
While the above process technically works to brew your virtual coffee, having all the code in one script like this can get disorganized as it grows. In this demo, we’ll refactor this into functions to make it more modular.
First, we’ll extract all of the brewing logic that we had to start the coffee machine into a single function, which we’ll call Start-CoffeeMachine.
This function just does one thing, it starts the coffee machine. Functions should do one thing only, so this one is done. But you’ll notice an addition here – the parameter. A parameter allows you to customize the behavior of functions, or in this case, pass an object to it that we can modify.
This function is accepting the CoffeeMachine object, which we created earlier as input, then makes all of the changes to it, such as changing the status to On. Then, it’s returning that same object. But we’ll get to parameters in the next section.
Once we have this function, we’ll bring in the Stop-CoffeeMachine function. This just “turns off” the machine, which essentially sets the status to Off. You’ll also see it return the option again on Line 30.

Last, we’ll bring in the Get-CoffeeStatus function.
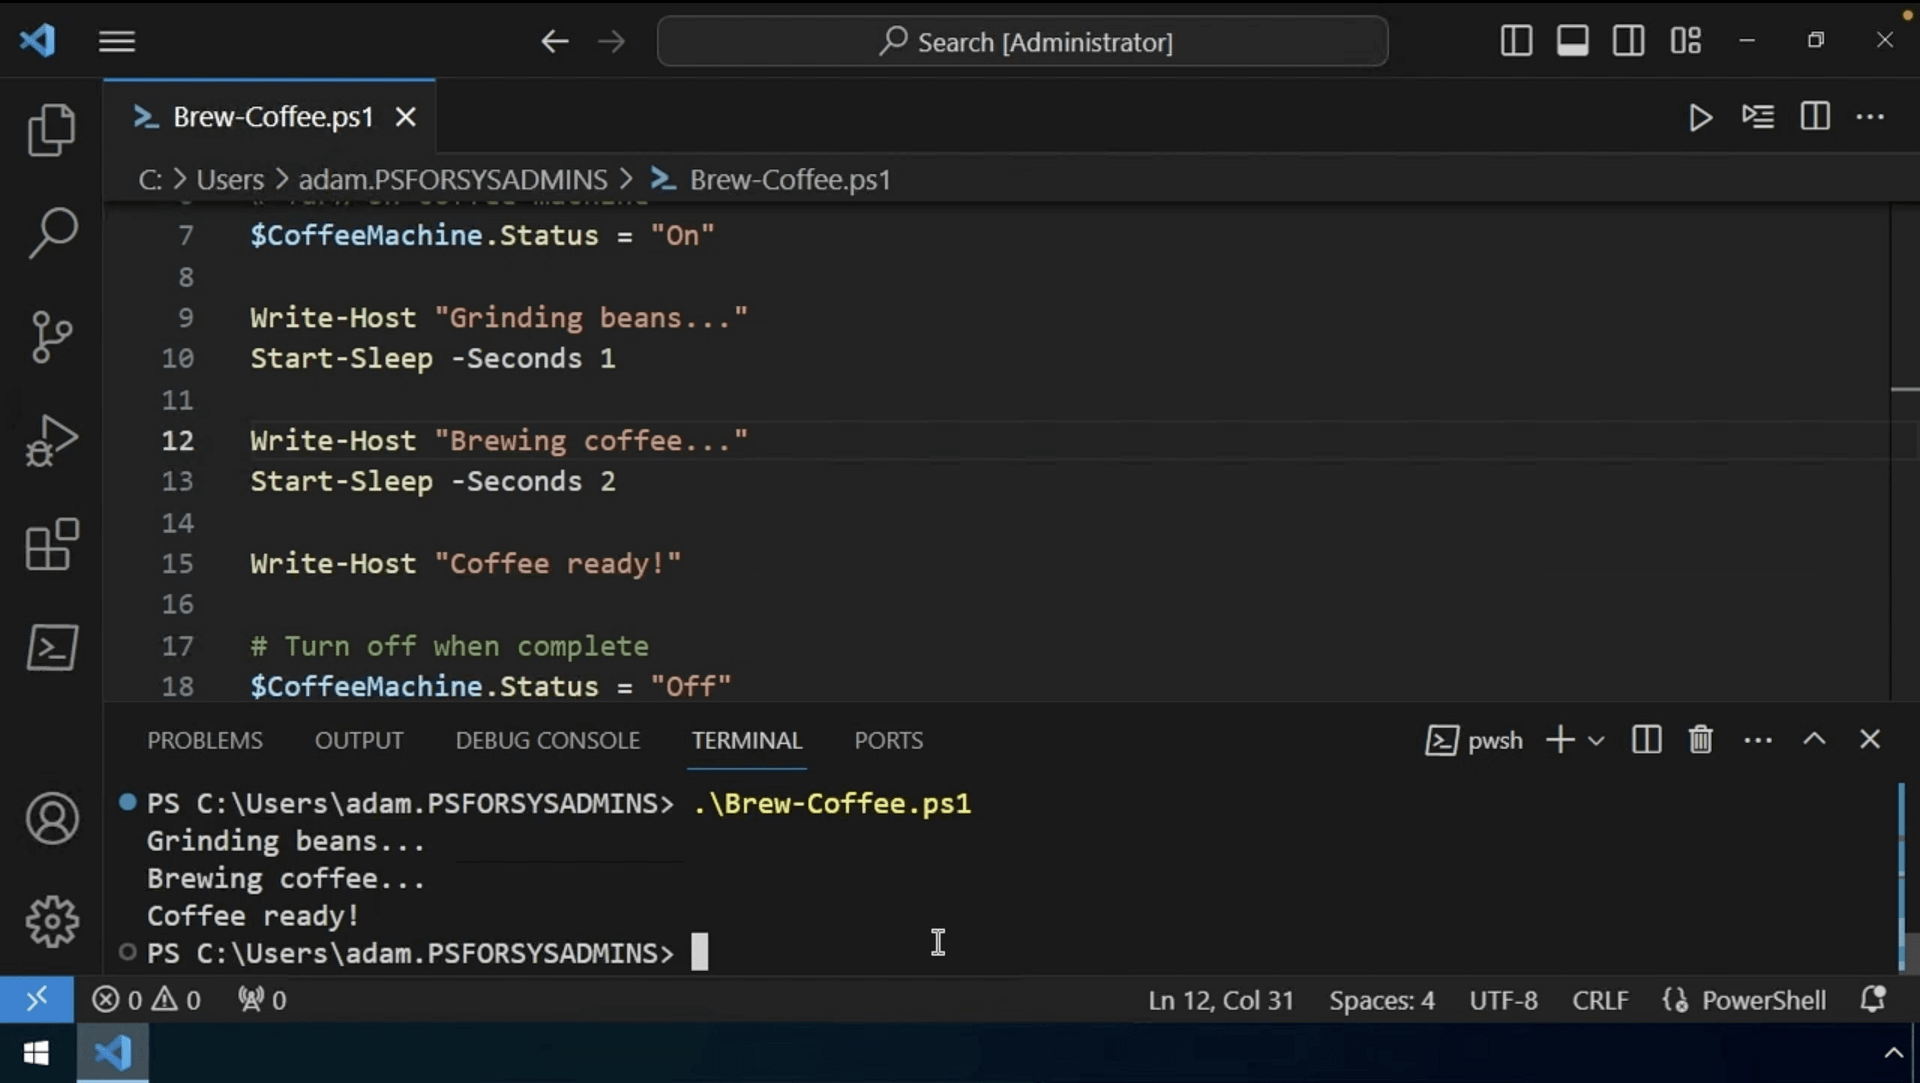
And if you’ll notice, there’s a pattern to creating functions. Think about the action you’re taking, what you want the coffee machine to do, then create a function for that action. Now that we have the functions here, we’ll save this one and run it again.
But because these are just defining the functions, nothing will output from our script.

Utilizing Calls
This brings us to our last piece of the puzzle in this demo – using calls for each function, which will change the objects, and return the updated object one at a time. We’ll add in the object we’re using to represent the coffee machine in the script, and we’ll also add the function call into the script.
So now, in addition to the function declarations we’re doing up here, we’re also going to be calling each function. You can see on Line 47, it’s going to run all of those manipulations of the coffee machine object, return it out, assign it back to the coffee machine variable and do the same thing for Stop-CoffeeMachine. Then at the end, it will run Get-CoffeeStatus, which won’t return any output at all. It is just outputting messages to the console, not returning any objects.

If we run it again, you should see it “brewing,” which means it’s essentially returning all those messages, and that is giving us a coffee status of off.

If we run it again, you should see it “brewing,” which means it’s essentially returning all those messages, and that is giving us a coffee status of off.
PowerShell Parameters
In the previous coffee brewing demo, we created a few functions to brew some delicious virtual coffee. It worked, but it didn’t really allow for much customization. Let’s change that with parameters.
As we mentioned before, parameters allow customizing function behavior without altering code. You learn how to use parameters to make scripts configurable. We’ll look at how to define strict data types and validate inputs to make your scripts more robust. In short, parameters control how your scripts run.
Parameter Demo
We’ll revisit the coffee brewing script using Brew Coffee V2 and see how parameters can make the brewing script more flexible.
Adding a String Parameter
First, we’ll go ahead and add a coffee type parameter using String to specify the type of coffee we’d like to add. We can also put a line in to reference that parameter. So, this line will now say “Brewing $CoffeeType coffee…”
Adding a Time Parameter
Next, we’ll add a start time parameter to schedule brewing. So, in this instance, we’ll create this parameter as a DateTime type. It will require a valid date and time, because we don’t want to pass in any old information to this start time parameter.
The DateTime object is a different parameter type, and it represents an exact date and time.

Defining the data types for your parameters ensures the input matches what the function expects. Good code limits input to exactly the kind of information you’re looking for.
Testing Your Script
To test the script, we’ll load the functions into our session and call them manually. So now, the script only contains the functions themselves.

Once we take out that code, we can do something called dot-sourcing. This will run the script in the background and load all of the functions into memory in the current session, allowing us to be able to call them. Dot-sourcing allows you to reference code defined in one script in a separate one. This is useful when working on a project with multiple scripts and might have functions specified in one script and calls in another.


And after running the code, we can verify that it worked! We were able to add those two parameters to customize the behavior.

Now, we can specify really any type of coffee here. As Adam demonstrates, we could even specify “swamp water” if you will. So you’ll add the coffee type as well as the coffee object.

Parameter Validation
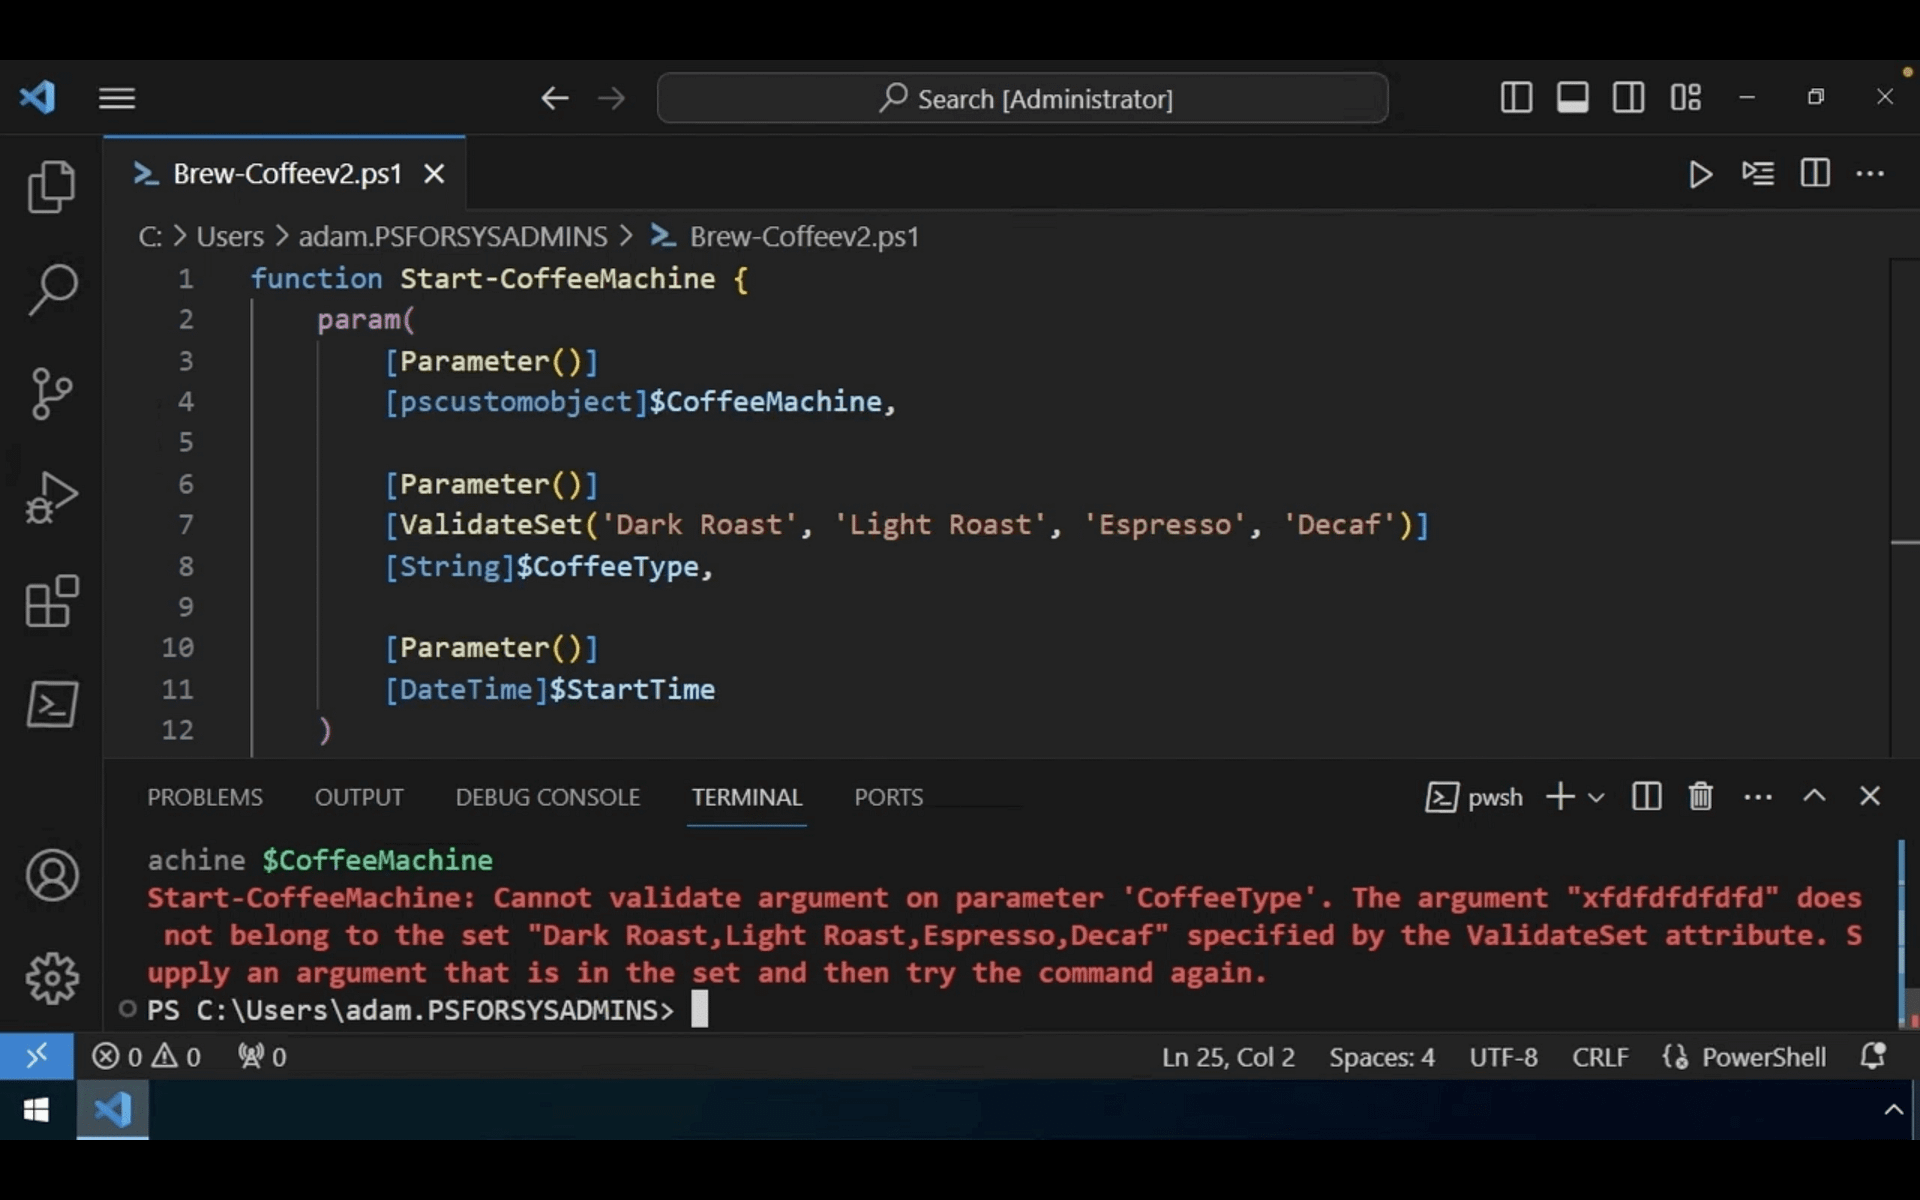
But now, we need to make the parameters account for all of these things, which is where parameter validation comes in. So, let’s go up to the Start-CoffeeMachine function again and drop down to the code.

We’ll go ahead and replace String with a ValidateSet parameter validation attribute. You can think of ValidateSet as the barista who knows exactly what types of coffee are on the menu. With ValidateSet, you can specify the exact number of values that are allowed for a particular parameter. That ensures that your script doesn’t attempt to brew a coffee it can’t make.

If you try to brew anything other than Dark Roast, Light Roast, Espresso, or Decaf, the function will throw an error. To test this out, you’ll need to dot-source it in to bring the new function into the current session, since it has been updated.
We’ll go ahead and do it with a name that it does support first, like Dark Roast.

But now, let’s say we’ll run Start-CoffeeMachine, CoffeeType of anything other than the pre-defined parameters.
ValidateSet helps to prevent unwanted surprises by making your script a lot more robust and user-friendly. It’s a great way to limit what types of parameter values are passed.
Real World Examples
Monitoring Systems Using PowerShell
In this demo, we’ll take a look at how PowerShell can help monitor critical systems. You’ll learn how to query system data, like disk space, with WMI and PowerShell. We’ll set up a scheduled task to run monitoring scripts automatically, and you’ll see how to send email alerts when issues are detected. These skills are great building blocks in keeping an eye on system health.
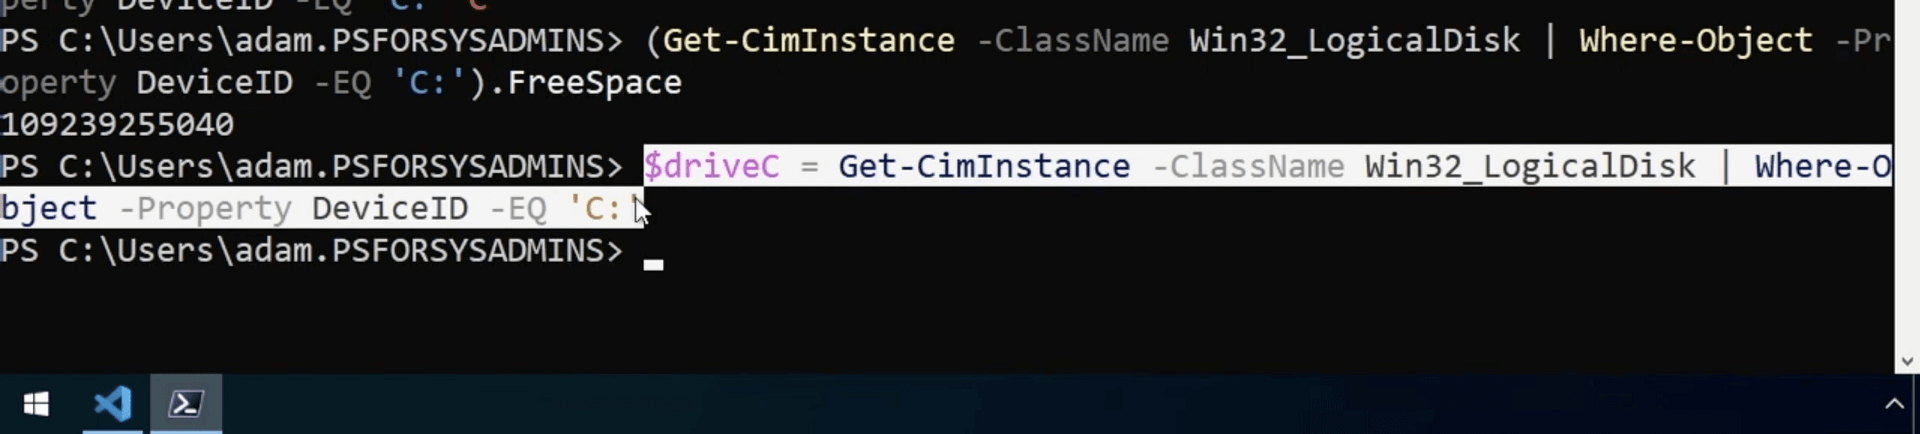
First, let’s look at monitoring disk space. One of the easiest ways you can do that is with the Get-CimInstance command. This command queries WMI on a Windows system and can return just about any piece of information on a Windows system you can imagine.
This information is stored in the Win32_LogicalDisk class. This class contains information like the storage volume, including the drive letter you see here, the volume name, and free space. In this sample, these are all of the volumes on this system.

But for this scenario, we just want to monitor the local C: drive. To filter this out, we’re piping the output of Get-CimInstance to the Where-Object command, and then it’s filtering each of those volume objects, ensuring the device ID property is equal to “C:”.

Now that we have a single object representing the C: drive, we can get the free space for that drive. By wrapping that in parentheses and specifying the FreeSpace property, we can get only the free space in that drive.

We’ll go ahead and save this C: drive object in a variable so that we can work with the output in a minute.

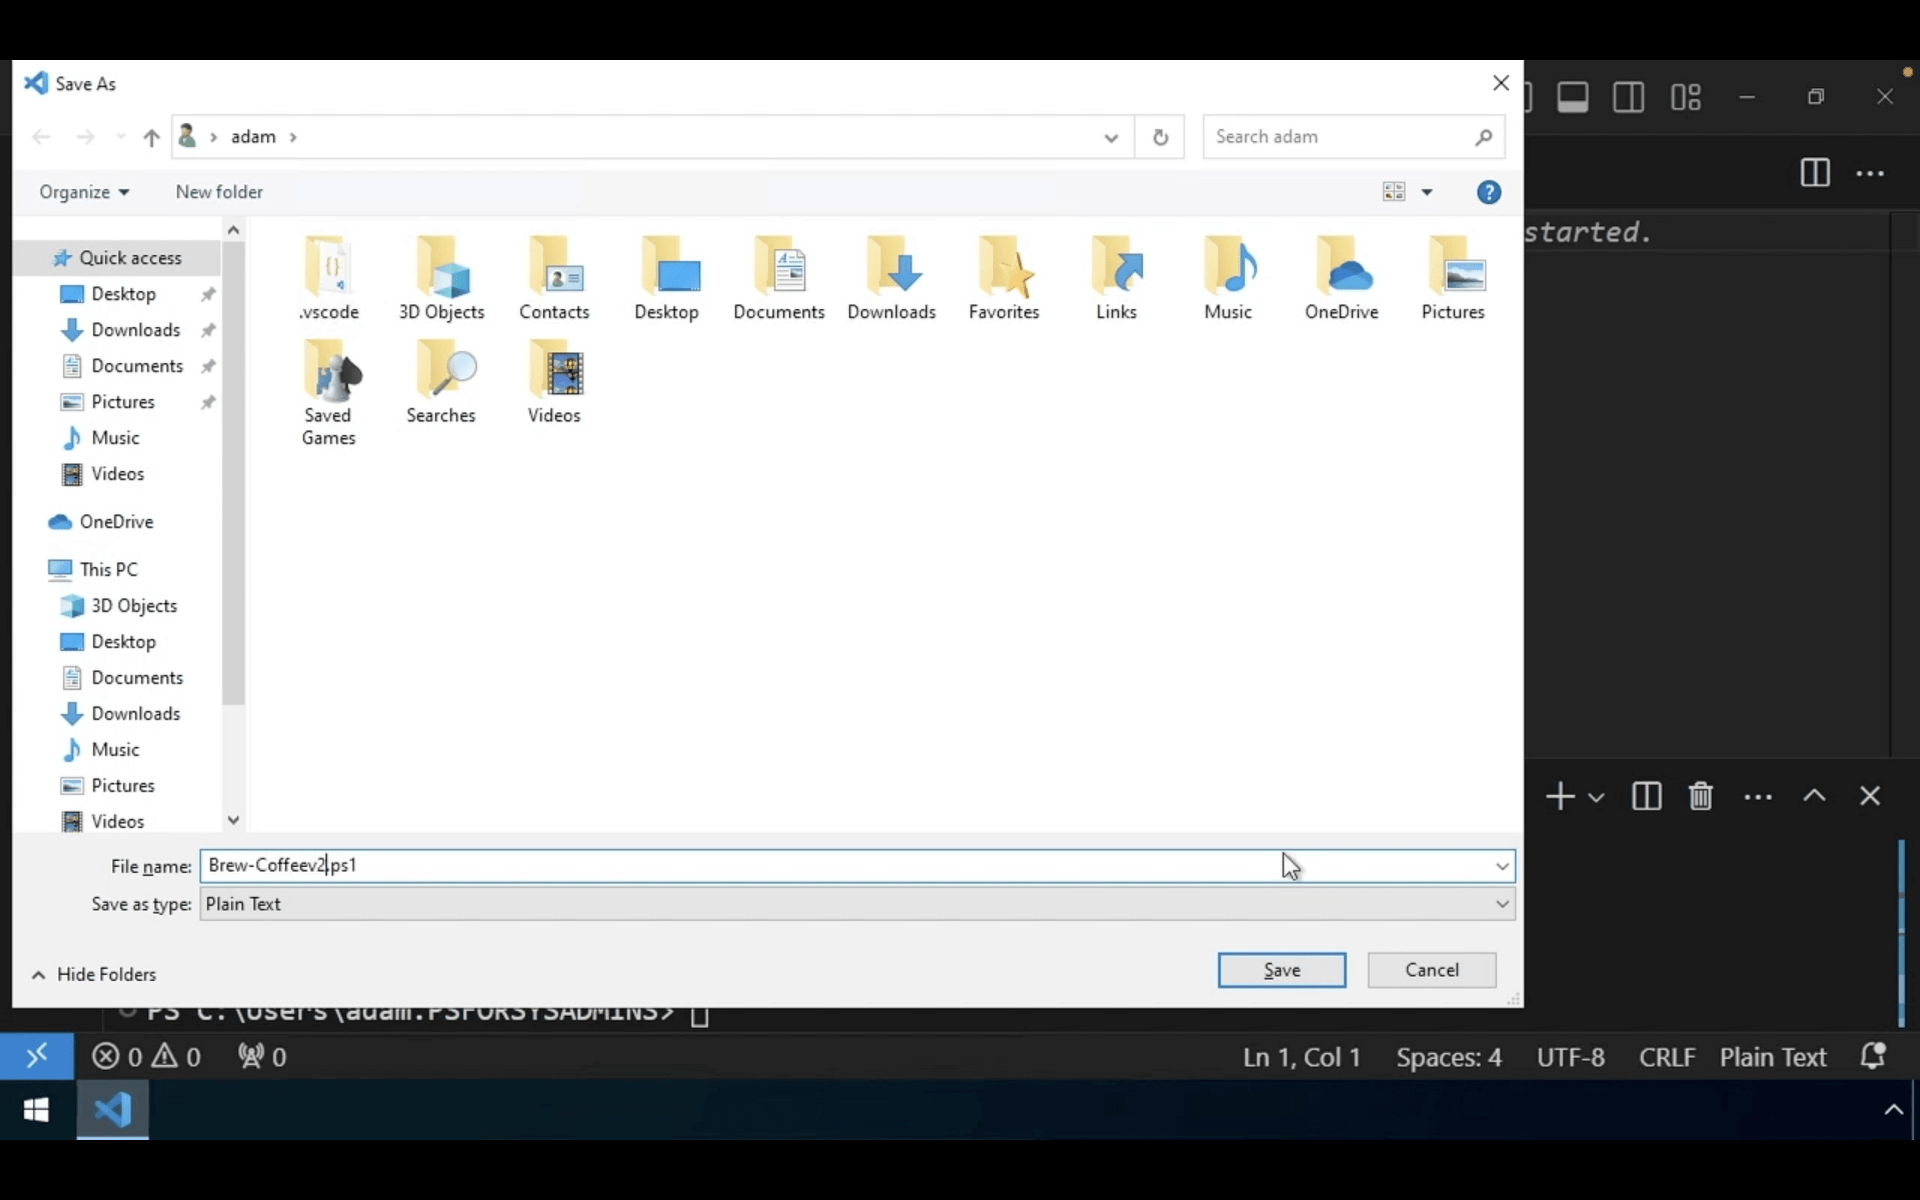
So, the free space is in bytes and let’s say it looks really low. But what is considered low? We’ll need to define some sort of criterion to know when low is low. To do that, we’ll need to an if statement to check if the FreeSpace property is less than a certain threshold. For this example, we’ll say 10 gigabytes. But now that we’ll be using some actual code, the best thing to do is to bring this into VS Code instead of through the CLI. You can save it as whatever name you’d like, we’ll use ServerMonitor.ps1 for this example, and then the code will be brought in here.
Now, we’ll create that if statement.

Then, we can fill in all of the code that will run if that condition is set. For this example, we’ve set up all of the values for a Send-MailMessage command, and we’ll pass those as parameters to it. Once all of the parameter values are defined, it executes Send-MailMessage to send the email. Although optional, Adam did add an else construct in here, to simply write a message to the console if the disk space is enough. Since the drive does have more than 10 gigabytes, the output is instead “Drive C has enough free space.”

And this is what it looks like when the command is successful.

Now that we have the script in place, we don’t want to have to run this manually every time, so we’ll need to create a scheduled task. In the integrated terminal, we’ll run New-ScheduledTaskAction, which will execute the PowerShell binary, the PowerShell.exe. Then, it’s going to pass the file where the script is located.

When executing scripts in the scheduled task, you do typically need the -NonInteractive argument and the -NoLogo argument. The -NonInteractive argument notes that there won’t be any kind of user input and the -NoLogo will skip the banner when executing.

Next, we’ll need to set up a trigger using the New-ScheduledTaskTrigger command. It has various parameters that allow you to customize the behavior of a scheduled task and how it executes. Here, the script will run daily, and it will be running at midnight.

And with an action of “start a program,” it will show you the details of the script that will run.

We’ve created the scripts to monitor the disk space and created a scheduled task to make it happen without direct input. Everything is there and accounted for. This script can be used to add on to and change for different kinds of monitoring needs. It’s a great way to build a script and create a scheduled task all within PowerShell.
Automating User Provisioning with PowerShell
In this demo, we’ll be exploring how PowerShell can automate the tedious process of provisioning new Active Directory user accounts. You’ll learn how to populate accounts from CSV files and script out account creation/removal using AD PowerShell cmdlets. By the end, you’ll be able to onboard and offboard users in seconds.
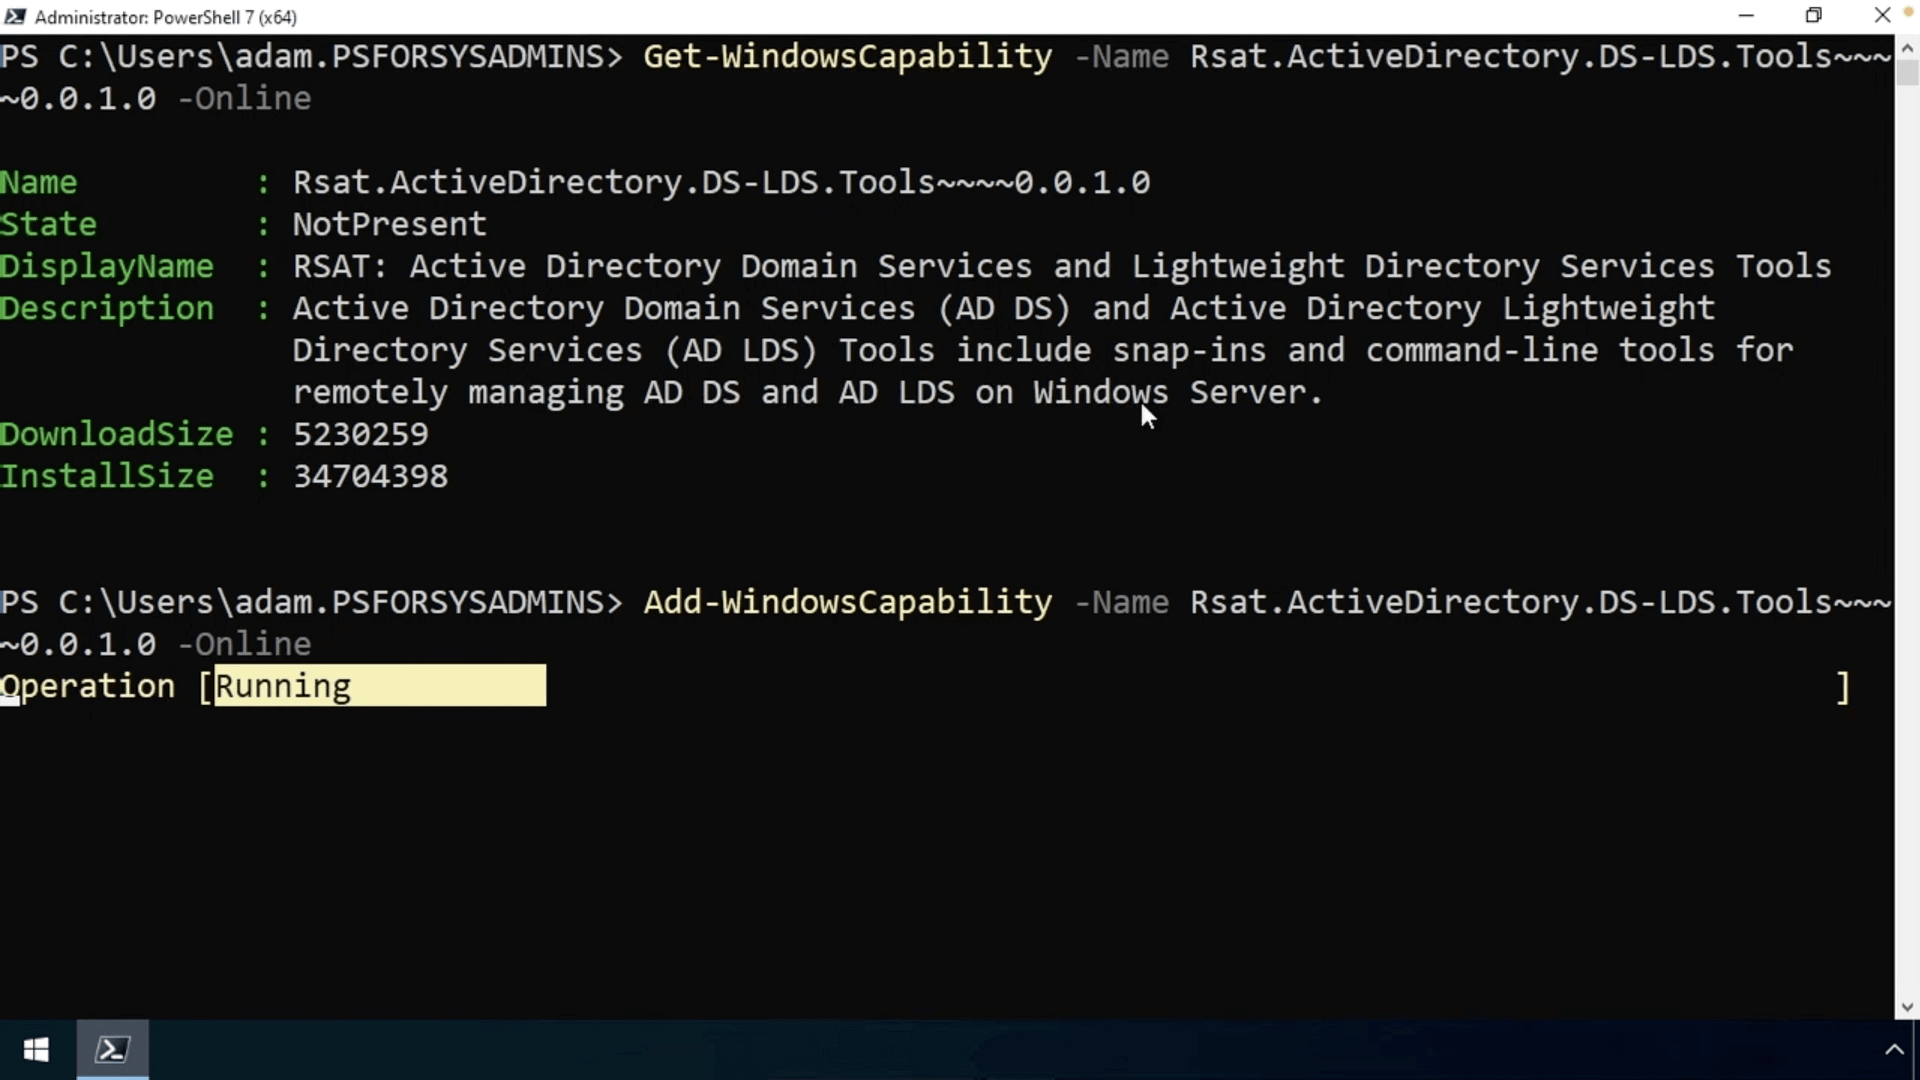
So, we’ll start with scripting up a solution to this onboarding problem. First, you’ll want to install the Active Directory PowerShell module into PowerShell. To get that, you’ll need the Remote Server Administration Tools package. You can check for that package using the Get-WindowsCapability command, which is a handy cmdlet that queries for installed features on client operating systems.
If it does not come up, then you’ll want to install it using Add-WindowsCapability. With this command, if the source files aren’t on the system, it’ll go out and download all the source files that it needs and install the package.
Next, you’ll want to check to make sure it’s actually on the system by using Get-Module ActiveDirectory -ListAvailable. If the Add-WindowsCapability command was successful, you’ll see the Active Directory module here. The -ListAvailable parameter here queries all modules on the file system, not just modules currently imported, like Get-Module normally would.

Now that we have it installed, we’ll work on writing some code. We need to figure out the code to create a single AD user manually first before introducing automation. To create a new AD user, the New-ADUser cmdlet in the Active Directory module is your best friend. Within the parameters, you’ll add a name, account name, and which OU the user account should fall under. By default, New-ADUser will place new users in the user’s container.
In this example, the name is “Adam Bertram,” the account name is ABertram, and the path is accounting.

Once you run it, you’ll want to make sure it’s been added by running Get-ADUser and the account name that you just added.

So now that we know how to create a single account, we’ll go ahead and look at the CSV file that we’ve created that’s full of employees with various information we need to create accounts using Import-CSV. With that imported, we can see all of the employees with various fields we need when adding the AD user account.

Now, if we put the two together with a for-each loop, it will read the CSV file and create AD users for each user in that CSV file. And using the $_ variable here, we’re referencing each object, or CSV row, as it’s processed. We’re then passing each CSV field in as an object property, feeding each to the New-ADUser command.

It looks like it worked, but we got no feedback. So, what happens if you run this again when the users actually exist? As expected, we get an error.

We’ll go ahead and make the code more resilient by first adding a check to see if the AD user exists using an if statement. And if we run that code again using an else statement, it does skip all of the accounts that have already been added and now we have a handy script to automate AD user creation from a CSV file.

Next, we’ll get this saved up in a script by opening VS Code and pasting in our code and saving it.
Now that we have a simple script to create AD users, we’ll build one for removing them as well. To do that, we’ll use the Remove-ADUser command and follow the same coding principles that we followed earlier when creating our New-ADUser command. Here, you’ll see that the logic has been flipped around, removing the AD user if they do exist, then sending a message to the console if they already don’t exist.

So, to run this, since we’re in VS Code, we’ll highlight it and hit F8 to see what happens.

If we do this, it will ask you to confirm the user removal. And with a long list of user accounts, you likely won’t want to confirm this action for every single one.

To silence this, we’ll add a parameter in our Remove-ADUser command. -Confirm$false will remove that approval process.

Since they’ve been added, we’ll go ahead and run it again. And this time, it will say it cannot find an object, which means that it was successfully deleted.

Unfortunately, the Get-ADUser command returns a terminating error here, which stops script execution completely. And it’s something from the Active Directory module that’s unique to how those cmdlets are built. To get around this, we can wrap it in a try-catch block.

Now, you’ll see that the username, existing user, and Remove-ADUser lines are all within the try block. If anything inside of that try block, like Get-ADUser or Remove-ADUser, returns a terminating error, it’s going to send that over to the catch block below. The data type specified here is specific to the exception that one of those cmdlets will return.

It will catch that exception and then write a message that the user already exists. Now that we have that in there, we’ll go ahead and run it again to get a more detailed data output.

Now you have some code to create a simple AD user onboarding script!
Securing Workstations with PowerShell
It’s crucial to properly secure endpoints. In the next demo, we’ll look at how PowerShell can help harden workstations. You’ll learn how to audit system settings, like Windows Defender status and real-time protection. We’ll enable key protections like firewall rules to block ports and you’ll see how to remediate issues by disabling unneeded accounts.
First, we’ll start in the PowerShell console, again with admin rights. We want to first investigate Windows Defender, so we can use the Get-mpComputerStatus command. This command allows you to query the status of just about every component of Windows Defender at once.

For this use case, we’re interested in the real-time protection only. And it looks like the RealTimeProtectionEnabled property of this says False, so real-time protection is disabled. Instead of scrolling up and down through the output, we’ll narrow down this list by only viewing the RealTimeProtectionEnabled property.
Now we can see only the data point we’re looking for, and unfortunately it is disabled. To turn it on, we can do it with the Set-MpPreference command. Using the -DisableRealTimeMonitoring parameter and setting that value to $false, we can easily flip the switch and enable real-time protection. Then, to check if it was successful, run the .RealTimeProtectionEnabled command again.

We can also use PowerShell to identify and disable unnecessary local admin accounts. To do that, we’ll use the command Get-LocalUser.

In this demo, we do have an errant UnnecessaryAdmin account and we need to disable it. By using the Disable-LocalUser command, we can quickly disable it until we can look further into it later.

And finally, we’ll focus on the Windows Firewall. Let’s say that you have some ports open that you need to close. TCP Port 445, or the SMB port, looks like a good one to close. We’ll first test that the port is indeed open, and the service is available using the Test-NetConnection command. This command allows you to easily check for ports, both on the local computer and on remote machines as well. Test-NetConnection will attempt to connect and tell you that it succeeded along with some important port information.

To block an open port, we can use the New-NetFirewallRule command, which creates a rule to restrict incoming traffic on this specific port. In this instance, we’ll name it Block_Port_445. You’ll set a display name, inbound or outbound, the local port number, action to take, and the protocol used on that port.

Once you run it, you’ll look at the Status and see if it was successfully parsed.

To confirm it, you’ll want to use the Get-NetFirewallRule command and add the display name you’ve added previously. So, in this case, Block_Port_445.

Let’s say you want to remove the rule and start over. Using the PowerShell pipeline, we can pipe that Get-NetFirewallRule output directly to Remove-NetFirewallRule and it will simply remove it. And once it’s removed, we can create another just as easily with a different name.

The big takeaway with these scripts is how important it is to be proactive about your security measures rather than reactive.
Debugging Scripts
In this final demo, you’ll learn techniques to squash bugs in your code. We’ll use Write-Output for debugging output, and some sleuthing techniques to track down bugs. With patience, you can methodically gather clues to uncover issues in your code. Debugging is a skill that will save you time and frustration.
We’ll go ahead and go back to the coffee machine automation script we began this tutorial with. The script turns the coffee machine on, simulates brewing, then turns it off. We’ll dot-source it in so that we can use the functions here by adding a dot then providing the name of the script path.

Now that we have that, we’ll start a cup of coffee. For this first cup, we’ll get Dark Roast. And when we run it, we get an error message regarding the Status.

So, why is that? Well, if we come to Line 21 (where the error message is referencing), we’ll see that it’s setting the coffee machine object, the status property, to off within here.

But if we look at the top, the coffee machine object is coming from the parameter. When we hit the up arrow, we didn’t even use the coffee machine object, so there’s not a coffee machine object being provided to it.

This is the first debugging issue we’ll need to tackle. To manage this, we’ll pass a coffee machine object to it. We’ll create a PSCustomObject within parentheses.

And next, we’ll need to add a hash table at the end of this object. The PSCustomObject in front of the hash table will convert all of the key-value pairs in the hash table to an object.

Now that this error has been resolved, we see another error. It says, “Brewing Dark Roast at” and does not have a time listed next to it.

If we go up to function code on Line 18, we see “Brewing $CoffeeType at Start Time,” which means that it’s expecting a start time. If it doesn’t have a start time, it’ll just send out a blank page.

To fix this, we can do two things. First, we could set it to Mandatory, but that’s not always a good idea if you ever want to run the code ad-hoc.

What we’ll end up doing here is the second option, setting a condition using if and else statements. If $StartTime is used, it will send the old message with the time that it was enabled. And if it’s not being used, it will just say “Brewing $CoffeeType” rather than adding the missing start time. Now, since we’re conditionally creating the message, we can simply use Write-Output to output the message variable.

We’ll now save this and dot-source it in to bring in the new function.

Now, we’ll see that it just says “Brewing Dark Roast” without the “at” included in the message.

Let’s say this next one we’ll start at 8am. Now, it says “Brewing Dark Roast at” today’s date at 8am, which means this code was successfully debugged.

When it comes to squashing bugs, you’ll want to check the error message, check which line it was (if provided), then troubleshoot from there. If the line is not provided, you can determine which part of the code it’s pulling from and start troubleshooting there.
Debugging is all about carefully gathering clues until you uncover the root issue. With some patient testing, you can solve just about all of PowerShell’s mysteries.
Wrap-Up
Remember that your journey with PowerShell is never over. Explore new scripts, new commands, and new possibilities. Experiment, break things, fix them, and keep learning. This is your roadmap to PowerShell mastery.
If you want to watch the video walkthroughs of all the demos listed above, please visit our PowerShell for IT Ninjas content page for an easy-to-follow series.