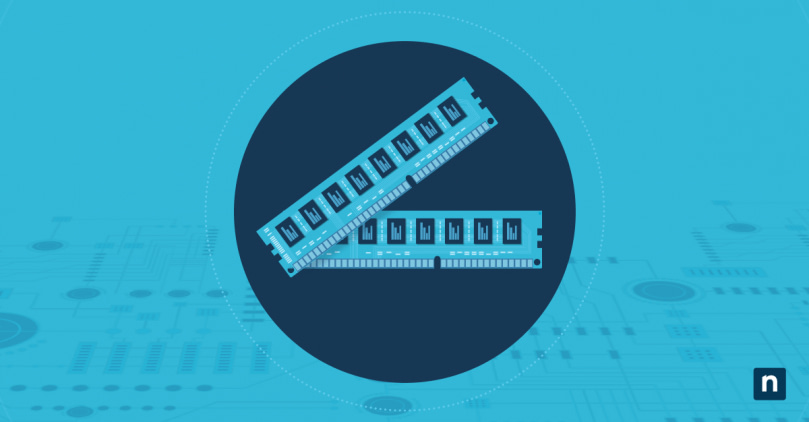
The performance of your laptop or PC is essential for staying productive and efficient, and replacing an aging computer isn’t always an option. Thankfully, most PCs can be readily upgraded at the component level. One of the most effective ways to boost your current device’s speed and responsiveness is by upgrading its RAM (Random Access Memory).
Whether you’re a seasoned tech enthusiast or a novice user, this guide will walk you through the process of how to upgrade RAM on your laptop or PC, learn its nature and intricacies so you can unleash its full potential.
Assessing your computer’s RAM needs
Not all RAM upgrades are the same, and different applications require different parts or form factors. It’s crucial to first assess your system’s current specifications and determine its requirements.
Identifying your computer’s current RAM specifications
To identify your computer’s current RAM specifications, you can use various built-in tools depending on your operating system.
- Windows: On Windows systems, you can use the Task Manager. Right-click on the taskbar and select “Task Manager.” Then, navigate to the “Performance” tab and click on “Memory.” Here, you’ll find information about your installed RAM, including its total capacity, speed, and usage.
- Mac: If you’re using a Mac, click on the Apple menu, then select “About This Mac.” In the window that appears, click on the “Memory” tab to view details about your installed RAM, such as type and size.
How much RAM can your system support?
Every computer has a maximum amount of RAM it can support, which is determined by factors such as the motherboard’s chipset and the operating system.
- Consult your device’s manual: Check the user manual or visit the manufacturer’s website for information on your computer’s maximum RAM capacity.
- Use system information tools: Alternatively, you can use system information tools like CPU-Z (for Windows) or System Information (for Mac) to gather details about your system’s maximum supported RAM.
Types of RAM and their compatibility
Modern computers primarily use DDR (Double Data Rate) RAM, with DDR3 and DDR4 being the most common variants. Understanding the type of RAM your system supports is crucial for compatibility.
- DDR3: Older systems typically use DDR3 RAM, which has a lower maximum bandwidth compared to DDR4 but is still widely compatible with many computers.
- DDR4: Newer systems often utilize DDR4 RAM, offering higher speeds and improved efficiency compared to DDR3. However, DDR4 RAM may not be backward compatible with DDR3 slots, so it’s essential to verify compatibility before purchasing.
- DDR5: While not as prevalent as DDR3 or DDR4, DDR5 RAM is starting to appear in newer systems, offering even higher speeds and efficiency. Ensure that your motherboard supports DDR5 before considering an upgrade.
Before purchasing new RAM modules, cross-reference your computer’s specifications with the type and maximum capacity of RAM it supports to ensure compatibility and optimal performance.
Choosing the correct RAM modules
Selecting the correct RAM modules for your computer involves considering various factors to ensure compatibility and optimal performance. Here’s what you need to know:
Factors to consider when selecting RAM modules
When choosing RAM modules, several factors come into play:
- Size (Capacity): Determine how much RAM your system needs based on your usage requirements. For basic computing tasks, 8GB is usually sufficient, while more demanding applications may benefit from 16GB or higher.
- Speed (MHz): RAM speed, measured in megahertz (MHz), determines how quickly data can be transferred to and from the memory. Higher-speed RAM can enhance overall system responsiveness, especially in tasks that require frequent data access.
- Latency (CAS Latency): CAS (Column Address Strobe) latency measures the delay between the memory controller requesting data and the data being available. Lower latency results in faster data retrieval, contributing to smoother performance.
Dual-channel vs. single-channel memory configurations
RAM modules (also known as “sticks”) can operate in either single-channel or dual-channel configurations:
- Single-channel: In a single-channel configuration, the system accesses memory through a single channel, limiting bandwidth. While suitable for basic computing tasks, dual-channel configurations typically offer better performance.
- Dual-channel: Dual-channel memory setups utilize two identical RAM modules installed in corresponding slots on the motherboard. This configuration doubles the memory bandwidth, enhancing system performance, particularly in tasks that benefit from high memory bandwidth, such as gaming and content creation.
- Other multichannel options: There are even triple and quad-channel RAM configurations, all depending on how many memory slots are available on the motherboard.
When upgrading your RAM, consider installing identical modules into each available slot to enable multi-channel mode and maximize memory bandwidth.
Motherboard compatibility
Ensuring compatibility between your chosen RAM modules and your computer’s motherboard is essential for a successful upgrade:
- Check motherboard specifications: Refer to your motherboard’s documentation or visit the manufacturer’s website to verify compatible RAM types, capacities, and speeds.
- Consider form factor: Choose RAM modules that match your motherboard’s form factor (e.g., DIMM for desktops, SODIMM for laptops) to ensure physical compatibility and proper fitment.
- XMP profiles: Some high-performance RAM modules feature XMP (Extreme Memory Profile) support, allowing for easy overclocking and optimized performance. Ensure that your motherboard supports XMP if you intend to utilize this feature.
By considering these factors and ensuring compatibility with your computer’s motherboard, you can confidently select the right RAM modules to enhance your system’s performance and responsiveness.
Preparations and safety measures for PC memory upgrades
Before starting your RAM install, it’s essential to prepare adequately and implement safety measures to safeguard both your computer and yourself throughout the process. The following tips will help you prevent damage or injury.
Gather the following tools and equipment to facilitate a smooth RAM upgrade:
- Compatible RAM modules: Ensure you have the correct type, capacity, and speed of RAM modules that are compatible with your computer’s specifications.
- Screwdriver: Depending on your computer’s design, you may need a Phillips or flat-head screwdriver to access and remove the RAM slots.
- Anti-static wrist strap: To prevent damage from electrostatic discharge, use an anti-static wrist strap by attaching it to a grounded object or wearing it throughout the upgrade process.
- Compressed air canister: Before installing the new RAM modules, use compressed air to gently clean any dust or debris from the RAM slots and surrounding components.
- Work surface: Choose a clean, well-lit workspace with ample room to comfortably access and work on your computer.
Safety precautions to protect your computer (and yourself)
Power off and unplug
Before handling any internal components, power off your computer and disconnect it from the electrical outlet to prevent electrical shock.
Handle components carefully
RAM modules are sensitive to static electricity and physical damage. Handle them by the edges and avoid touching the gold connectors or circuitry.
Don’t force the RAM sticks
When inserting or removing RAM modules, apply gentle, even pressure to avoid bending or damaging the modules or motherboard.
Mind your surroundings
Be mindful of your workspace to prevent accidental spills, bumps, or damage to your computer or its components.
Backing up important data and files
Although RAM memory upgrades typically don’t affect data stored on your hard drive, it’s always wise to back up important files and data as a precautionary measure:
- Backup strategy: Use external hard drives, cloud storage services, or backup software to create copies of important documents, photos, videos, and other data.
- Data integrity: Ensure your backups are up-to-date and verify that you can access and restore your data if needed.
Step-by-step RAM upgrade process
Follow these detailed instructions when upgrading the memory (or adding new RAM to existing RAM) in your laptop or PC:
Opening the laptop or PC case (if applicable)
Laptop: Laptop RAM upgrades are typically very straightforward, requiring only a screwdriver to access the correct ports. Turn off your laptop and disconnect it from the power source. Flip the laptop over and locate the RAM access panel, typically secured with screws. Use a screwdriver to remove the screws and carefully lift off the access panel.
PC tower: Power off the PC and disconnect it from the power source. Remove any peripheral devices connected to the PC. Depending on the case design, you may need to unscrew or slide off the side panel to access the internal components.
Locating and accessing the RAM slots
Laptop: Inside the RAM access panel, you’ll find the RAM slots typically secured by clips or levers. Gently release the clips to open the slots.
PC tower: Once inside the PC case, locate the RAM slots on the motherboard. They are long, rectangular slots usually found near the CPU. Depending on the motherboard design, you may need to release retention clips or levers to access the slots.
Removing the existing RAM modules
Laptop and PC: If there are existing RAM sticks installed, gently push outward on the clips or levers securing the modules. The modules will pop up at an angle. Carefully grasp the sides of the module and pull it straight out of the slot.
Installing the new RAM modules correctly
1. Ensure compatibility: Before installing the new RAM modules, verify that they are compatible with your computer’s specifications in terms of type, capacity, and speed.
2. Align and insert: Hold the new RAM module by its edges, aligning the notch on the module with the notch in the RAM slot. Insert the module into the slot at a 45-degree angle and apply firm, even pressure until it clicks into place.
3. Repeat for additional modules (if applicable): If you’re installing multiple RAM modules for a multi-channel configuration, repeat the process for each module.
Closing the laptop or PC case (if opened)
Laptop: Once the new RAM modules are installed, carefully place the RAM access panel back onto the laptop and secure it with the screws.
PC tower: If you removed the side panel, slide it back into place or reattach it using the screws. Reconnect any peripheral devices and power cables to the PC.
Final steps
Power on and verify: Power on your laptop or PC and wait for it to boot up. Once booted, verify that the system recognizes the new RAM modules by checking the total RAM capacity in the system settings or using system information tools.
Congratulations! You’ve successfully upgraded the RAM in your laptop or PC, boosting its performance and enhancing your computing experience.
Testing and verifying the RAM upgrade
After completing the RAM upgrade, it’s crucial to test and verify that the new RAM modules are functioning correctly. Follow these steps to ensure your computer recognizes and utilizes the upgraded memory effectively:
1. Boot up your computer
Power on your computer and allow it to boot up fully into the operating system.
2. Check system information
Once the system is booted up, access the system information tool on your computer. This tool can typically be found in the control panel or settings menu.
Verify that the total amount of installed RAM matches the capacity of the new RAM modules you installed. If the total memory displayed is less than expected, double-check the installation to ensure the modules are properly seated in the RAM slots.
3. Run system diagnostics
Many operating systems offer built-in diagnostic tools that can test the functionality of hardware components, including RAM.
Run a comprehensive system diagnostic test with a RAM upgrade checker to check for any errors or issues related to the RAM modules. This test can help identify any potential problems with the new RAM installation.
4. Perform memory stress tests
Consider running memory stress tests to thoroughly evaluate the stability and performance of the new RAM modules.
Memory stress testing software, such as MemTest86 or Windows Memory Diagnostic, can help identify any potential issues with the RAM memory modules, such as errors or instability under load.
5. Monitor system performance
Keep an eye on your computer’s performance after the RAM upgrade. Monitor factors such as system responsiveness, multitasking capabilities, and overall speed.
If you notice any unusual behavior or performance degradation, further investigation may be necessary to determine the cause, such as incompatible RAM modules or improper installation.
6. Benchmarking (optional)
For users seeking to quantify the performance improvements gained from the RAM upgrade, consider running benchmarking tests before and after the upgrade.
Benchmarking software, such as PassMark PerformanceTest or UserBenchmark, can provide detailed performance metrics and comparisons, helping you assess the impact of the RAM upgrade on your computer’s performance.
7. Periodic checks
Even after verifying the RAM upgrade initially, it’s a good practice to periodically check your computer’s performance and system information to ensure the continued functionality of the new RAM modules.
Benefits of upgrading RAM
Why are larger or faster RAM modules one of the most common PC upgrades users seek? For a simple swapping of RAM sticks, the process offers several significant benefits, including:
Improved performance
Additional RAM allows your computer to handle more tasks simultaneously without slowing down. It reduces the need for the system to use virtual memory (hard drive space) as a substitute for RAM, resulting in faster response times, smoother multitasking, and overall better performance.
Enhanced multitasking
With more RAM, you can run multiple applications simultaneously without irritating lag or slowdowns. This is particularly beneficial for users who frequently work with resource-intensive programs such as video editing software, graphic design tools, or virtual machines.
Better gaming experience
Many modern games require a significant amount of RAM to run smoothly, especially when running at higher resolutions or with demanding graphics settings. Upgrading RAM can help reduce loading times, minimize stuttering, and provide a more immersive gaming experience.
Increased system stability
Insufficient RAM can lead to system crashes, freezes, or application errors, especially when running memory-intensive tasks. By upgrading RAM, you provide your system with more of the resources it needs to operate smoothly and prevent stability issues.
Faster data processing
RAM plays a crucial role in data processing and manipulation. With more RAM available, your computer can store and access frequently used data more quickly, leading to faster data processing, file transfers, and overall system responsiveness.
Future-proofing your system
As software and operating systems become more resource-intensive over time, upgrading your RAM ensures that your computer remains capable of handling new applications and tasks efficiently. It extends the lifespan of your system and delays the need for a full hardware upgrade.
Optimized virtualization performance
For users who run virtual machines or use software for simulation and emulation purposes, upgrading RAM is essential. It allows for smoother operation of virtual environments, improved performance of guest operating systems, and better overall VM performance.
In summary
What does upgrading RAM do? Now you know — boosting the memory on your laptop or PC is a straightforward yet powerful way to enhance its performance and capabilities. By following the step-by-step process outlined in this guide, you can unlock the full potential of your computer.
Whether you’re a casual user looking to improve multitasking capabilities, a gamer seeking smoother gameplay, or a professional aiming for increased productivity, upgrading your system’s memory offers numerous benefits, including improved system responsiveness, enhanced multitasking, and better overall stability.


