The Microsoft Management Console (MMC) offers several snap-in tools, including the Group Policy Management Console (GPMC), to help you manage your Windows environment.
Group Policy Management Console overview
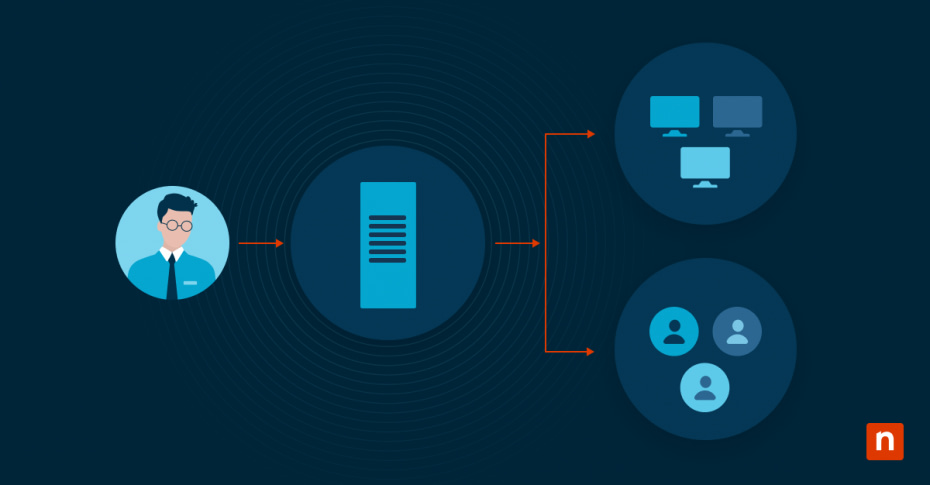
GPMC provides a single interface for managing Group Policy Objects (GPOs) in an Active Directory environment. With GPMC, you can centrally manage and deploy group policies across your network, simplifying group policy administration and ensuring consistent configuration and security settings for all domain-joined computers.
NinjaOne complements group policy management through its Windows endpoint management capabilities.
Learn more
Features and capabilities of GPMC
GPMC offers several key features for managing GPOs, including:
1. Centralized management
Centrally manage GPOs across your network by creating, editing, and linking from a single console, eliminating the need to connect to individual domain controllers. This saves time and effort, especially in large and complex network environments.
2. Easy-to-use interface
GPMC’s user-friendly interface organizes GPOs into a hierarchical structure, allowing you to locate and modify specific policies quickly. It also offers comprehensive search and filtering capabilities, making finding specific settings or GPOs within your network easier.
3. Reporting and analysis
With GPMC, you get powerful reporting and analysis features that provide insights into your group policy settings. You can generate reports on GPOs, settings, and their impact on specific computers or users, allowing you to assess the effectiveness of your group policy configurations and identify any issues or conflicts.
4. Copy GPOs across domains
Import and copy GPOs across domains and forests by creating migration tables that map references to users, groups, and computers from a source GPO to new values in a destination GPO.
5. Prototype your Group Policy
Use a simulated Resultant Set of Policy (RSoP) data to test your Group Policy before implementing it in the production environment.
How do I open the Group Policy Management Console?
To open GPMC in Windows, search for it on your device:
- Press the Windows key on your keyboard to open the Start menu.
- Type “Group Policy Management Console” in the search bar.
- Click on the “Group Policy Management Console” app in the search results to open the console.
You can also open GPMC through the Run dialog box following these steps:
- Press the Windows key + R to open the Run dialog box.
- Type “gpmc.msc” in the Run dialog box.
- Press Enter or click OK to open the Group Policy Management Console.
Navigating the GPMC interface
The GPMC interface is divided into sections and provides easy navigation to manage group policies.
Console tree
The left pane of the GPMC interface contains the console tree, which displays a hierarchical view of your domains, sites, and organizational units (OUs). You can expand or collapse these nodes to navigate and select the desired object.
Details pane
The details pane displays information about the selected object in the console tree, such as GPOs, WMI filters, and security settings.
Actions pane
The actions pane provides quick access to common tasks and actions related to the selected container, such as creating new GPOs, editing existing GPOs, and linking GPOs to specific domains, sites, or OUs.
Toolbar
At the top of the interface is a toolbar with various buttons for performing common tasks, such as creating, editing, and managing GPOs and generating reports and backups.
Managing Group Policy Objects with GPMC
GPOs are the building blocks of group policy management, and GPMC provides a comprehensive set of tools to create, edit, and manage GPOs. Here are some of GPMC’s key functions for managing GPOs and the steps to complete the action:
Creating a new GPO
Creating a new GPO is one of the most crucial tasks in Group Policy Management. This operation allows administrators to establish specific settings and rules for specified user groups or computers within an Active Directory domain. Creating new GPOS enables organizations to tailor policies to meet the distinctive needs of different departments, teams, or locations, ensuring users have access to resources and settings they require for specific roles and responsibilities. Here are the steps in creating a new GPO:
- Creating a new GPO is on the GPMC interface, select the domain, site, or OU where you want to create the GPO.
- Right-click on the selected container and choose “Create a GPO in this domain, and Link it here” from the context menu.
- Enter a name for the GPO and click OK to create it.
Editing an existing GPO
There are instances that may require edits for an existing GPO configuration. Changes in organizational requirements and security standards may prompt this task. Addressing specific issues or errors may also require editing an existing GPO. This operation involves the modification of settings, adding or removing permissions, and updating configurations, ensuring policies are relevant and effective. Editing an existing GPO also helps organizations adapt their policies to evolving needs and maintain a secure and efficient IT environment. Here are the steps in editing an existing GPO:
- In the GPMC interface, navigate to the GPO you want to edit.
- Right-click on the GPO and choose “Edit” from the context menu.
- The Group Policy Management Editor will open, allowing you to modify the settings and configurations of the GPO.
Linking a GPO to a specific domain, site, or OU
Another important task in the administration of Group Policy Management is linking a GPO to a specific domain, site, or OU. The operation is crucial for applying policies to the desired target audience to ensure that the correct policies are enforced for users and computers based on their location or organizational membership. Linking GPOs allows administrators to control the scope of policy application and prevent unintended consequences. It also helps maintain order and consistency within the Active Directory environment. Here’s how to link a GPO to a specific domain, site, or OU.
- In the GPMC interface, select the GPO you want to link.
- Right-click on the selected GPO and choose “Link an Existing GPO” from the context menu.
- Select the domain, site, or OU where you want to link the GPO and click OK.
Importing GPO settings
Importing GPO settings is a valuable tool for streamlining the deployment of policies across multiple domains or environments. This allows administrators to reuse existing policies and configurations, saving time and effort. By importing GPOs, organizations can ensure consistency and standardization across different parts of their IT infrastructure. This can be particularly useful when implementing new policies or migrating to a new domain structure. Here’s how administrators can import GPO settings:
- In the Group Policy Management Console, go to the OU, domain, or site that contains the GPO where you want to import settings.
- Right-click the target GPO and choose “Import Settings…”
- Select the backup or template file (.admx or .adml) with the GPO settings you want to import, then click “Open.”
- If the backup location contains several GPOs, choose the specific one from which you want to import the settings.
Advanced GPMC functions
GPMC has additional features for managing GPOs:
1. Backup and restore
GPMC allows you to create backups of your GPOs and restore them if any issues arise. This ensures that you can preserve and recover GPO settings, preventing any potential loss of configurations.
2. Resultant Set of Policy
RSoP is a feature that helps you determine the effective group policy settings for a specific user or computer. It allows you to simulate the application of multiple GPOs and view the resulting policy settings. In the event of conflicts, troubleshoot by determining the precedence of applied policies.
3. Group Policy Modeling
Group Policy Modeling allows you to simulate the application of group policies without actually applying them to your network. This helps you assess the impact of potential policy changes before implementing them and troubleshoot issues that can arise after multiple Group Policy settings are applied.
What is Enforce in GMPC?
Enforce in GMPC pertains to a setting that forces a Group Policy Object to apply to all Active Directory objects within a container, regardless of their nesting level. This means the settings defined in the Group Policy enforced GPO will override any conflicting settings from other GPOs applied later in the hierarchy.
Here’s a breakdown of what enforce does in GMPC:
- Overriding conflicting settings: A GPO’s settings take precedence over any other GPOs linked to the same container or its child containers when a GPO is enforced, guaranteeing that the GPO settings are implemented uniformly across all objects within the specified scope.
- Applying settings to all objects: Enforced GPOs can be applied to all Active Directory objects regardless of their depth or location in the hierarchy to facilitate the deployment and management of settings for administrators across a large number of computers.
- Enforcing security policies: Enforced GPO implementation often aids in deploying crucial security policies, which involve password requirements, account lockout, and user rights assignments. Enforcing security policies allows organizations to prevent unauthorized access to their data while protecting their computer systems.
Meanwhile, here are some important considerations in enforcing GPOs:
- Enforced GPO precedence: As mentioned, when a GPO is enforced, its settings become the definitive policy for all users and computers within its scope, superseding any conflicting policies from higher-level containers.
- Conflicting settings: Multiple enforced GPOs that apply to the same container or its child containers may cause unexpected behaviors if administrators fail to ensure settings don’t conflict with each other. This is why it’s important to review enforced GPOs before implementation to prevent difficulties in troubleshooting the problems conflicting enforced GPOs may cause.
- Testing and troubleshooting: Aside from carefully reviewing GPOs before enforcement, testing them in a test environment is always a vital part of the process. Administrators can also use the Resultant Set of Policy (RSoP) tool to analyze the GPOs that apply to a specific computer or user and identify potential conflicts.
- Enforcing too many GPOs: The enforce option must be used cautiously because enforcing too many GPOs can make it difficult to manage your Active Directory environment. Administrators should only enforce policies that are truly necessary. Proper planning and testing are key to ensuring that Group Policy enforced settings do not create management challenges.
Optimize your Windows endpoint management with NinjaOne’s powerful Group Policy capabilities.
Start your free trial
Tips and guidelines for using GPMC
To make the most out of GPMC and ensure smooth group policy management, keep these tips and guidelines in mind:
Organize GPOs
Organize your GPOs using a logical naming convention and folder structure. This makes it easier to locate and manage specific policies within GPMC.
Document changes
Keep track of any changes made to GPOs by documenting the modifications, including the date and reason for the change. This helps troubleshoot and maintain an audit trail of policy modifications.
Test and verify
Before deploying GPOs to your entire network, test them in a controlled environment and verify their impact on a small group of test computers or users to ensure the policies work as intended.
Regularly review policies
Periodically review your group policies to ensure they align with your organization’s evolving needs and security requirements. Remove any outdated or unnecessary policies to simplify management and improve performance.
NinjaOne Windows endpoint management as a GPMC alternative
While GPMC is a powerful tool for managing group policies in a Windows environment, alternative solutions are available in the market.
One is an add-on to GPMC developed by Microsoft. Advanced Group Policy Management (AGPM) provides advanced change management and version control capabilities for group policies, allowing you to track and manage policy changes, apply approvals, and roll back to previous versions if needed. AGMP is part of the Microsoft Desktop Optimization Pack (MDOP), only available to Software Assurance customers.
Another solution is NinjaOne’s Windows endpoint management software, which offers comprehensive group policy management capabilities and simplifies Group Policy Editor processes. These capabilities, along with additional features for endpoint management, can significantly enhance your Windows Policy Editor experience, ensuring optimal group policy management. Additionally, NinjaOne lets you manage all your Windows endpoints — including servers, virtual machines, workstations, and laptops — from a single console.
Automate software and patch deployment, antivirus deployment, user management, and remediate issues without interrupting the user. Learn more about how NinjaOne’s Windows endpoint management software manages all of your Windows endpoints.
FAQs
1. How to enable location in Group Policy?
To enable location in Group Policy, follow these steps:
- Open the Group Policy Management Console (GPMC).
- Navigate to User Configuration > Administrative Templates > Windows Components > Location and Sensors.
- Double-click on “Turn off location services” and set it to Disabled to enable location services.
- Click Apply and then OK to save the changes.
- Ensure the GPO is linked to the appropriate Organizational Unit (OU) or domain for it to take effect.
2. What is the difference between Group Policy Object Editor and Group Policy Management Editor?
The Group Policy Object Editor and the Group Policy Management Editor are related but serve different purposes:
The Group Policy Object Editor is specifically used to edit individual Group Policy Objects, allowing administrators to configure settings for users and computers within a GPO.
In contrast, the Group Policy Management Editor is part of the broader Group Policy Management Console. It provides a comprehensive interface for managing all aspects of Group Policy, including creating, linking, and editing GPOs.
Together, these tools enable effective administration of group policies in a Windows environment.
3. What is Windows Policy Editor?
Windows Policy Editor is another name for Group Policy Editor. The tool is also called Windows Policy Editor because it specifically pertains to policy management within the Windows environment.
4. Can Group Policy be applied to non-domain computers?
Group Policy is primarily designed for Active Directory environments, where policies can be applied to all domain-joined computers. However, you can use the Local Group Policy Editor (gpedit.msc) to manage policies for non-domain or standalone computers. Note that these policies will only affect the individual machine, not a broader network.
5. How do you back up Group Policy Objects (GPOs)?
To back up GPOs:
- Open GPMC and navigate to the Group Policy Objects container.
- Right-click on the GPO you want to back up and select Back Up.
- Choose a destination folder, provide a description if necessary, and click Back Up. This will create a backup of the selected GPO, which you can restore later if needed.
6. How to troubleshoot group policy issues?
You can troubleshoot group policy issues by:
- Using the Resultant Set of Policy (RSoP) tool to simulate and analyze the applied policies for a specific user or computer.
- Checking the Event Viewer logs under Applications and Services Logs > Microsoft > Windows > GroupPolicy for errors or warnings related to policy processing.
- Running the gpupdate /force command in Command Prompt to refresh and apply the latest GPO settings manually.


