

Windows 11’s File Explorer navigation pane is your hub for accessing folders and drives quickly. To make this pane even more convenient for you, add a drive directly to File Explorer’s navigation pane as a standalone entry to quickly access it and save valuable time.
In this guide, you’ll learn the simple method of adding or removing the E: drive from the navigation pane, making it more accessible for users.
Method: Adding and removing the E: drive using Registry Editor
Directly modifying the Windows Registry gives you precise control over whether the E: drive appears as a standalone entry in File Explorer’s navigation pane.
📌 Use case: Making your E: drive, whether it’s an internal SSD, external HDD, or network-attached storage, permanently visible in File Explorer’s navigation pane allows for instant access. Some users prefer to remove it to decrease clutter since it shows up when it is not needed after updates or hardware changes.
📌 Prerequisites: Before proceeding to configure the E: drive via the Registry Editor, all steps below are available for all editions of Windows 11. Your account must have administrative privileges to ensure you can edit the registry without hindrances.
⚠️ Warning: Incorrect edits in the Registry can lead to serious system instability. Ensure that you are familiar with the tool, and always back it up or create a system restore point. We recommend checking ⚠️ Things to look out for before proceeding.
📌Recommended deployment strategies:
| Click to Choose a Method | 💻 Best for Individual Users | 💻💻💻 Best for Enterprises |
| How to add the E: drive to the navigation pane | ✓ | ✓ |
| How to remove the E: drive from the navigation pane | ✓ | ✓ |
How to add the E: drive to the navigation pane
The Registry can precisely configure your E: drive to add it to the navigation pane of your File Explorer, making it a system location for one-click access.
📌 Use case: IT admins can use this approach to standardize navigation setups across enterprise workstations. This will also allow normal users to access the drive more frequently instead of having to navigate through “This PC” in File Explorer.
Step-by-step procedure:
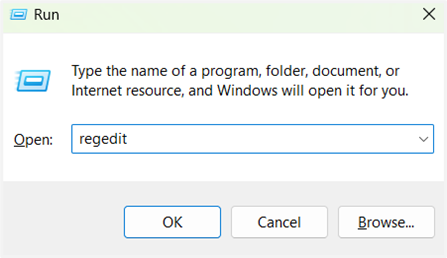
- Open Registry Editor:
- Open Run (Win + R), then type regedit. Confirm the UAC prompt if it pops up.
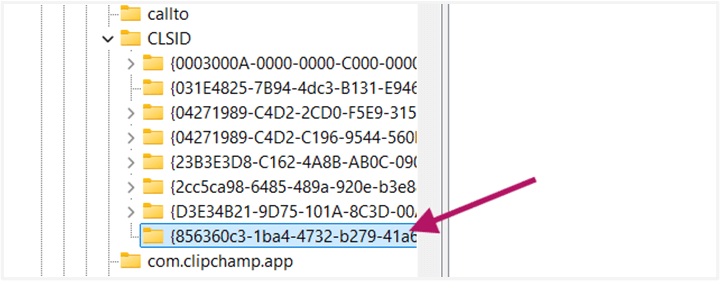
- Navigate to the CLSID key:
- Go to or paste this path into the address bar: Computer\HKEY_CURRENT_USER\Software\Classes\CLSID

- Create a new key:
- Right-click the CLSID key, then select New > Key.
- Name the new key as {856360c3-1ba4-4732-b279-41a6d03fb99b}.
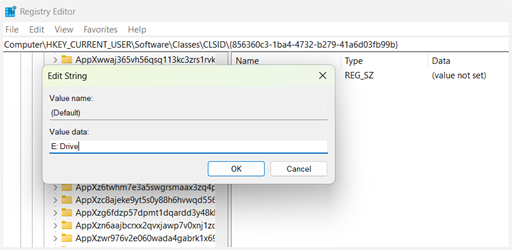
- Set the default value:
- In the new key, double-click (Default).
- Set the Value data to E: Drive.
- Add critical DWORD values:
- Right-click the new key again, then select New > DWORD (32-bit) Value.
- Create two new DWORD Values.
- Right-click the new key again, then select New > DWORD (32-bit) Value.
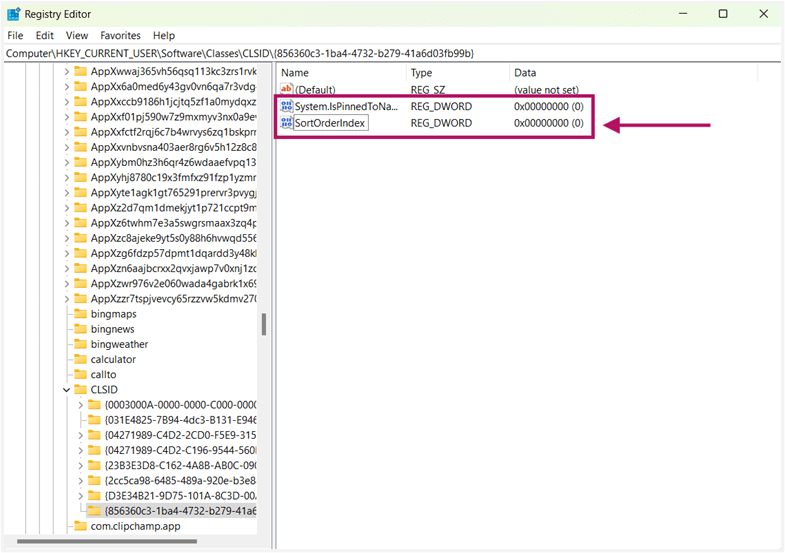
- Name one DWORD as System.IsPinnedToNamespaceTree, then set its Value data to 1.
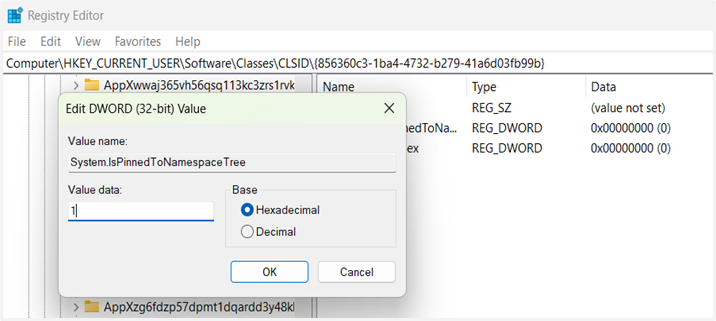
- Name the other DWORD as SortOrderIndex, then set its Value data to 3c or 60 in Decimal, which will position it below Quick Access.

- Create DefaultIcon subkey:
- Right-click the {856360c3-1ba4-4732-b279-41a6d03fb99b} key, then select New > Key.
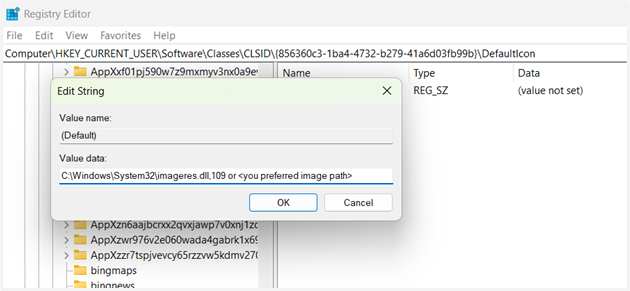
- Name this subkey as DefaultIcon.
- Right-click the {856360c3-1ba4-4732-b279-41a6d03fb99b} key, then select New > Key.

- In this new subkey, double-click its (Default), then set its Value data to your preferred icon path.
- E.g., C:\Windows\System32\imageres.dll,-32 (generic drive icon).
- In this new subkey, double-click its (Default), then set its Value data to your preferred icon path.
- Create InProcServer32 subkey:
- Right-click the {856360c3-1ba4-4732-b279-41a6d03fb99b} key, then select New > Key.
- Name this subkey as InProcServer32.
- Right-click the {856360c3-1ba4-4732-b279-41a6d03fb99b} key, then select New > Key.

- In this new subkey, double-click its (Default), then set its Value data to C:\WINDOWS\system32\shell32.dll.

- Build instance structure:
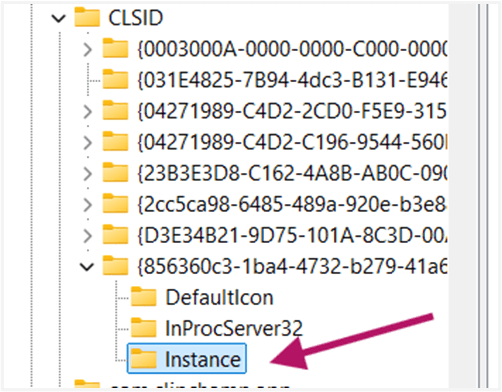
- Right-click the {856360c3-1ba4-4732-b279-41a6d03fb99b} key, then select New > Key.
- Name this subkey as Instance.
- Right-click the {856360c3-1ba4-4732-b279-41a6d03fb99b} key, then select New > Key.
- Inside the Instance subkey, create a String (New > String), then name one CLSID, then set its value to {0E5AAE11-A475-4c5b-AB00-C66DE400274E}.
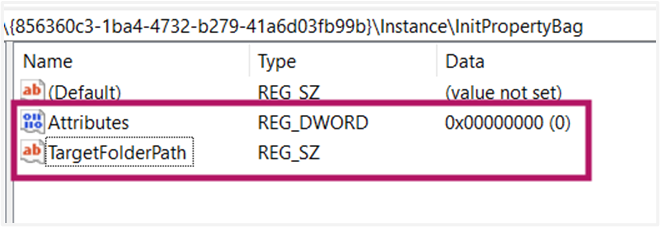
- Right-click the Instance subkey, select New > Key, then name it InitPropertyBag.

- Inside InitPropertyBag, create a:
- DWORD: Name it Attributes, then set its Value data to 11 and 17 in Decimal.
- String: Name it as TargetFolderPath, then set its value data to E:\.
- Inside InitPropertyBag, create a:
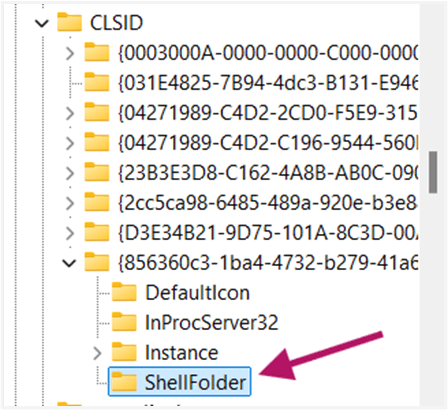
- Add ShellFolder settings:
- Right-click the {856360c3-1ba4-4732-b279-41a6d03fb99b} key, then select New > Key.
- Name this subkey as ShellFolder.
- Right-click the {856360c3-1ba4-4732-b279-41a6d03fb99b} key, then select New > Key.
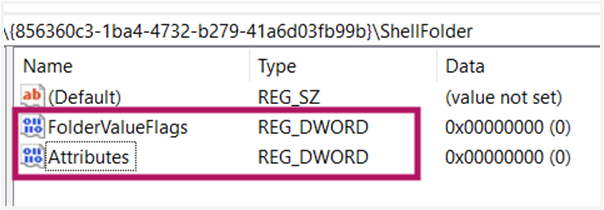
- Inside ShellFolder, create two DWORD (32-bit) Values:
- FolderValueFlags: Set its Value data to 28 in Hexadecimal or 40 in Decimal.
- Attributes: Set its Value data to f080004d in Hexadecimal.
- Inside ShellFolder, create two DWORD (32-bit) Values:
- Apply changes:
- Close the Registry Editor.
- Restart your PC.
Your E: drive should now appear as a standalone entry at the top of File Explorer’s navigation pane. If it still doesn’t appear, double-check the spelling of CLSID and its path leads to TargetFolderPath.
How to remove the E: Drive from the Navigation Pane
If you no longer need the E: drive pinned in File Explorer’s navigation pane, deleting its Registry entry cleanly will remove it from this area.
📌 Use case: This is ideal when the system E: hard drive shows up in my File Explorer after hardware changes or updates, and you want to declutter. You can also do this when decommissioning the drive or reorganizing your workspace.
Step-by-step procedure:
- Open Registry Editor:
- Open Run (Win + R), then type regedit. Confirm the UAC prompt if it pops up.
- Navigate to the CLSID key:
- Go to or paste this path into the address bar: Computer\HKEY_CURRENT_USER\Software\Classes\CLSID
- Locate the E: drive key:
- Find the key named: {856360c3-1ba4-4732-b279-41a6d03fb99b}.
- Delete the key:
- Right-click the {856360c3-1ba4-4732-b279-41a6d03fb99b}, then select Delete.
- Confirm with Yes if the warning prompt pops up.

- Apply changes:
- Close the Registry Editor.
- Restart your PC.
The E: drive will be removed from the navigation pane. It will remain accessible under “This PC” if the drive is still connected.
⚠️ Things to look out for
This section highlights potential challenges to keep in mind while following this guide.
| Risks | Potential Consequences | Reversals |
| 1. No Registry backup | Accidental deletion/corruption of critical keys may cause system instability, boot failures, or application crashes. | Back up the registry (regedit > File > Export) or create a System Restore Point. Watch How to Back Up and Restore Windows Registry for more details. |
| 2. Incorrect CLSID entry | This can cause the E: drive to fail to appear in the navigation pane, duplicate entries for the key, or conflicting GUIDs, causing UI glitches. |
|
| 3. Wrong value types/data (e.g., hex vs. decimal) | It can cause the navigation pane corruption, Explorer crashes, or the drive icon/name not to display. |
|
| 4. Deleting adjacent keys | Unintended removal of system CLSIDs (e.g., {20D04FE0…} for This PC) may disable core OS features |
|
| 5. Permission errors | Inability to create/delete keys due to lack of admin rights or corporate Group Policy restrictions |
|
Key considerations when adding or removing the E: drive
Adding your E: drive directly to the navigation pane delivers faster access to critical data, but thoughtful implementation ensures a seamless experience.
Balance convenience vs. clutter
Adding the E: drive as an item in the navigation pane streamlines workflow, making it more accessible. However, overusing this method and adding multiple drives can congest it. Reserve this approach only for your most essential drives to maintain a neat interface.
Adjust the SortOrderIndex value (e.g., 60) during the setup to control its position relative to default entries like Quick Access.
Drive letter stability is critical
The registry method permanently binds your customization to the E: drive letter. If this letter changes, such as when reconnecting external drives or modifying disk configurations, the navigation pane shortcut will break and appear orphaned.
To prevent this, assign persistent drive letters via Disk Management > Change Drive Letter and Paths for removable media, or use static letters for internal partitions.
User-specific scope requires planning
Customizations apply only to the user profile applied to them. For multi-user configurations, you will need to repeat the Registry steps for each account needing the shortcut. IT teams can automate the process via Group Policy deployments, while Home users should document the steps for consistency.
Streamline access by adding drives to File Explorer
Customizing File Explorer’s navigation pane puts your most-used drives like E: front and center, slashing clicks and boosting productivity. While Windows Settings offers no native way to add a drive to File Explorer’s navigation pane, the Registry Editor method we’ve covered provides precise control, letting you pin or remove E: as a standalone entry.
Related topics


