

Hard drive partitioning is a critical process for any Windows 10 user looking to optimize their system’s performance and data management. Partitioning your hard drive allows you to divide a single physical disk into several separate sections, each acting as its own independent disk drive. This technique is particularly useful for organizing files, running different operating systems, or segmenting a large drive into manageable chunks.
This guide serves as a comprehensive tutorial on how to partition a hard drive in Windows 10. It explores the rationale behind partitioning alongside the benefits and potential risks involved. The aim is to provide readers with the necessary knowledge to effectively partition their hard drive, choose suitable partition sizes, and manage their storage space efficiently.
The benefits of partitioning a hard drive
- Organized data storage: By separating your operating system and application files from personal data, you can streamline backups and improve data retrieval.
- Enhanced system performance: Partitioning can lead to more efficient file system management, potentially speeding up search operations and system response times.
- Increased data security: Segregating your system data from personal files can provide an additional layer of security in case of system failure or malware attacks.
- Increased system resilience: Partitioning enables the installation of other operating systems, providing a backup OS in the event of system failure or malware attacks.
What is hard drive partitioning
Hard drive partitioning refers to the process of dividing a hard drive into multiple independent regions, each formatted to appear as a separate hard drive. This organization not only optimizes performance but also enhances the user’s ability to manage data effectively across Windows 10 systems.
Types of hard drive partitions
- Primary: The main partitions used to boot operating systems and store system files. Hard drives’ amount of primary partitions are limited. This also depends on the partitioning scheme used, however:
- Master Boot Record (MBR): The limit for primary partitions on a modern HDD (Hard Disk Drive) or SSD (Solid State Drive) when using the Master Boot Record (MBR) partitioning scheme is four. This limitation stems from the structure of the MBR itself, which has only four entries in its partition table for primary partitions.
- GUID Partition Table (GPT): The limitation is significantly higher. GPT supports up to 128 partitions by default in Windows and Linux without the need for extended partitions or logical drives. This flexibility makes GPT a better choice for modern systems with large storage capacities and the need for multiple partitions.
- Extended: A partition that acts as a container for logical drives, useful when you need more than the typical limit of primary partitions. Used less often, more modern operating systems support the GPT scheme by default.
- Logical: Nested within an extended partition, these can be used to segregate and manage data effectively.
Partitioning and formatting a drive are often confused but serve different complementary purposes:
- Partitioning divides the hard drive into segments, each of which can be independently formatted and used.
- Formatting prepares the partition by setting up a file system, making it ready for data storage.
Enable IT admins to remotely support Windows 10 disk partitioning and configuration.
Learn more about NinjaOne Remote Access
Preparing for partitioning
Before partitioning your hard drive, consider the following preparations to ensure a smooth and safe process:
1. Back up your data: Always back up your existing data to avoid loss during partitioning. Use cloud services, external drives, or Windows 10 built-in tools like File History.
2. Defragment your data:
a) If it’s an SSD: DON’T DO IT! Solid state drives do not require defragmentation as they access memory cells randomly, so defragmenting them can actually reduce their lifespan.
b) If it’s an HDD: Before you start the partitioning process, it’s beneficial to defragment your hard drive. Defragmentation consolidates fragmented files and spaces on the drive, which can improve the performance and speed of the partitioning process. This step is crucial for ensuring that the existing data on your hard drive is organized in a contiguous block, making it easier and safer to resize and manipulate partitions.
3. Gather necessary tools: Essential resources for partitioning in Windows 10 include the Disk Management tool, a reliable data backup solution, and possibly third-party partition management software for more complex scenarios.
Step-by-step guide to partitioning in Windows 10
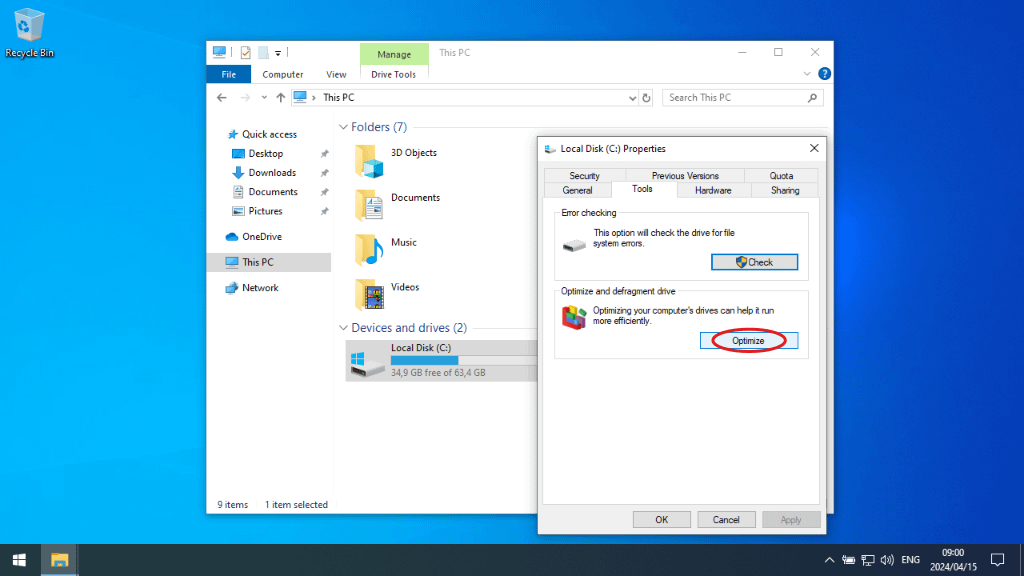
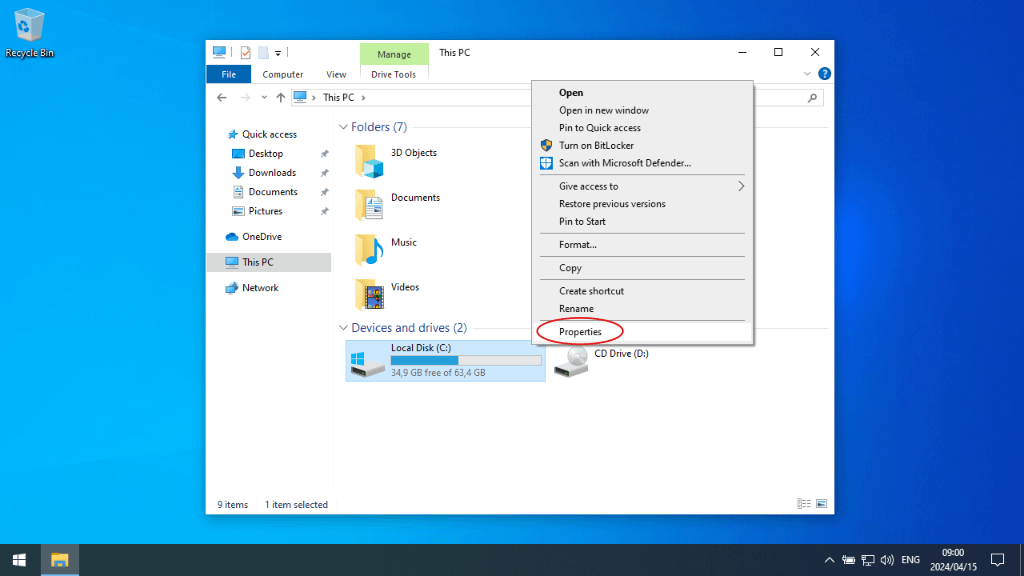
1. Check your existing partitions’ health: Open Windows Explorer (Win + E) -> “This PC” -> Right-click the drive that you want to repartition -> Properties -> Tools tab -> “Check…”:
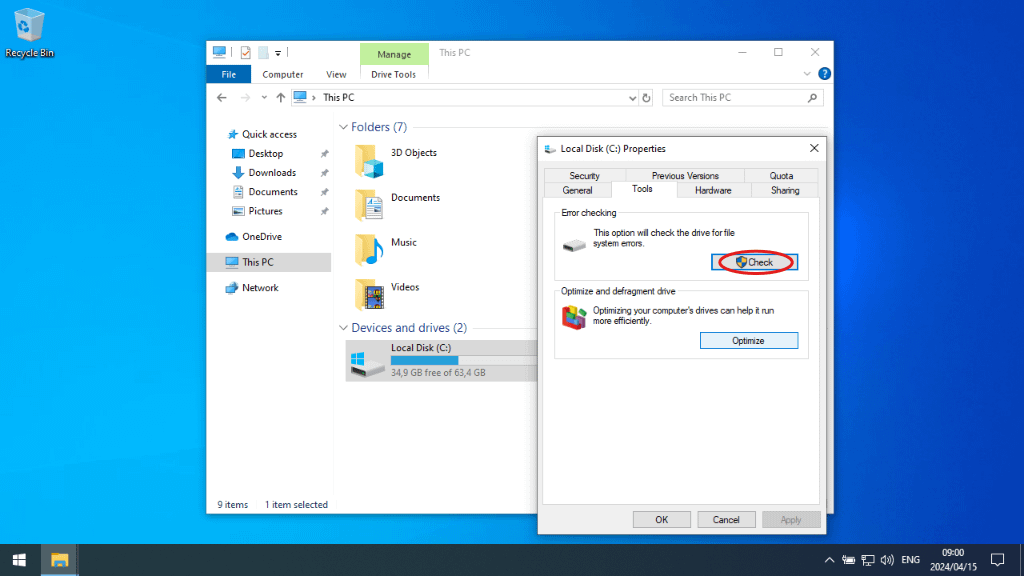
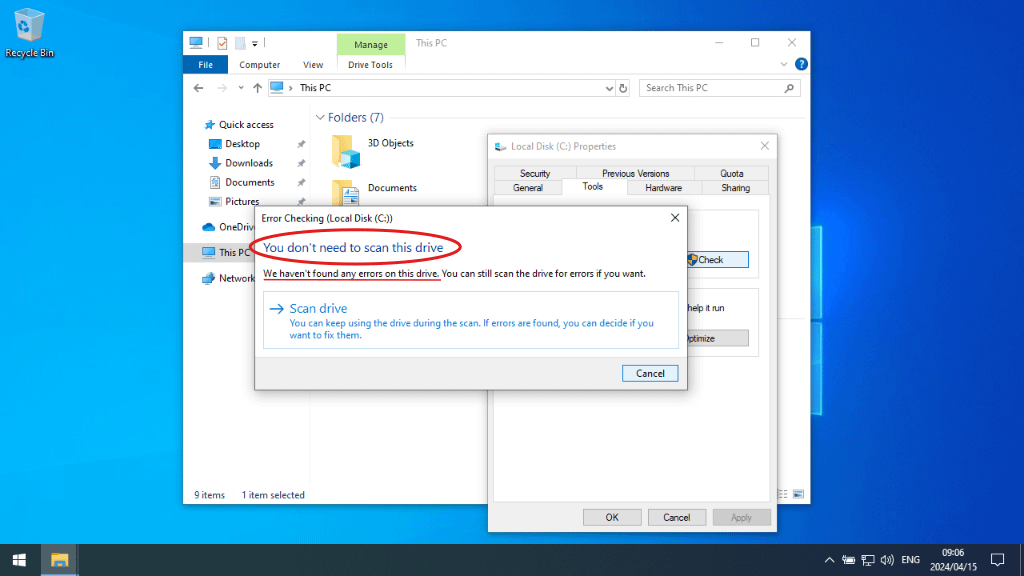
Your disk should be free of errors before proceeding, or you risk certain data corruption.
NOTE: If the GUI disk check fails, run CHKDSK on the command line:
- Press Win + R, type “cmd”, press Ctrl + Shift + Enter, click “Yes” to confirm Administrator mode.
- Run the command “chkdsk c: /F” (replace c: with your drive letter) to force fixing errors.
- If the requested drive is in use, a disk check and fix will be performed on your next reboot. If so, reboot now before proceeding.
2. Shrink your existing partition: Let’s make some space on your existing drive. (Skip to step 3 if you are partitioning a new drive.)
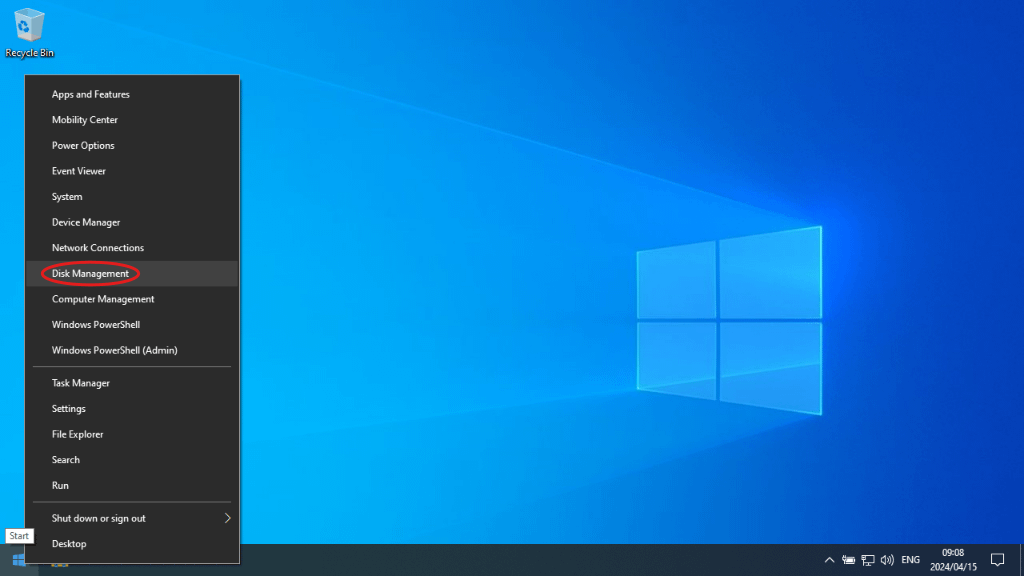
a) Right-click the Start button (or press Win + X) and click Disk Management:
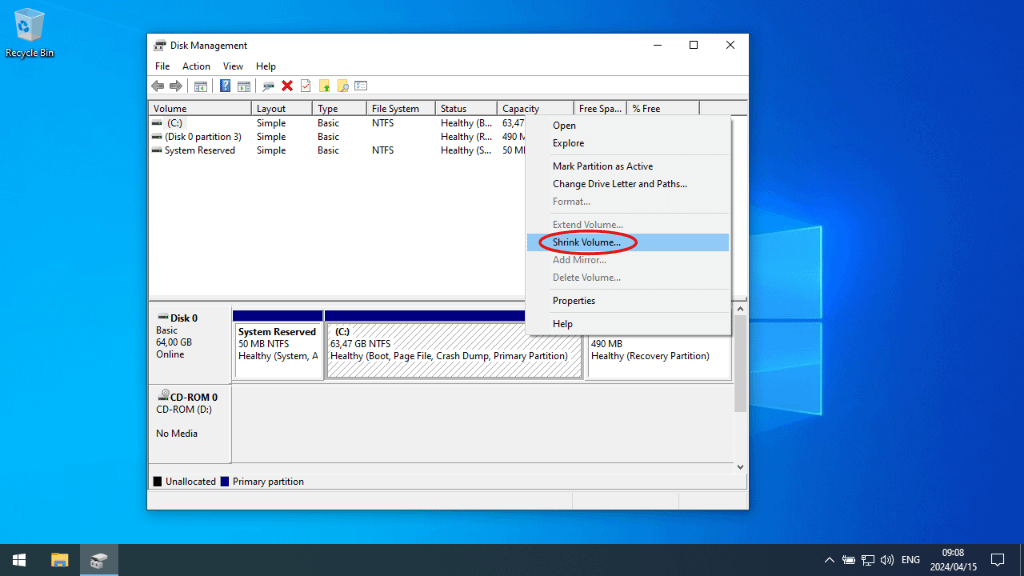
b. Right-click on the partition you’re shrinking and click “Shrink Volume…”
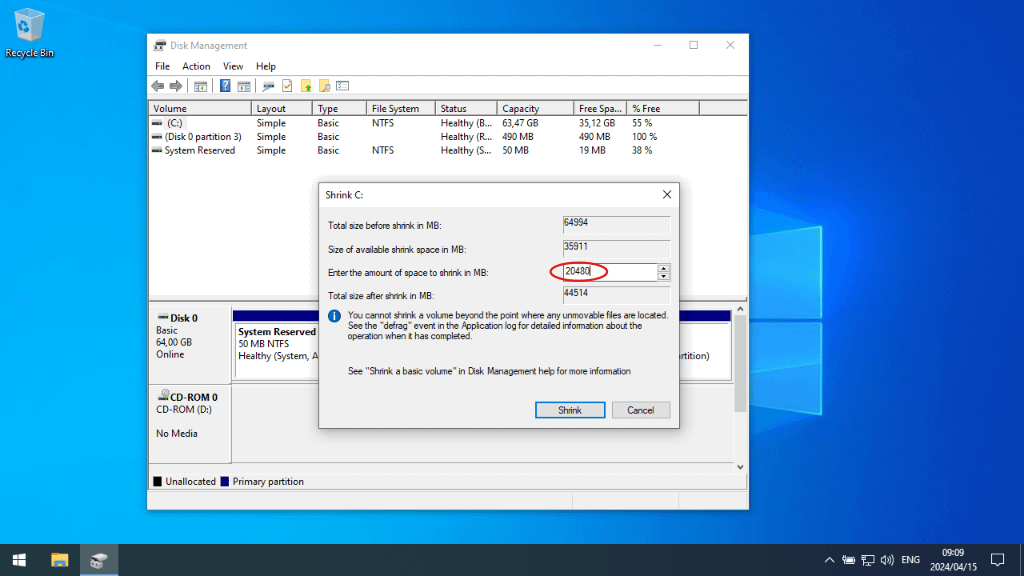
c. Give your partition a new size to shrink to. (By default it will select the maximum that can possibly be freed up – it is highly advisable to leave a healthy margin over and above the default number if you are repartitioning your C: drive or risk system instability) This is the amount of space that will be freed up:
d. If you are repartitioning to install another OS, you are done here – go ahead and reboot.
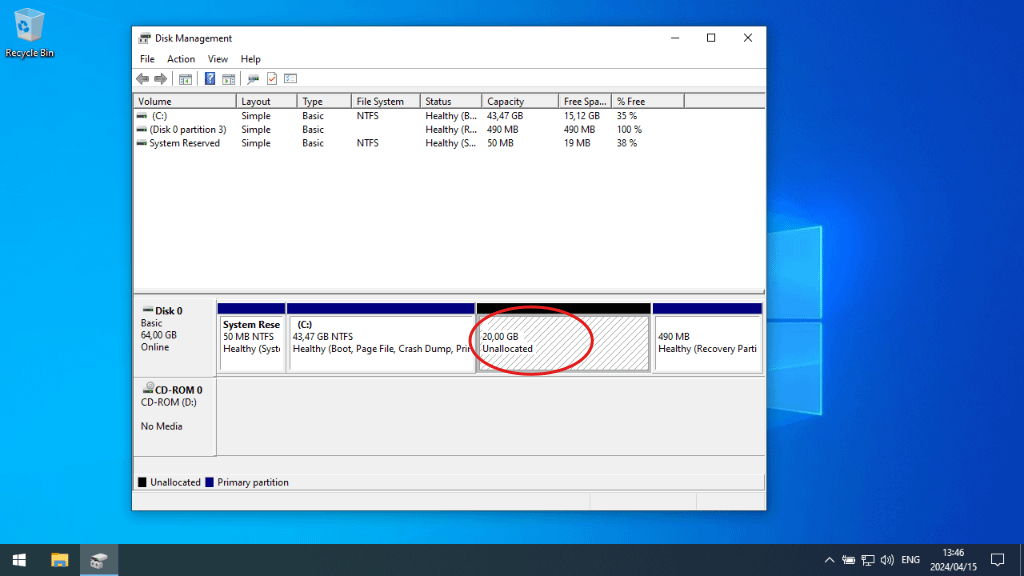
3. Create your new partition: Either you are partitioning a new drive, or Step 2 went well.
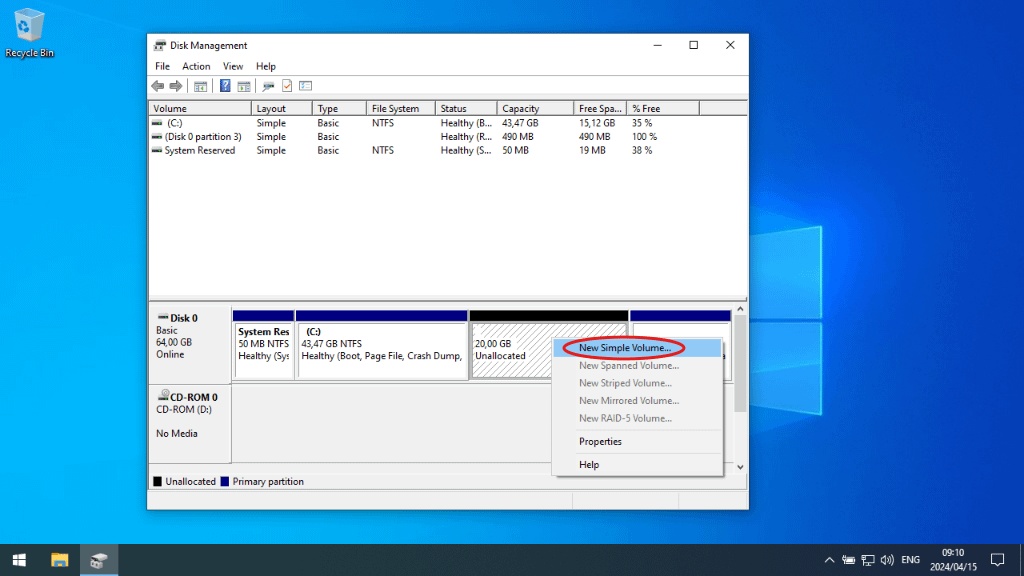
a) Right-click the unallocated space you want to use -> “New Simple Volume…”:
b. Specify a size to subpartition or accept the full default:

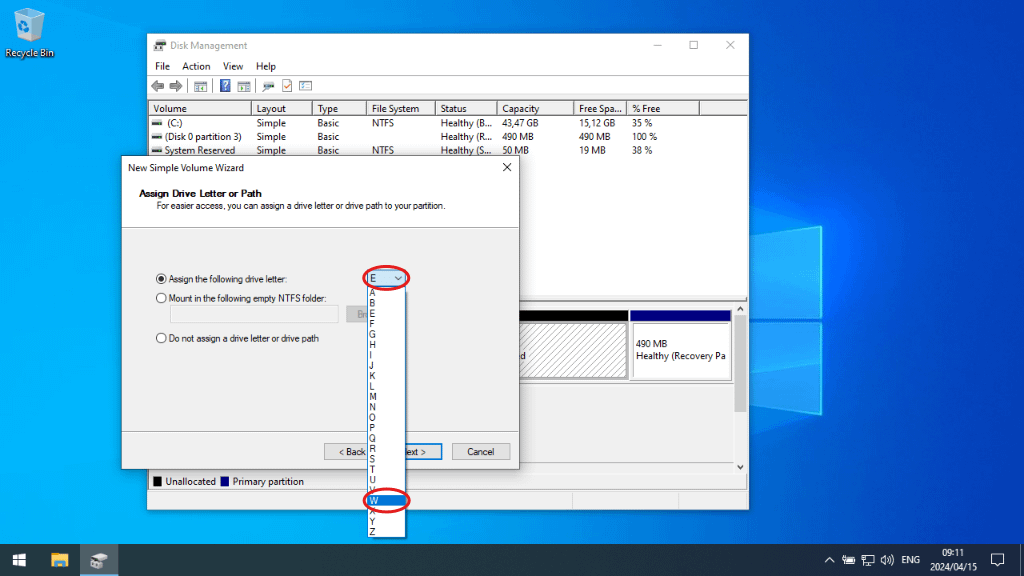
c. Choose a drive letter for your new partition:
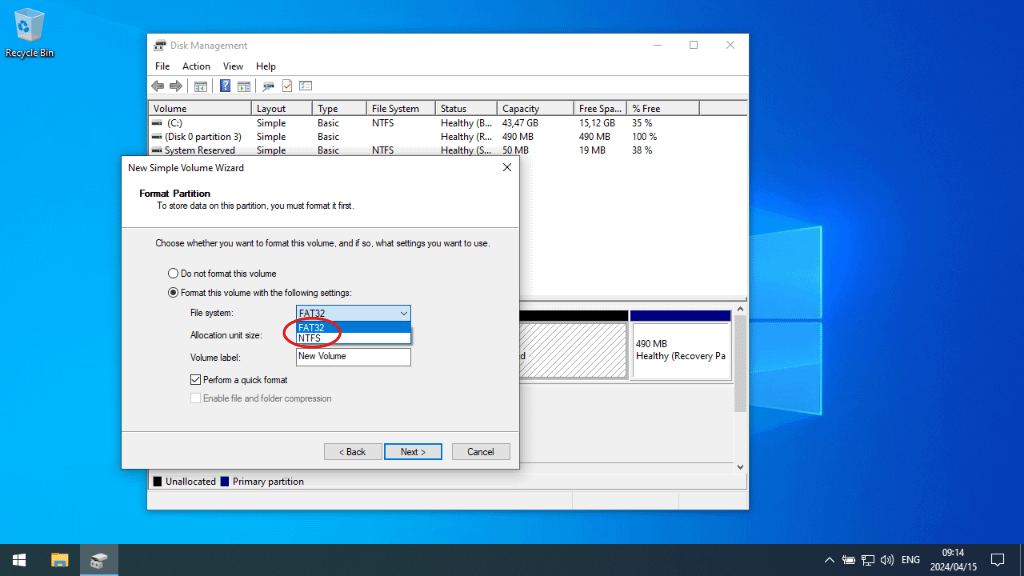
d. Choose a filesystem: Your needs will determine the best option here. If you need greater compatibility with MacOS or Linux, choose FAT32; if you are only going to access the partition using Windows, NTFS is better. Optionally give your new volume a name (label).
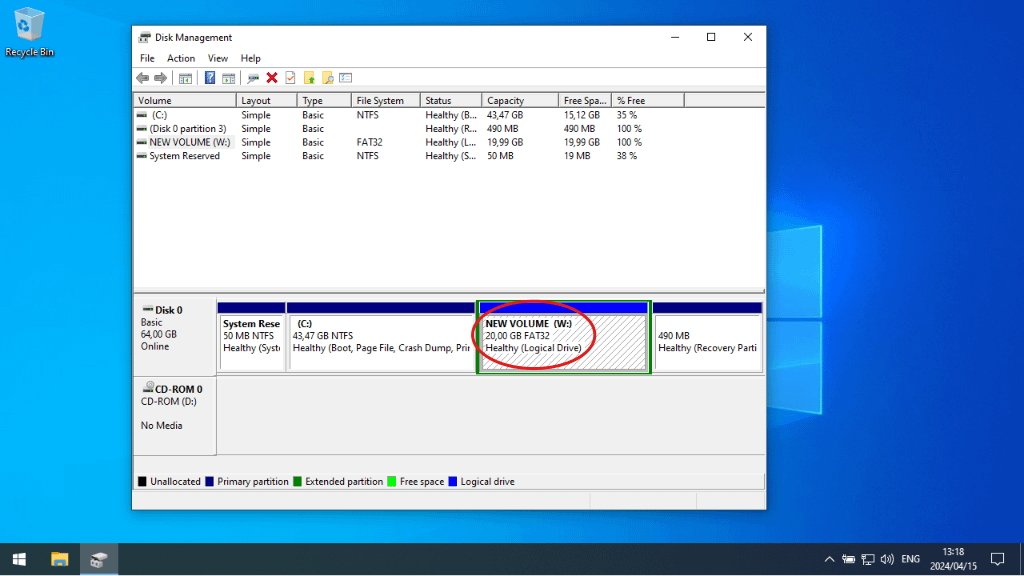
e. Your new partition is ready for use!
Partition management and maintenance
Maintaining your partitions can involve regular checks and adjustments
- Resizing and deleting partitions: Adjust partition sizes or remove them as needed, using Disk Management or third-party tools.
- Defragmenting: If using (platter) hard drives, run the Windows defragmenter regularly to ensure that your partitions are operating efficiently.
- Managing labels and drive letters: Keep your drive letters and labels organized to ensure easy navigation and management of your files.
- Running regular disk checks: Use Windows’ disk check regularly to ensure your file systems’ integrity as per Step 1 above.
Best practices for hard drive partitioning
When partitioning your hard drive, consider the following best practices:
- Plan your partition sizes based on the types of data storage and system requirements, as well as your multi-platform compatibility needs.
- Back up: Regularly back up important data to mitigate the risk of loss.
- Update: Keep your system software and drivers updated to support new hardware and software configurations effectively. Consider upgrading to another operating system before Windows 10 support ends in October 2025, when it will reach EOL (End-Of-Life) status.
NinjaOne simplifies IT management with powerful tools to manage your Windows 10 devices more efficiently.
Watch a demo or start a free trial
Partitioning: your pathway to systems freedom
Partitioning your hard drive is a strategic approach to enhancing your computing experience on Windows 10. It not only helps in organizing data but also improves system performance and security. By following the outlined steps and best practices, ensure you are effectively managing your hard drive partitions, leading to a more efficient and secure system.
For a visual walkthrough, watch the video guide on How to Partition a Hard Drive in Windows 10.


