Does your computer need a fresh start? Launching a clean boot is a good way to identify any software conflicts or issues that are causing your system to slow down or behave erratically.
Running a clean startup process can help you identify software conflicts by reducing your computer’s processes to the bare minimum. In this comprehensive guide, we’ll explore the steps for how to perform a clean boot in various Windows versions, as well as provide tips and troubleshooting techniques to ensure a healthy clean boot process.
What is a clean boot in Windows?
A clean boot in Windows refers to starting your computer with only the essential services and drivers required for it to function. It allows you to isolate the problems by disabling unnecessary startup programs or services that might be causing interference. If performing the clean boot resolves the issue that you were experiencing, you can then gradually reenable the system’s services and startup programs one by one to identify the specific one causing the problem.
What is the difference between clean boot and safe mode?
Performing a clean boot is similar to, yet distinct from, launching your computer in safe mode. While both modes serve the purpose of troubleshooting and resolving system issues, they have distinct functionalities.
Safe mode
Safe mode is designed to start your computer with only the most basic drivers and services necessary to run the operating system. It disables unnecessary programs and drivers, making it easier to diagnose and fix problems. Safe mode is particularly helpful when you encounter issues related to malware infections, driver conflicts, or problematic updates.
Clean boot
On the other hand, a clean boot, or clean startup, goes a step further by disabling all third-party applications and services, leaving only the essential Microsoft services and drivers active. It helps in identifying software conflicts caused by non-Microsoft programs, making it an effective method to troubleshoot issues such as slow startup, freezes, or crashes.
The differences between clean boot and safe mode can be summed up as follows:
- Use cases: Clean boot is used for suspected conflicts with third-party software or services, while safe mode is used for suspected conflicts with core Windows components or drivers.
- Access: Clean boot is launched through the System Configuration utility in Windows, while safe mode is accessed through the Windows startup process (e.g., by pressing a specific key).
- Components: Clean boot disables all non-Microsoft services and startup programs, while safe mode loads a minimal set of drivers and services.
How to perform a clean boot in Windows (7/8/10/Vista)
Performing a clean boot may vary slightly depending on the version of Windows you are using. Here, we’ll guide you through the steps to perform a clean boot in Windows Vista, Windows 7, Windows 8, and Windows 10.
Windows Vista/7/8
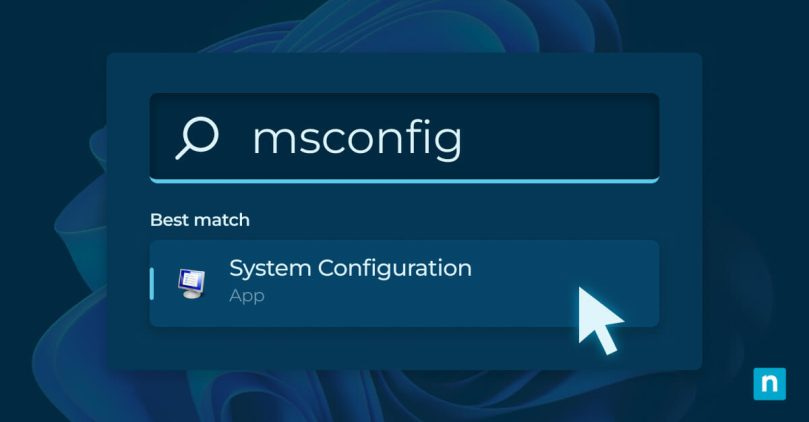
- Press the Windows key and type “msconfig” in the search bar.
- Click on the “System Configuration” option from the search results.
- In the System Configuration window, navigate to the “General” tab.
- Under the “Selective startup” section, uncheck the box that says “Load startup items.”
- Head to the “Services” tab and check the box that says “Hide all Microsoft services.”
- Click on the “Disable all” button to disable all non-Microsoft services.
- Once done, go to the “Startup” tab and click on “Open Task Manager.”
- In the Task Manager, disable all startup items by right-clicking on each item and selecting “Disable.”
- Close the Task Manager and click “OK” in the System Configuration window.
- Restart your computer to initiate the clean boot process.
Windows 10
- Press the Windows key and type “msconfig” in the search bar.
- Click on the “System Configuration” option from the search results.
- In the System Configuration window, navigate to the “Services” tab.
- Check the box that says “Hide all Microsoft services.”
- Click on the “Disable all” button to disable all non-Microsoft services.
- Head to the “Startup” tab and click on “Open Task Manager.”
- In the Task Manager, disable all startup items by right-clicking on each item and selecting “Disable.”
- Close the Task Manager and click “OK” in the System Configuration window.
- Restart your computer to initiate the clean boot process.
Tips and troubleshooting for a healthy clean Windows boot process
Knowing how to perform a clean boot of your Windows computer is an effective way to identify and resolve software conflicts and system performance issues. To ensure a healthy clean boot process, consider the following tips and troubleshooting techniques.
Identify software conflicts
After performing a clean Windows boot, monitor your system’s performance and gradually enable the disabled services and startup items one by one. By enabling them individually, you can identify any software conflicts that may be causing problems. If an issue arises after enabling a particular service or startup item, it is likely the source of the conflict. Disable or uninstall the conflicting software and try launching the full version of Windows.
Regularly update the operating system and drivers
Keeping your operating system and device drivers up-to-date is crucial for a smooth and stable clean boot process. Outdated software may contain bugs or compatibility issues that can interfere with the clean boot functionality. Regularly check for updates from Microsoft and your hardware manufacturers to ensure you have the latest patches and drivers installed.
Optimize startup programs
Even after you’ve performed a clean Windows boot, optimizing your startup programs can be beneficial for the system’s performance and boot time. Start by opening the Task Manager and navigating to the “Startup” tab. In here, you can disable any unnecessary programs that you don’t need to launch during startup.
Use system tools
Windows provides built-in system utilities that can help optimize and maintain a clean boot. Use tools such as Disk Cleanup to remove unnecessary files, Disk Defragmenter to optimize your hard drive, and System File Checker to scan and repair corrupted system files. Perform these maintenance tasks at regular intervals to keep your system running smoothly.
Restoring normal startup after a clean boot
Once you’ve identified and resolved any software conflicts by launching a clean boot, you’ll want to restore full functionality to your computer in normal startup mode. To do this, follow the same steps mentioned earlier to access the System Configuration window:
- Press the Windows key and type “msconfig” in the search bar.
- Click on the “System Configuration” option from the search results.
Under the “General” tab, select the “Normal startup” option and click “OK.” Restart your computer, and it will boot with all services and startup items enabled.
Should you perform a clean Windows boot?
Performing regular clean boots when you encounter IT issues will help you perform system maintenance and contribute to a smoother and more efficient computing experience. If you’re struggling to troubleshoot computer problems or crashes, follow the steps above to launch a Windows clean boot—your computer will thank you for it!


