

Enabling the “Let Windows manage my default printer” option permits the system to automatically select the last printer you’ve used as the default. This setup is convenient in isolation but can be disruptive in controlled, kiosk, or enterprise environments where a dedicated device is preferred. This guide will help you manage these settings to match your preferences.
Prerequisites and methods for changing printer preferences
Here are some important reminders on how this option can be modified and how it behaves in certain environments.
✔️ Printers must already be installed and accessible from the device.
✔️ This setting is user-specific (HKCU) unless scripted for all profiles.
✔️ Admin privileges may be required for registry or script-based deployment methods.
Method 1: Enable or disable via Windows Settings (GUI)
This simple execution is recommended for single-user preferences.
- Open Settings from Search or press Win + I.
- Navigate to Bluetooth & devices → Printers & scanners.
- Scroll down and toggle Let Windows manage my default printer.
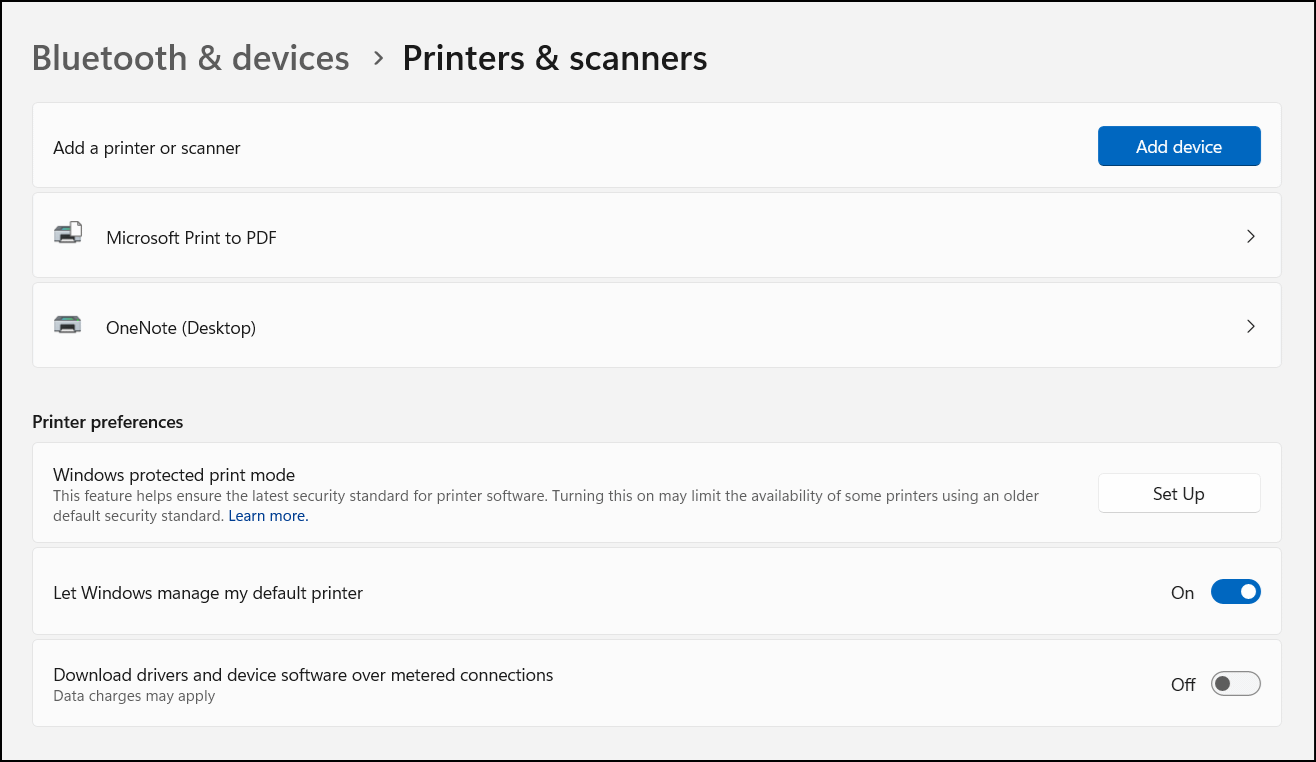
Leaving this option switched off means the default printer will be manually selected.
Method 2: Configure via Registry Editor (advanced)
This path is useful for enforcing policies but requires a sufficient understanding of how to navigate and make changes to the Windows Registry.
- Press Win + R, type regedit, and tap OK to open the Registry Editor.
- Navigate to or copy and paste the following path to the Registry address bar:
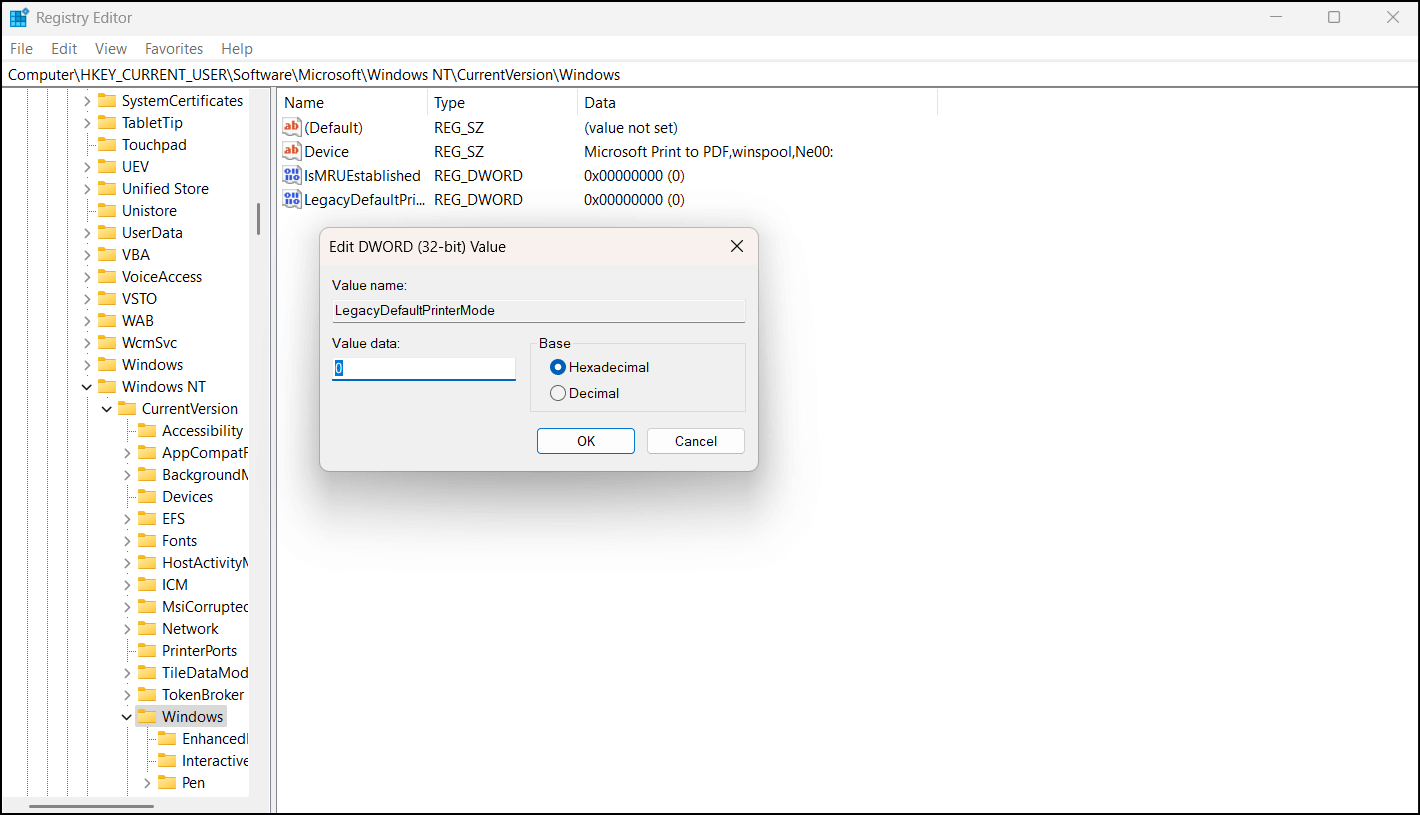
Computer\HKEY_CURRENT_USER\SOFTWARE\Microsoft\Windows NT\CurrentVersion\Windows
- Create or modify the following 32-bit DWORD value: LegacyDefaultPrinterMode.
- Set it to 0 to enable the Let Windows manage default printer option. Switch or leave it to 1 to keep the default settings.
⚠️Warning: Making unintended changes to the Windows Registry can affect your system’s performance and stability. Learn how to back up the Registry database and create a restore point before making any changes.
Method 3: Use PowerShell for scripting or remote management
Here’s the PowerShell script for disabling the Windows-managed default printer option:
Set-ItemProperty -Path "HKCU:\Software\Microsoft\Windows NT\CurrentVersion\Windows" `
-Name "LegacyDefaultPrinterMode" -Value 1
Replace -Value with 0 to enable this setting. To initiate the changes, ensure that you’re running PowerShell with administrative privileges.
Additional tips and considerations for changing printer preferences
Group Policy and Mobile Device Management (MDM)
There is currently no direct Group Policy setting to control this specific behavior. However, administrators can use GPO Preferences to modify the LegacyDefaultPrinterMode value in the Registry.
As an admin, you can combine these changes with your IT management software’s deployment policies (if applicable) to exercise more control over printer preferences and settings.
Roaming profiles
On the other hand, individual users who switch networks frequently may benefit from enabling Let Windows manage my default printer.
Shared devices
This behavior is likely to be disabled in Kiosks and shared workstations. These setups are usually more secure and consistent, with limited access or fixed preferences for connecting with third-party devices.
User overrides
Under normal circumstances, the end user can manually override the selected default printer unless this setting is enforced through a policy or automation.
Best practices for default printer preferences
If you have an environment with multiple printers, enabling Let Windows manage my default printer will allow the system to always set your default printer to the last device you used. This option prevents Windows from always asking for the preferred printer for each task.
Meanwhile, opting to disable Let Windows manage my default printer is commonly preferred for kiosk, enterprise, and managed IT setups. Leaving this option turned off limits endpoints to the printer dedicated to the network. This helps reduce security concerns and improve consistency and workflow in production.


